Assembly (Con’t.)
3
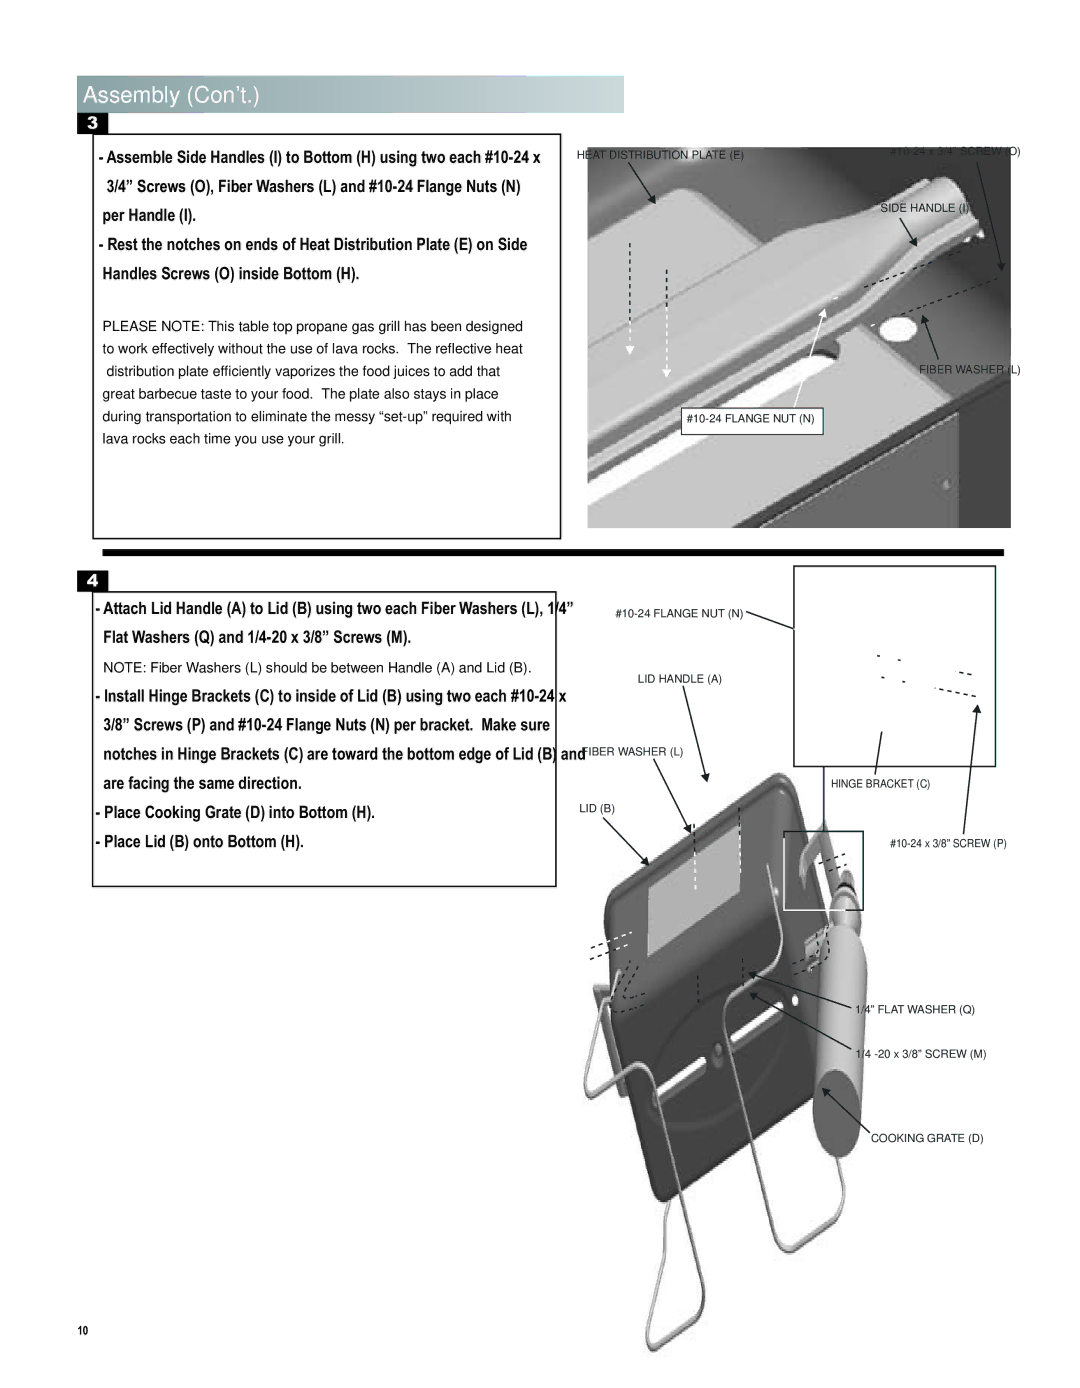
-Assemble Side Handles (I) to Bottom (H) using two each
per Handle (I).
-Rest the notches on ends of Heat Distribution Plate (E) on Side Handles Screws (O) inside Bottom (H).
PLEASE NOTE: This table top propane gas grill has been designed to work effectively without the use of lava rocks. The reflective heat distribution plate efficiently vaporizes the food juices to add that great barbecue taste to your food. The plate also stays in place during transportation to eliminate the messy
HEAT DISTRIBUTION PLATE (E) |
SIDE HANDLE (I)
FIBER WASHER (L)
4
-Attach Lid Handle (A) to Lid (B) using two each Fiber Washers (L), 1/4” Flat Washers (Q) and
NOTE: Fiber Washers (L) should be between Handle (A) and Lid (B).
-Install Hinge Brackets (C) to inside of Lid (B) using two each
-Place Cooking Grate (D) into Bottom (H).
-Place Lid (B) onto Bottom (H).
![]()
LID HANDLE (A)
FIBER WASHER (L)
LID (B)
HINGE BRACKET (C)
1/4” FLAT WASHER (Q)
1/4
COOKING GRATE (D)
10