TM
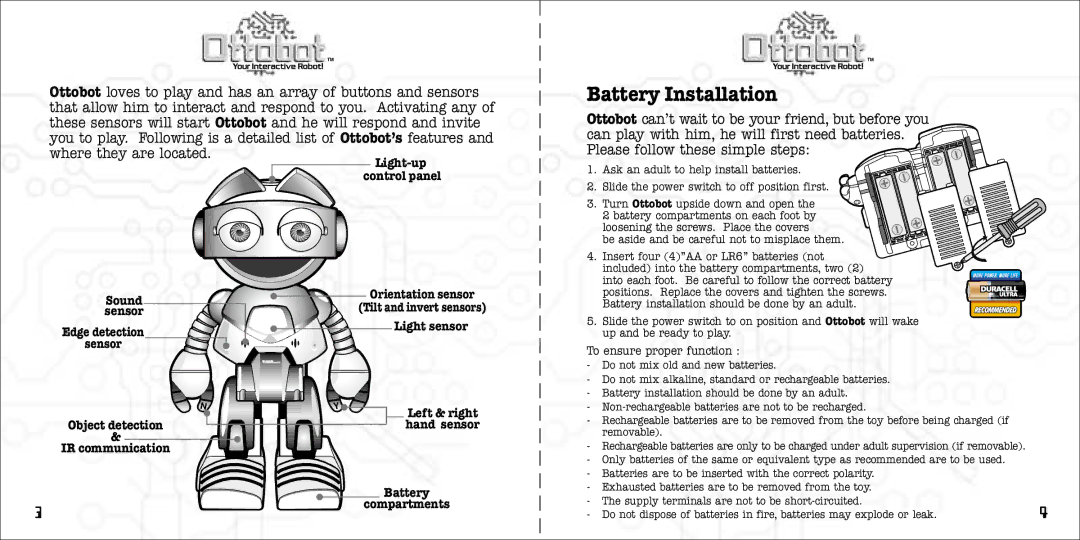
Ottobot loves to play and has an array of buttons and sensors that allow him to interact and respond to you. Activating any of these sensors will start Ottobot and he will respond and invite you to play. Following is a detailed list of Ottobot’s features and where they are located.
TM
Battery Installation
Ottobot can’t wait to be your friend, but before you can play with him, he will first need batteries. Please follow these simple steps:
Sound sensor
Edge detection
sensor
![]()
![]() Orientation sensor (Tilt and invert sensors)
Orientation sensor (Tilt and invert sensors)
Light sensor
1. Ask an adult to help install batteries.
2. Slide the power switch to off position first.
3. Turn Ottobot upside down and open the
2 battery compartments on each foot by loosening the screws. Place the covers
be aside and be careful not to misplace them.
4. Insert four (4)”AA or LR6” batteries (not included) into the battery compartments, two (2) into each foot. Be careful to follow the correct battery positions. Replace the covers and tighten the screws. Battery installation should be done by an adult.
5.Slide the power switch to on position and Ottobot will wake up and be ready to play.
To ensure proper function :
N | Y |
Object detection
&
IR communication
Left & right hand sensor
- Do not mix old and new batteries. |
- Do not mix alkaline, standard or rechargeable batteries. |
- Battery installation should be done by an adult. |
- |
- Rechargeable batteries are to be removed from the toy before being charged (if |
removable). |
- Rechargeable batteries are only to be charged under adult supervision (if removable). |
- Only batteries of the same or equivalent type as recommended are to be used. |
- Batteries are to be inserted with the correct polarity. |
- Exhausted batteries are to be removed from the toy. |
Battery
compartments
- | The supply terminals are not to be |
- | Do not dispose of batteries in fire, batteries may explode or leak. |