SECTION 2
INSTALLATION
A. Shipping Damage Inspection | C. Installation |
IMPORTANT
IT IS THE CUSTOMER’S RESPONSIBILITY TO REPORT ANY CONCEALED OR NON- CONCEALED DAMAGE TO THE FREIGHT COMPANY.
1.All shipping containers should be examined for damage before and during unloading. This equipment was carefully inspected and packaged at the factory. The freight carrier has assumed responsibility for its safe transit and delivery. If the equipment is received in a damaged condition, either apparent or concealed, a claim must be made with the delivering carrier.
2.Apparent Damage or Loss - If the damage or loss is apparent, it must be noted on the freight bill or on the express receipt at the time of delivery, and must be signed by the carrier’s agent (the driver). If this is not done, the carrier may refuse the claim. The carrier will supply any necessary claim forms.
3.Concealed Damage or Loss - If damage or loss is NOT apparent until after the equipment is unpacked, a request for inspection of the concealed damage must be made with the carrier within 15 days. The carrier will make an inspection and will supply necessary claim forms. Be certain to retain all contents plus external and internal packing materials for inspection.
B.Unpacking
The griddle is delivered in a carton that is fastened to a wooden shipping pallet.
WARNING
USE CAUTION WHEN CUTTING THE
BANDING STRAPS. WHEN CUT, THE
STRAPS MAY SNAP AWAY FROM THE
CARTON.
1.Cut the banding straps that hold the carton in place. Lift the carton up, and remove it from over the griddle.
2.Carefully turn the pallet - with the griddle still mounted atop it -
3.Remove the pallet from the griddle.
4.Retain all shipping materials until it is certain that the griddle has not suffered concealed
shipping damage. | 5 |
NOTE
IF INSTALLING THE GRIDDLE ON A STAND, CONSULT THE STAND INSTRUCTIONS FOR THE INSTALLATION PROCEDURE. ENSURE THAT THE LOCATION OF THE STAND ALLOWS SUFFICIENT CLEARANCE FOR THE GRIDDLE, AS SHOWN IN THE DIAGRAM BELOW. THEN, PROCEED TO STEP D, ELECTRICAL CONNECTION.
IF INSTALLING THE GRIDDLE ON A COUNTERTOP, PROCEED WITH THE INSTRUCTIONS BELOW.
1.Installing the Spacer Brackets and Legs
a.Check that the griddle is still
b.Place the two spacer brackets along the side edges of the bottom plate of the Accu- Miser. The holes in the brackets should align with the weldnuts on the bottom plate. The flanged edge of the brackets should face the outside of the griddle, with the flange itself facing up.
c.Locate the four 4” adjustable legs and thread them into the weldnuts on the leg mounting plates. This holds the two spacer brackets in place. Tighten the legs until they are secure against the spacer brackets.
2.Leveling the Griddle
a.Carefully lift the griddle onto its legs, and place it on the counter in its permanent position.
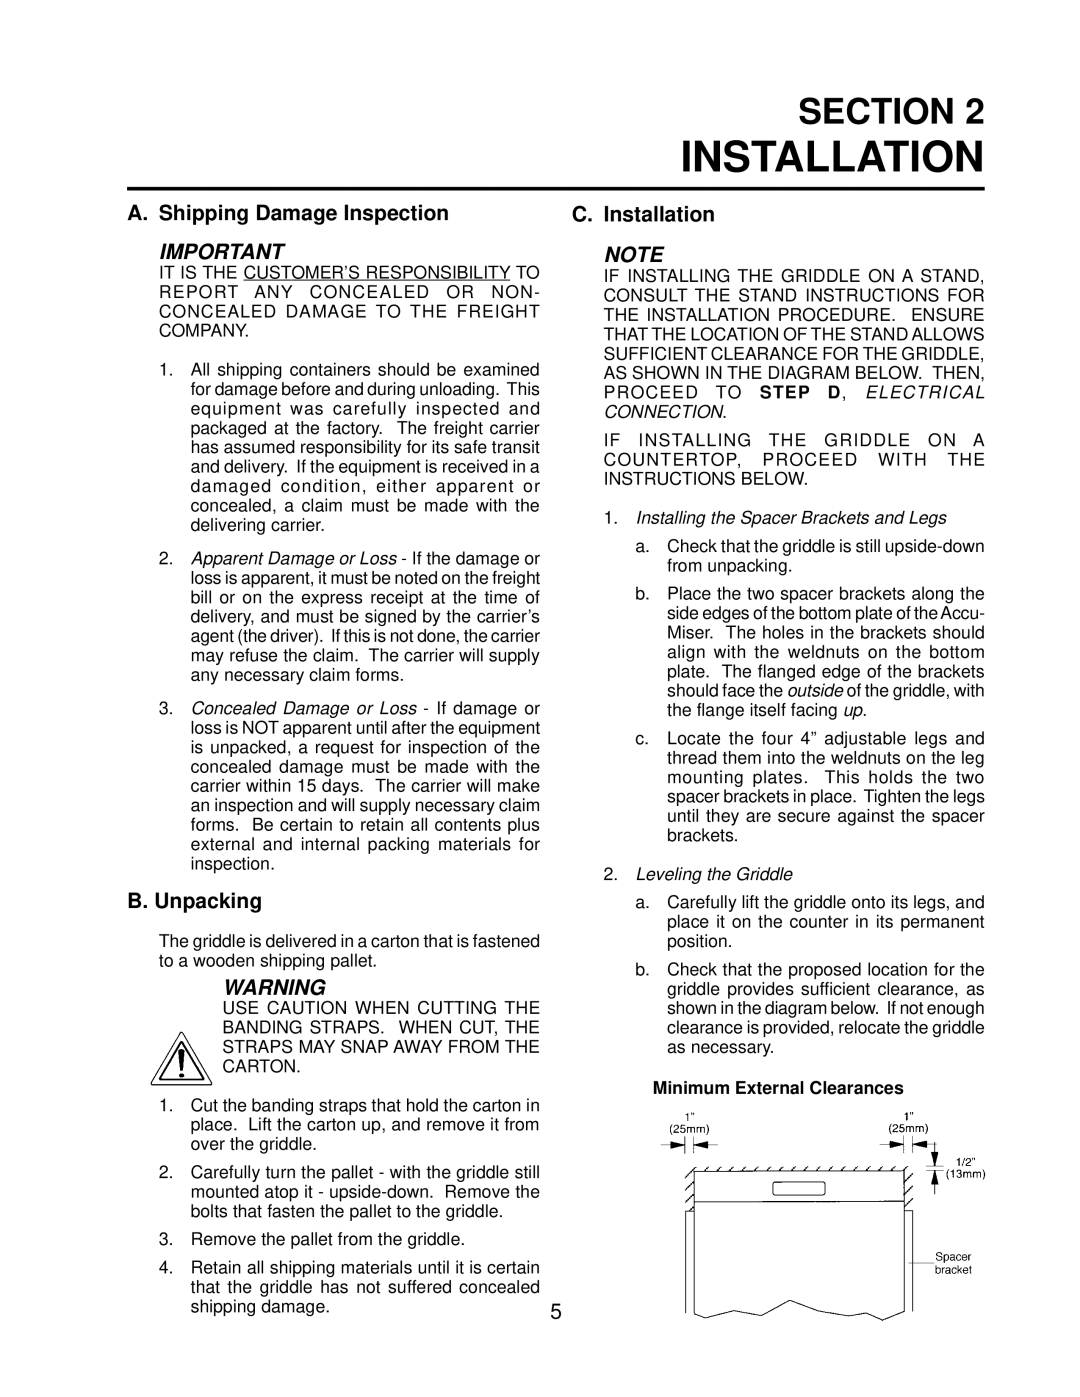
b.Check that the proposed location for the griddle provides sufficient clearance, as shown in the diagram below. If not enough clearance is provided, relocate the griddle as necessary.
Minimum External Clearances