installing your dryer
4.Review the Exhausting section before installing the exhaust system. Install the ductwork from your dryer to the exhaust hood. The crimped end of the duct sections must point away from your dryer.
DO NOT use sheet metal screws when assembling ducting. These joints should be taped. Never use plastic flexible exhaust material.
Tip for tight installations: install a section of exhaust system to your dryer before putting it in place. Use duct tape to secure this section to your dryer, but do not cover ventilation slots at the back of the unit in the dryer cabinet.
5.Review Electrical Requirements section.
BEFORE OPERATING OR TESTING, follow the grounding instructions in the Grounding section.
IMPORTANT – The dryer is produced for a
The dryer frame is grounded to the neutral conductor at the terminal block.
Remove the terminal block cover plate.
Insert the power cord through the hole provided in the cabinet near the terminal block.
![]() A strain relief must be used.
A strain relief must be used.
Do not loosen the nuts already installed on the terminal block. Be sure they are tight. Use a 3/8” (1cm) deep well socket.
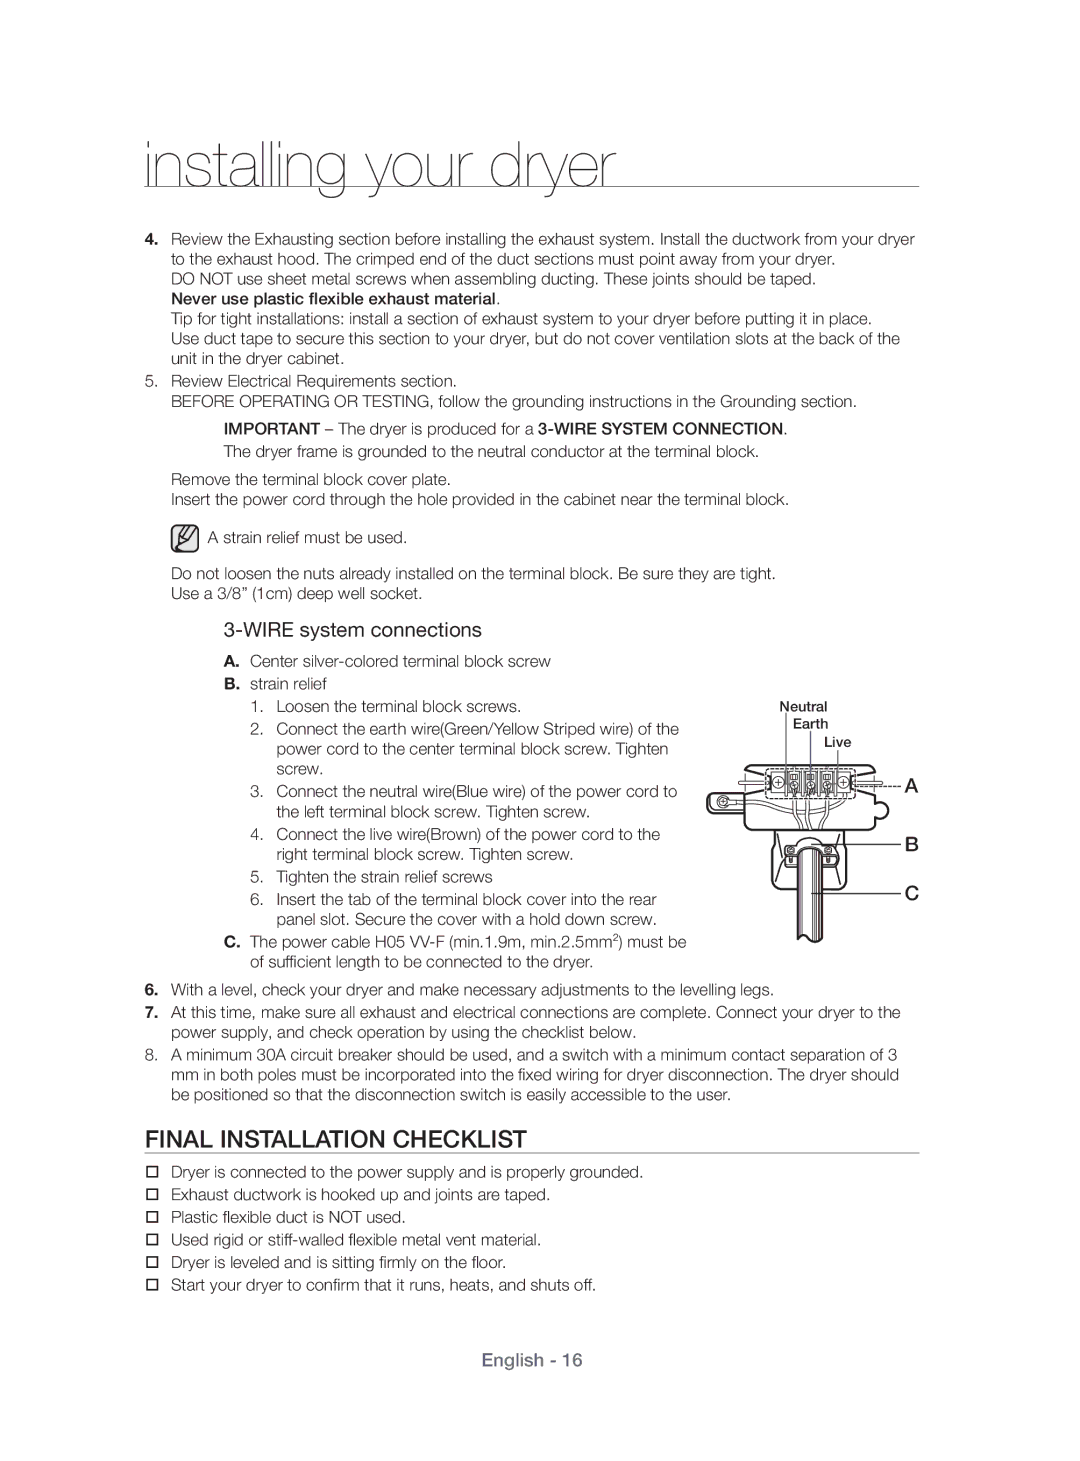
3-WIRE system connections
A.Center
B.strain relief
1.Loosen the terminal block screws.
2.Connect the earth wire(Green/Yellow Striped wire) of the power cord to the center terminal block screw. Tighten screw.
3.Connect the neutral wire(Blue wire) of the power cord to the left terminal block screw. Tighten screw.
Neutral
Earth
Live
![]() A
A
4. Connect the live wire(Brown) of the power cord to the right terminal block screw. Tighten screw.
5. Tighten the strain relief screws
6.Insert the tab of the terminal block cover into the rear panel slot. Secure the cover with a hold down screw.
C.The power cable H05
6.With a level, check your dryer and make necessary adjustments to the levelling legs.
7.At this time, make sure all exhaust and electrical connections are complete. Connect your dryer to the power supply, and check operation by using the checklist below.
8.A minimum 30A circuit breaker should be used, and a switch with a minimum contact separation of 3 mm in both poles must be incorporated into the fi xed wiring for dryer disconnection. The dryer should be positioned so that the disconnection switch is easily accessible to the user.
B
C
FINAL INSTALLATION CHECKLIST
Dryer is connected to the power supply and is properly grounded.
Exhaust ductwork is hooked up and joints are taped.
Plastic fl exible duct is NOT used.
Used rigid or
Dryer is leveled and is sitting fi rmly on the fl oor.
Start your dryer to confi rm that it runs, heats, and shuts off.
