26HL84 32HL84
Dear Customer
Exemptions
Installation
Important Safety Instructions
Care
Service
Introduction
Welcome to Toshiba
Supplied accessories
Introduction
Quick Connect Guide
Top
Exploring your new TV
Connecting your TV
Connecting a VCR
Connecting a cable converter box
You will need ¥ three coaxial cables
Connecting a cable converter box and VCR
Introduction Connecting YourTV
Connecting a DVD player or satellite receiver and a VCR
From Antenna Stereo VCR
DTV Antenna
Connecting a camcorder
Connecting two VCRs
DVI/HDCP device For example, set-top box or DVD player
Connecting a device to the DVI/HDCP
Connecting a device to the TheaterLink
Connecting an audio system
Using the remote control
Preparing the remote control for use
Installing the remote control batteries
Remote Control functional key chart
CBL/SAT Audio VCR TV/VCR TV/SAT
Searching and sampling the code of a device
Device code setup
Operational feature reset
Using the volume lock feature
Device code table
VCR setup codes
CD Player setup codes
Learning about the remote control
Learning about the menu system
Setting up your TV
Cable box output channel selection
Using the Quick Connect Guide
Select channels using Cable box
Picture mode selection
Changing the on-screen display language
Selecting the antenna input
Press x or to highlight your desired language
Adding channels to the TVÕs memory
Programming channels automatically
Press z to select CH Program
Changing channels using SpeedSurf
Changing channels
Adding and erasing channels manually
Switching between two channels using SurfLockª
Using the TVÕs features
Adjusting the channel settings
Switching between two channels using Channel Return
Favorite
Labeling channels
Press PIC Size on the remote control
Viewing the wide-screen picture formats
Selecting the picture size
Theater Wide 1 picture size
¥ To raise the picture, press y
Press x or to display the Scroll Adjustment mode
Selecting the cinema mode
Using the auto aspect feature
Buttons 0-9
Using the POP double-window feature
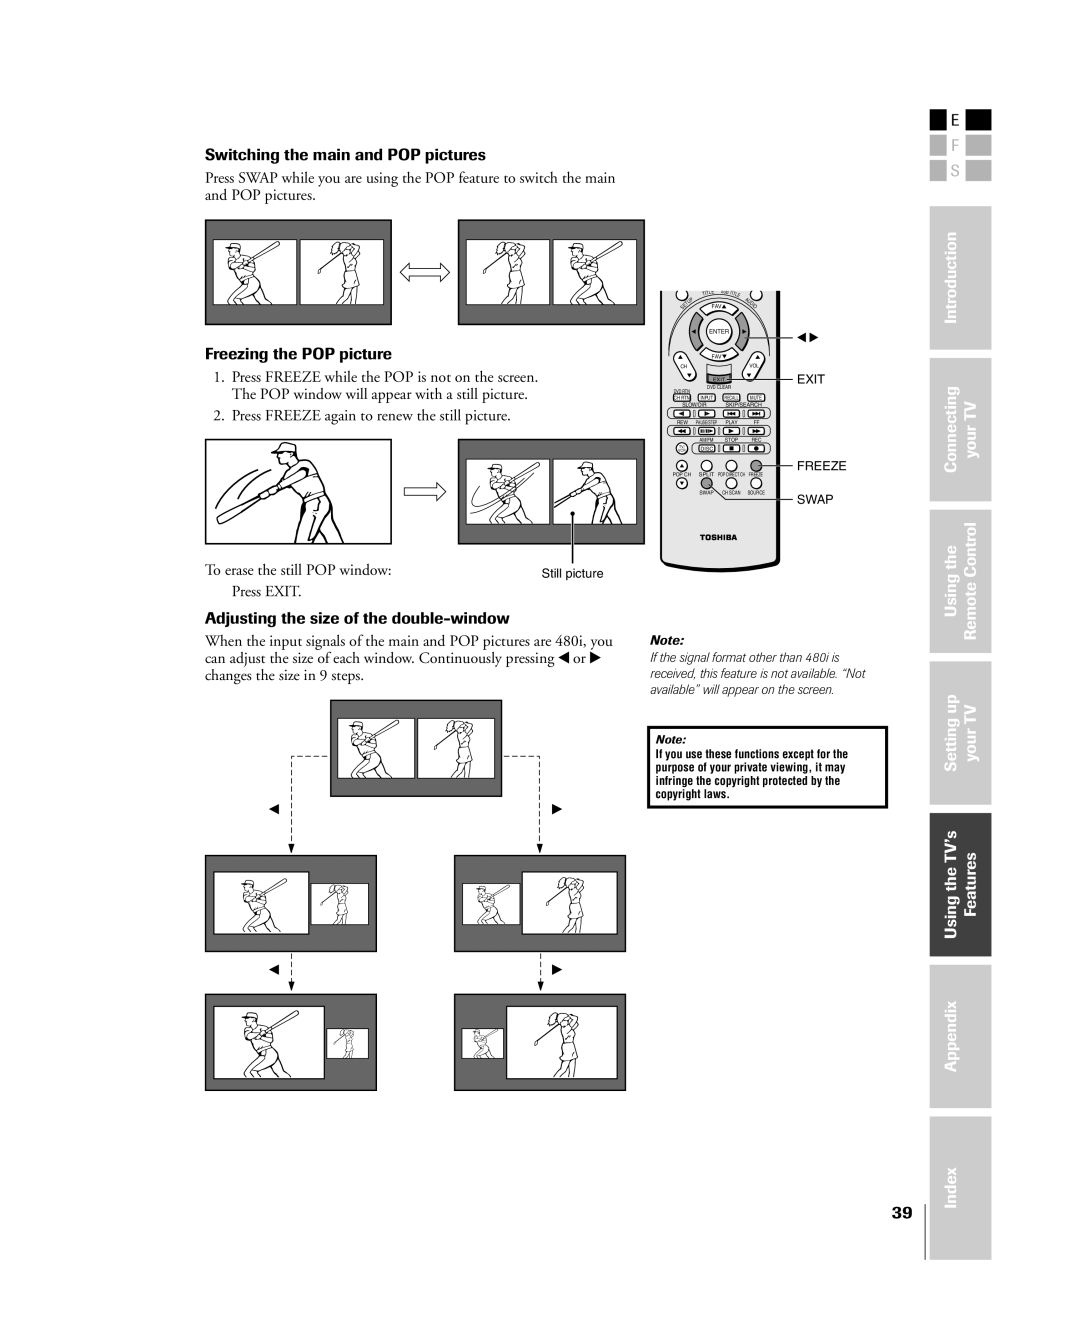
Press Exit
Switching the main and POP pictures
Adjusting the size of the double-window
Freezing the POP picture
Double-Window with keeping aspect ratio
Using the programmed channel search function
About the auto favorite feature
Using the favorite channel search function
If you cannot remember your PIN code
Using the Locks menu
Press y or z to display the PIN code entering mode
Entering the PIN code
TV Rating Independent rating system for broadcasters
Using the V-CHIP menu
Press x or to return to the Locks menu
Mpaa Rating Independent rating system for movies
Locking channels
Unlocking programs temporarily
Repeat steps 3 and 4 for other channels Locks menu
OFF
Locking video inputs
Changing the PIN code
Using the game timer
Using the front panel lock feature
To cancel the timer Select OFF in above
Adjusting the picture
Selecting the picture mode
Adjusting the picture quality
Using CableClearª DNR Digital Noise Reduction
Selecting the color temperature
Saving your new preferences
Selecting the video input source
Resetting your picture quality adjustments
Selecting the background of the menu display
Labeling the video input sources
¥ To view text, highlight T1, T2, T3, or T4
Using the closed caption feature
Setting the sleep timer
Setting the ON-timer
Adjusting the sound
Muting the sound
Selecting stereo/SAP broadcasts
Enjoying the WOWª surround sound feature
Enjoying the Dolby Virtual sound feature
Resetting your audio adjustments
Adjusting the sound quality
To turn on the built-in speakers Highlight on in above
Using the sub-bass system SBS
Turning off the built-in speakers
To turn off the SBS Highlight OFF in above
Selecting the Audio OUT sound
Using the StableSound¨ feature
Adjusting the back lighting feature
Press x or to adjust the screen brightness
Selecting the gray level of the side panels
Displaying on-screen information
Viewing the demonstration mode
Understanding the auto power off feature
Understanding the last mode memory feature
Appendix
Specifications
T2, T3, or T4. Turn closed captioning OFF
Troubleshooting
Antenna
Black box appears on the screen
Limited United States Warranty
Limited Canada Warranty
Audio OUT sound, selecting
Index
Toshiba DE ELECTROMEX, S.A. DE C.V