Getting started
TV front and side panel controls
•You can operate your TV using the buttons on the side panel or the remote control. The back and side of the panel provide the terminal connections to connect other equipment to your TV (- “Connecting your TV” pages 33 - 37).
•For the use of each control, see the pages in brackets.
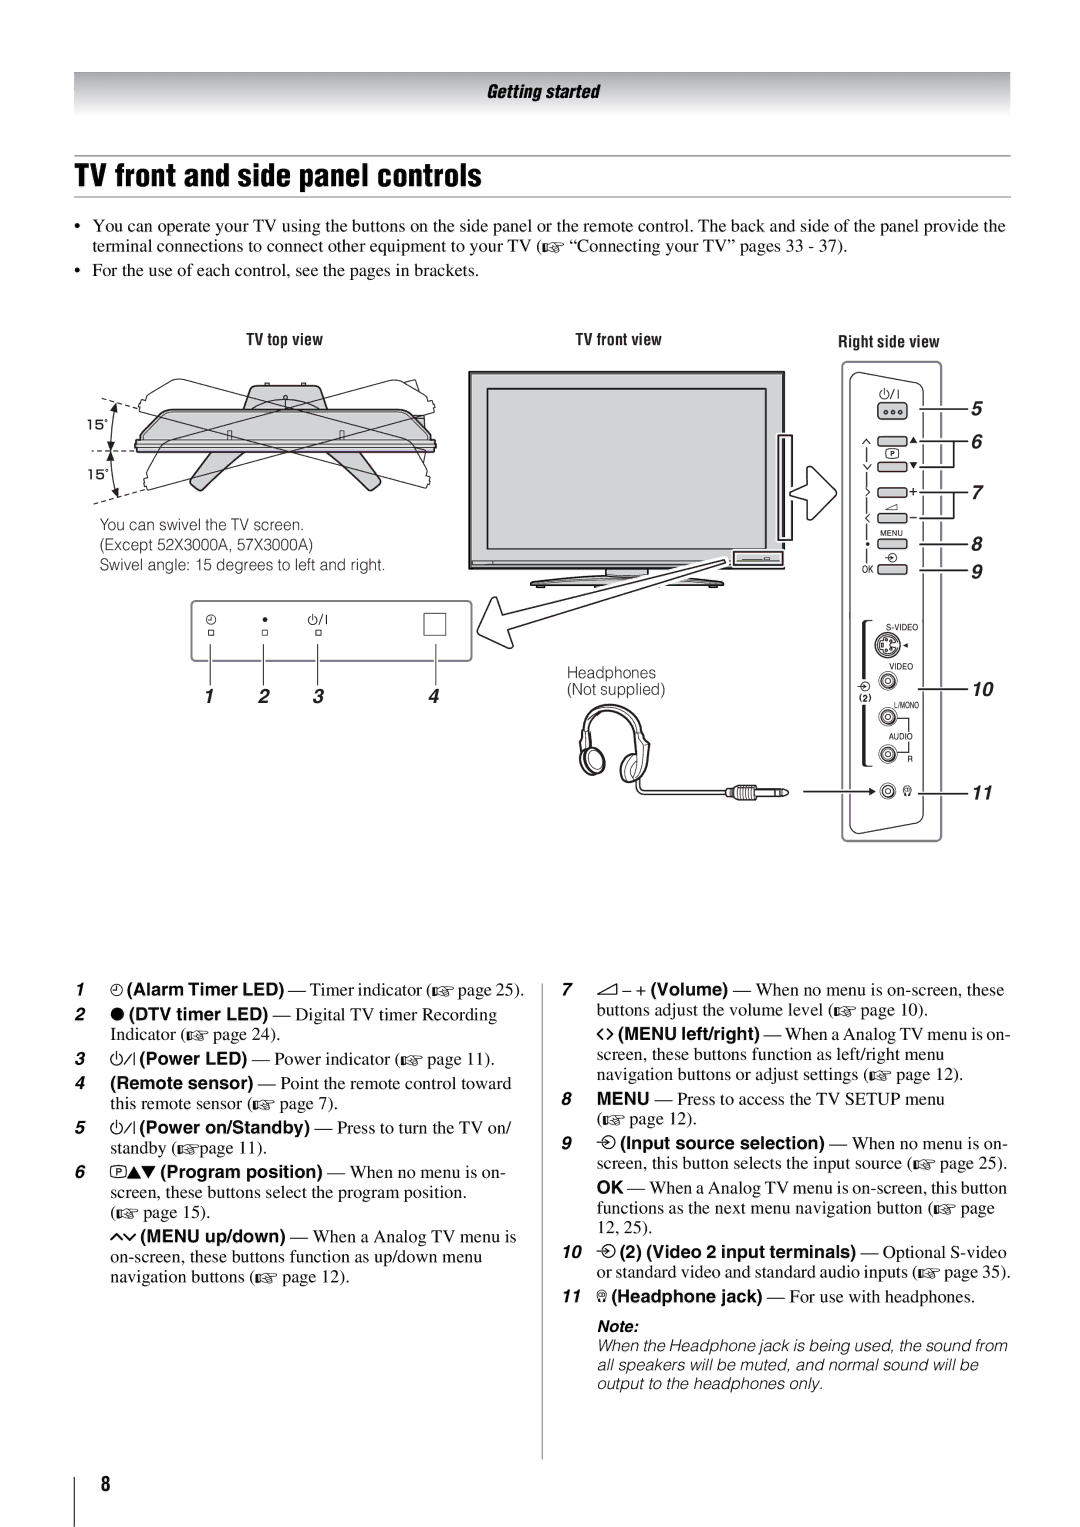
TV top view | TV front view | Right side view |
You can swivel the TV screen. (Except 52X3000A, 57X3000A)
Swivel angle: 15 degrees to left and right.
|
|
|
|
|
|
|
| Headphones | |||
|
|
|
|
|
|
|
| (Not supplied) | |||
1 | 2 | 3 | 4 | ||||||||
|
|
| |||||||||
|
|
|
|
|
|
|
|
|
|
| |
5
6
7
8
9
10
11
14 (Alarm Timer LED) — Timer indicator (- page 25).
2● (DTV timer LED) — Digital TV timer Recording Indicator (- page 24).
3! (Power LED) — Power indicator (- page 11).
4(Remote sensor) — Point the remote control toward this remote sensor (- page 7).
5! (Power on/Standby) — Press to turn the TV on/ standby
6pBb (Program position) — When no menu is on- screen, these buttons select the program position.
(- page 15).
Uu (MENU up/down) — When a Analog TV menu is
72 – + (Volume) — When no menu is
I i (MENU left/right) — When a Analog TV menu is on- screen, these buttons function as left/right menu navigation buttons or adjust settings (- page 12).
8MENU — Press to access the TV SETUP menu (- page 12).
9o (Input source selection) — When no menu is on- screen, this button selects the input source (- page 25).
OK — When a Analog TV menu is
10o (2) (Video 2 input terminals) — Optional
11D (Headphone jack) — For use with headphones.
Note:
When the Headphone jack is being used, the sound from all speakers will be muted, and normal sound will be output to the headphones only.
8