•In playback mode, press GOTO, then press the number buttons
13 | Number buttons | to enter | a title, chapter, track, | ||||
time or file number. |
| ||||||
|
|
| |||||
|
| • In menu mode, press to enter | |||||
|
| the parental code password. | |||||
14 | GOTO | Press | to | display | the | search | |
menu. |
|
|
|
| |||
|
|
|
|
|
| ||
|
| Press to turn on the unit, or to turn | |||||
15 | ON/STANDBY | the unit into the standby mode. (To | |||||
completely turn off the unit, you | |||||||
|
| ||||||
|
| must unplug the power cord.) | |||||
|
| • During | |||||
|
| press to open a menu that | |||||
|
| lets you control | |||||
16 | POPUP/TOP MENU | playback. |
|
| |||
|
| • During | DVD playback, | press | |||
|
| to open the DVD menu (if | |||||
|
| available). |
|
| |||
|
| In playback mode, press to adjust | |||||
|
| picture quality according to your | |||||
|
| preference (Actual effect to picture | |||||
17 | PIC | may vary depending on TV.): | |||||
• E.P.M (Ehanced Picture Mode): | |||||||
|
| ||||||
|
| The picture is sharper with | |||||
|
| enhanced color. |
|
| |||
|
| • Sharpness |
|
| |||
18 | INFO | Press to display disc information. | |||||
19 | RESOLUTION | Press to select the video resolution | |||||
in full stop mode. |
|
| |||||
|
|
|
| ||||
20 | MENU | Press | to | return to | the previous | ||
menu. |
|
|
|
| |||
|
|
|
|
|
| ||
|
| In PIP mode, press to turn the | |||||
|
| audio for the secondary video on | |||||
21 | 2nd AUDIO | or off. For more details, see “PIP | |||||
|
| (BONUSVIEW) Setting” on page | |||||
|
| 24. |
|
|
|
| |
| / / / | Press to select items or settings. | |||||
22 | OK | Press to confirm or select menu | |||||
| items. |
|
|
|
| ||
|
|
|
|
|
| ||
In PIP mode, press to turn the
232nd SUBTITLE subtitle for the secondary video on or off.
24 | FWD | During playback, press to fast | |||||
forward the playback. | |||||||
|
|
|
|
|
| ||
25 | PLAY | Press to start playback or resume | |||||
playback. | |||||||
|
|
|
|
|
| ||
|
|
|
|
|
| • During playback, press to skip to | |
26 | SKIP |
|
| the next title, chapter, track or file. | |||
|
| • During the JPEG playback, | |||||
|
|
|
|
|
| ||
|
|
|
|
|
| press to go to the next file. | |
27 | STOP |
|
| Press to stop playback. | |||
| |||||||
| |||||||
28 |
|
|
|
|
| Press to play back the disc in slow | |
|
|
|
|
| motion. | ||
|
|
|
|
|
| ||
29 | REPEAT | Press to toggle between various | |||||
repeat modes. | |||||||
|
|
|
|
|
| ||
30 | RANDOM | Press to turn random function on | |||||
or off. | |||||||
|
|
|
|
|
| ||
|
|
|
|
|
| Press to play back a defined | |
31 | section between point A and B | ||||||
|
|
|
|
|
| repeatedly. | |
32 | CLEAR | Press to clear an input error. | |||||
33 | ENTER | Press to confirm or select menu | |||||
items. | |||||||
|
|
|
|
|
| ||
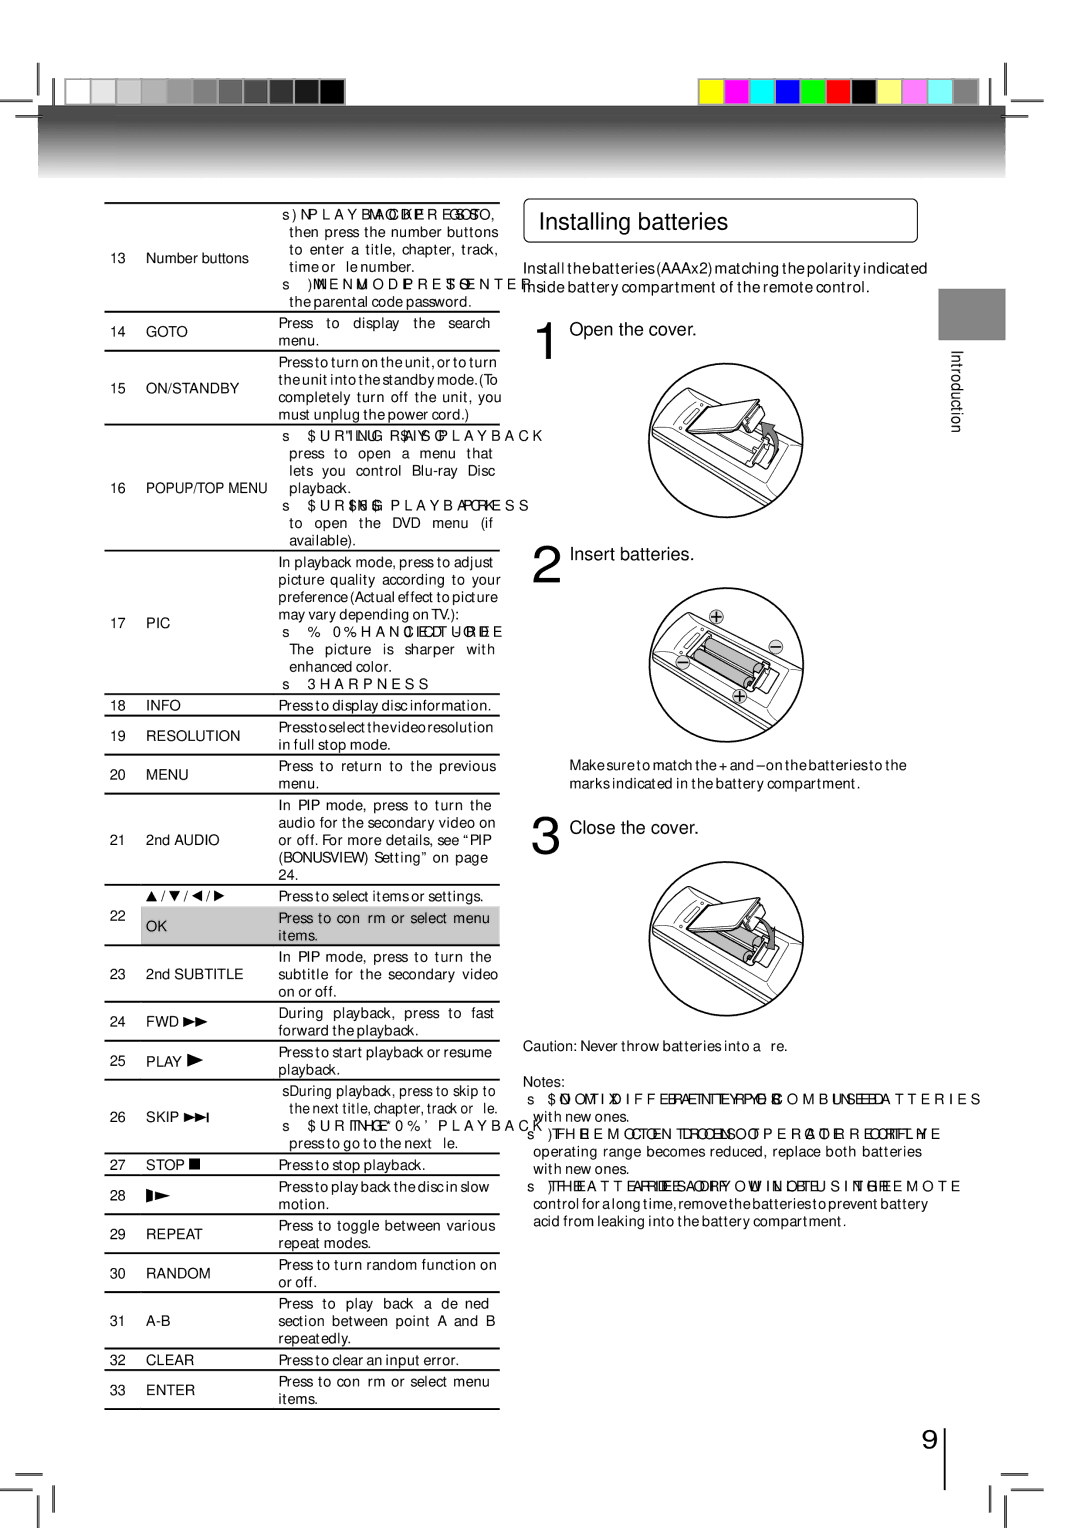
Installing batteries
Install the batteries (AAAx2) matching the polarity indicated inside battery compartment of the remote control.
1 Open the cover.
2 Insert batteries.
Make sure to match the + and – on the batteries to the marks indicated in the battery compartment.
3 Close the cover.
Caution: Never throw batteries into a fire.
Notes:
•Do not mix different battery types or combine used batteries with new ones.
•If the remote control does not operate correctly, or if the operating range becomes reduced, replace both batteries with new ones.
•If the batteries are dead or if you will not be using the remote control for a long time, remove the batteries to prevent battery acid from leaking into the battery compartment.
Introduction
9