E6581339⑥
2. Installing the IO card option in the VF-AS1/PS1
2.1 Connection to the inverter
Mandatory
(1) Turn off input power before installing.
Turn off the input power of
(2)Securing the option to the inverter
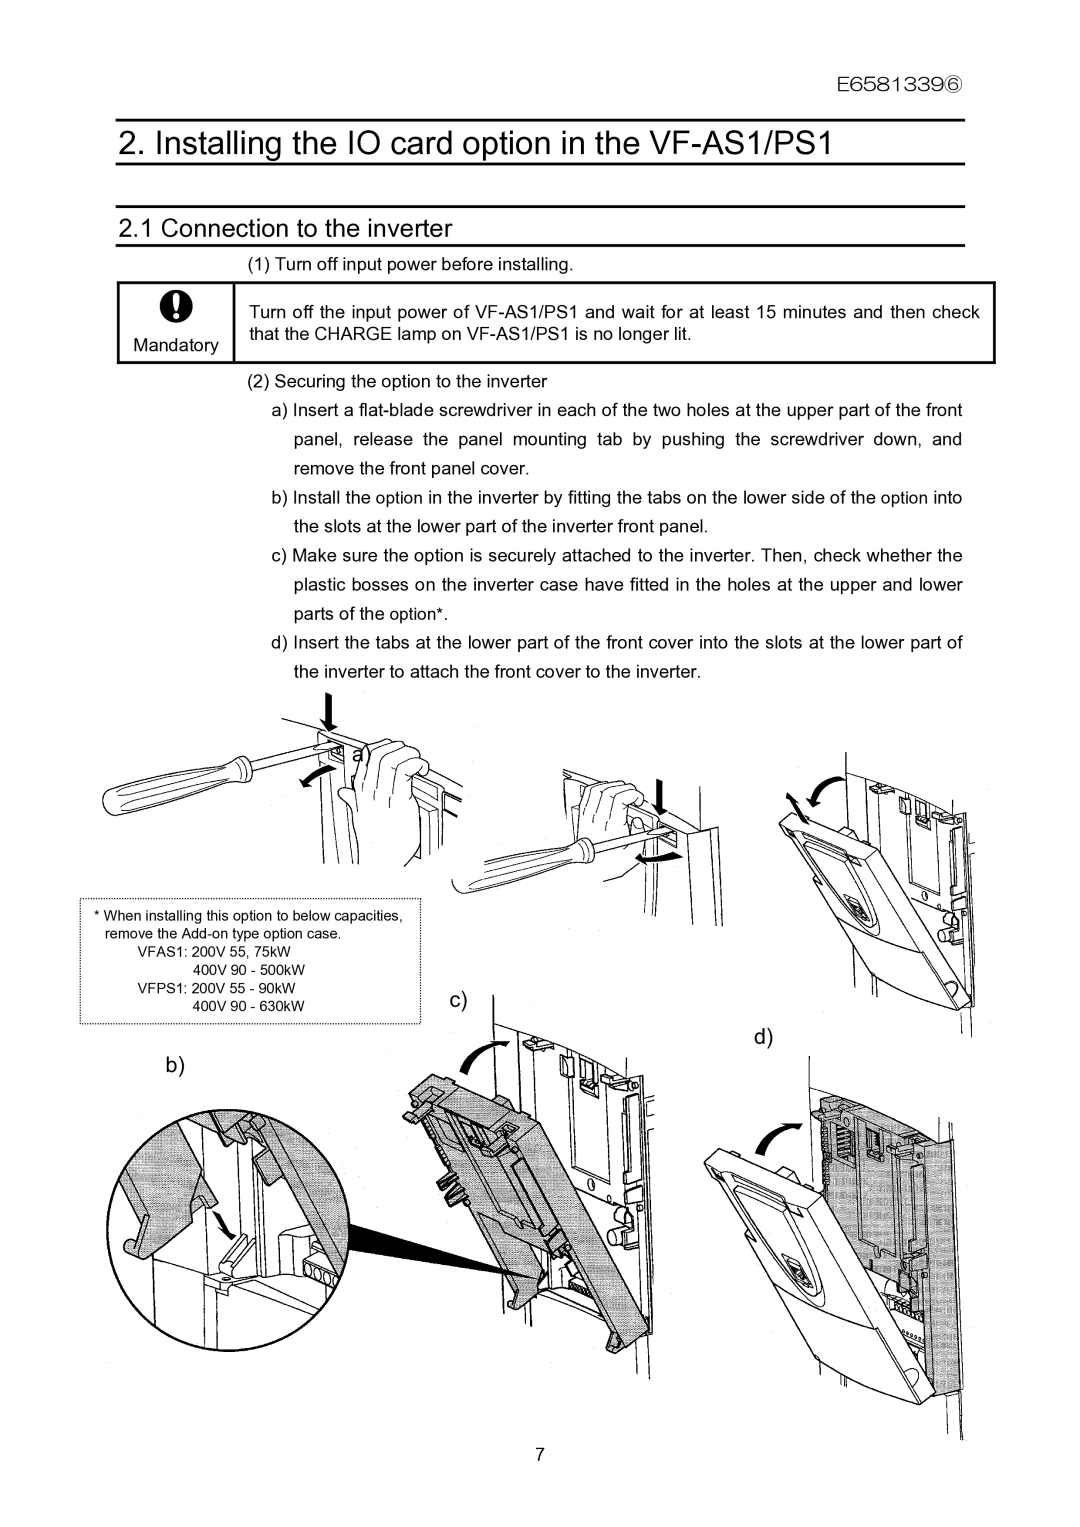
a)Insert a
b)Install the option in the inverter by fitting the tabs on the lower side of the option into the slots at the lower part of the inverter front panel.
c)Make sure the option is securely attached to the inverter. Then, check whether the plastic bosses on the inverter case have fitted in the holes at the upper and lower parts of the option*.
d)Insert the tabs at the lower part of the front cover into the slots at the lower part of the inverter to attach the front cover to the inverter.
a)
*When installing this option to below capacities, remove the
VFAS1: 200V 55, 75kW 400V 90 - 500kW
VFPS1: 200V 55 - 90kW | c) |
400V 90 - 630kW |
d)
b)
7