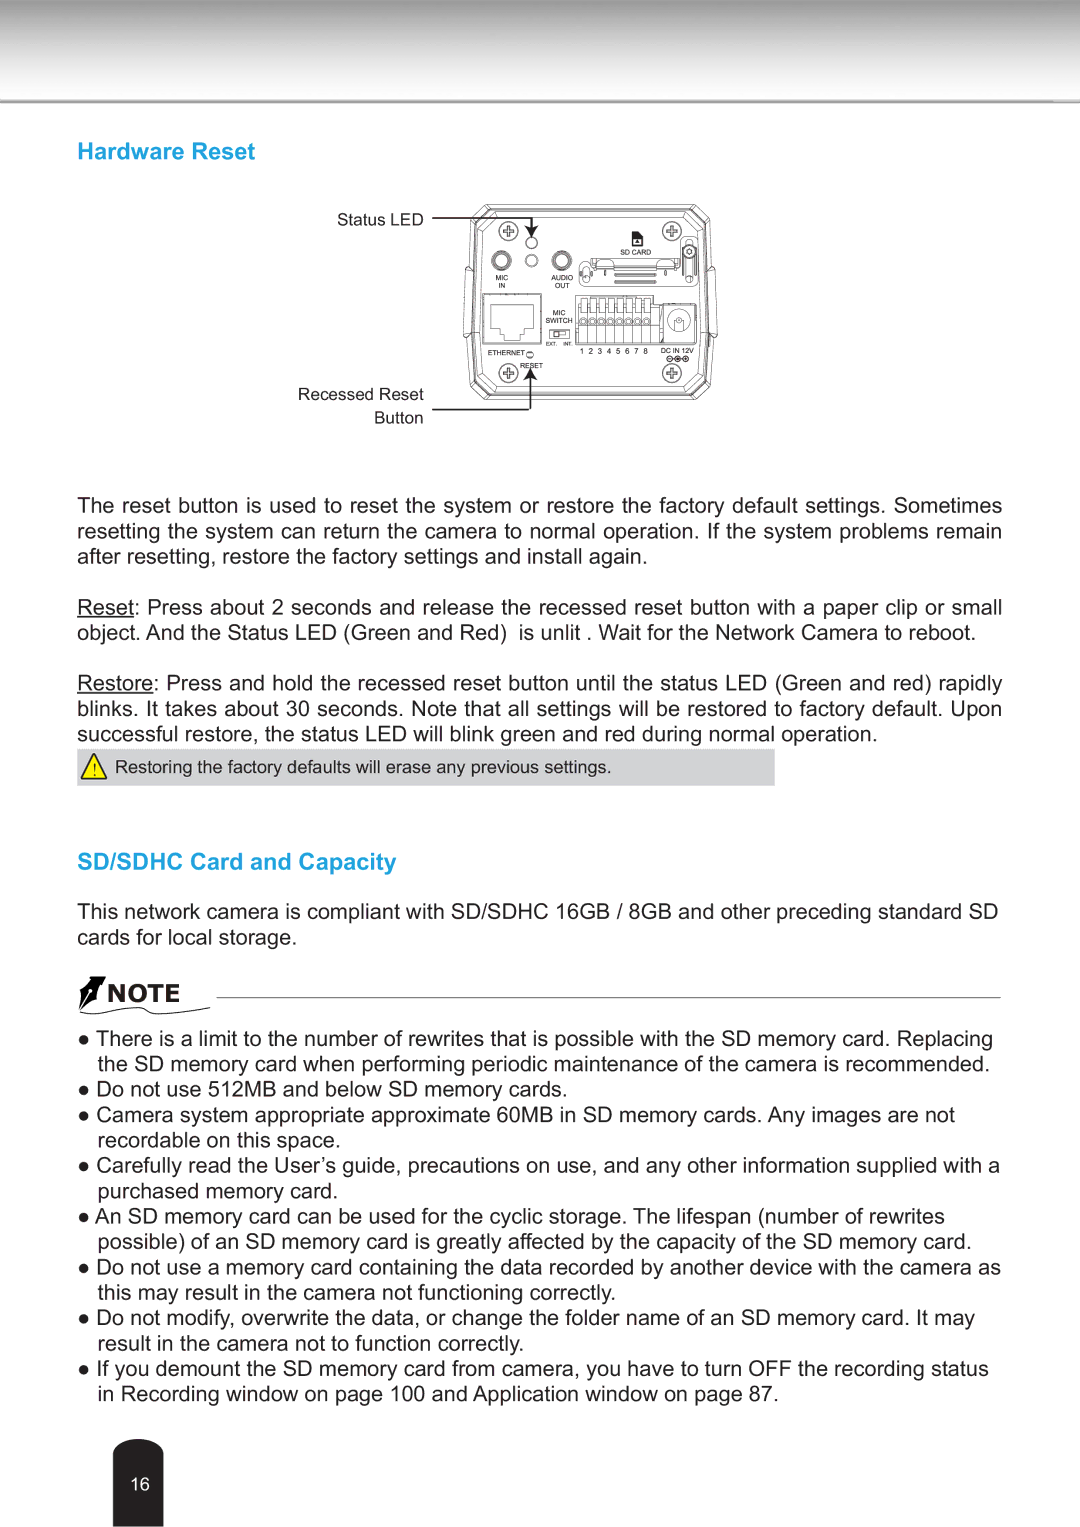
Hardware Reset
Status LED
Recessed Reset
Button
The reset button is used to reset the system or restore the factory default settings. Sometimes resetting the system can return the camera to normal operation. If the system problems remain after resetting, restore the factory settings and install again.
Reset: Press about 2 seconds and release the recessed reset button with a paper clip or small object. And the Status LED (Green and Red) is unlit . Wait for the Network Camera to reboot.
Restore: Press and hold the recessed reset button until the status LED (Green and red) rapidly blinks. It takes about 30 seconds. Note that all settings will be restored to factory default. Upon successful restore, the status LED will blink green and red during normal operation.
ʴRestoring the factory defaults will erase any previous settings.
SD/SDHC Card and Capacity
This network camera is compliant with SD/SDHC 16GB / 8GB and other preceding standard SD cards for local storage.
![]() NOTE
NOTE
●There is a limit to the number of rewrites that is possible with the SD memory card. Replacing the SD memory card when performing periodic maintenance of the camera is recommended.
●Do not use 512MB and below SD memory cards.
●Camera system appropriate approximate 60MB in SD memory cards. Any images are not recordable on this space.
●Carefully read the User’s guide, precautions on use, and any other information supplied with a purchased memory card.
●An SD memory card can be used for the cyclic storage. The lifespan (number of rewrites possible) of an SD memory card is greatly affected by the capacity of the SD memory card.
●Do not use a memory card containing the data recorded by another device with the camera as this may result in the camera not functioning correctly.
●Do not modify, overwrite the data, or change the folder name of an SD memory card. It may result in the camera not to function correctly.
●If you demount the SD memory card from camera, you have to turn OFF the recording status in Recording window on page 100 and Application window on page 87.
16
