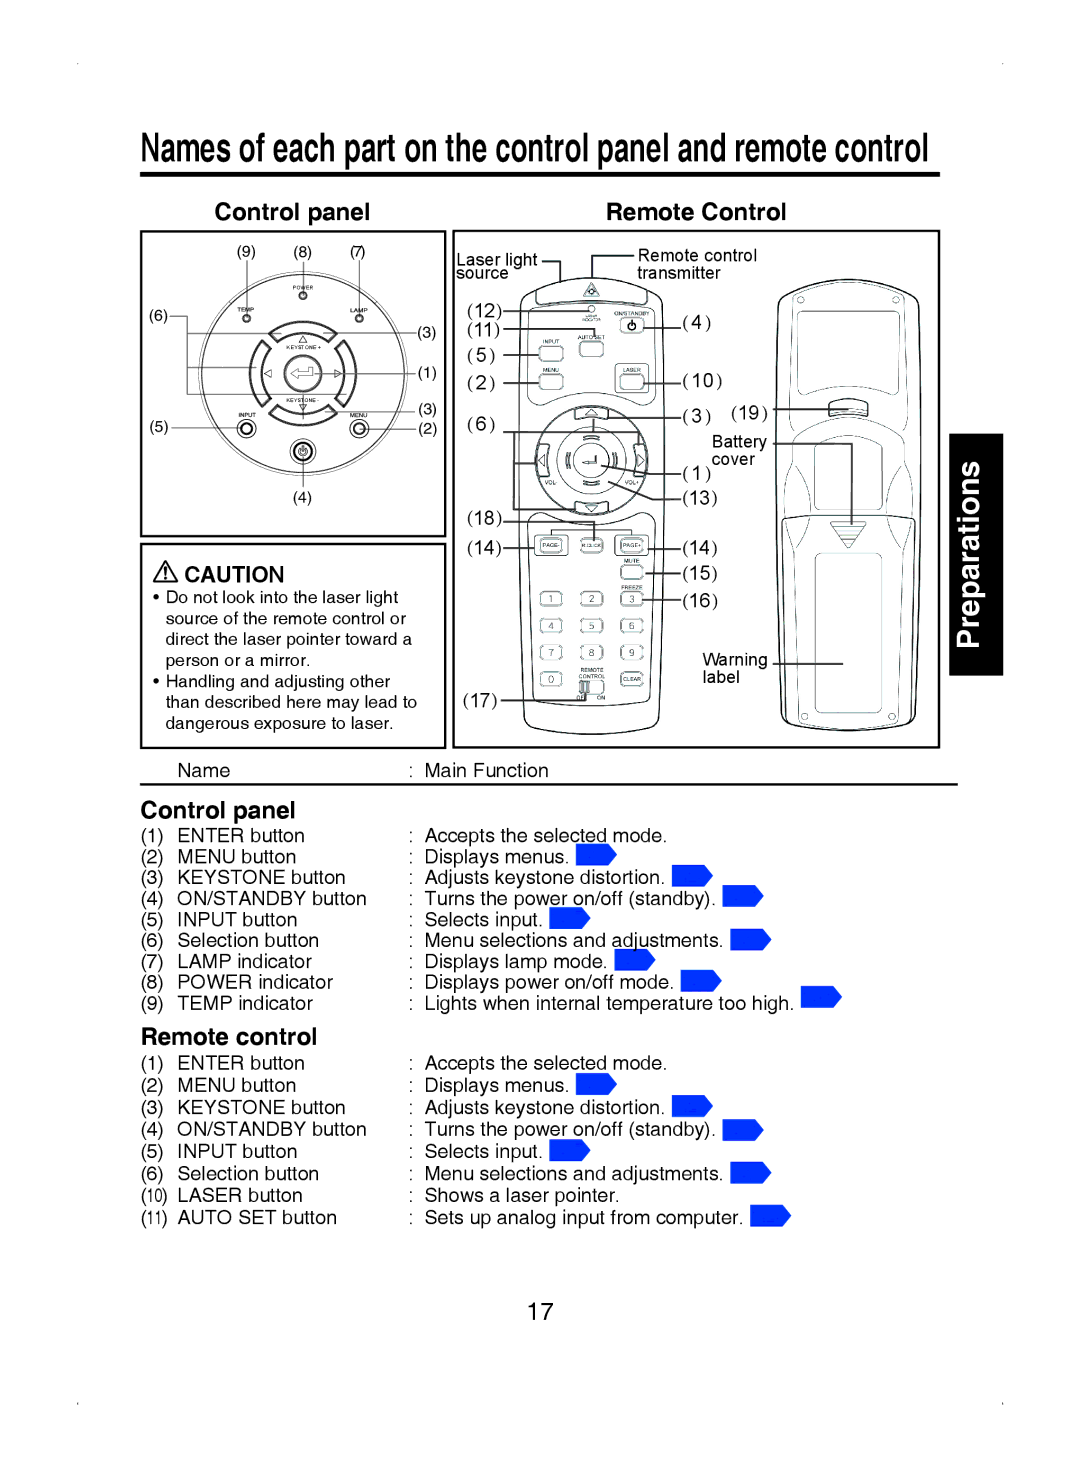
Names of each part on the control panel and remote control
Control panel | Remote Control |
(9) | (8) | (7) |
| POWER |
|
(6) |
| (3) |
|
| |
| KEYSTONE + |
|
|
| (1) |
| KEYSTONE - | (3) |
(5) |
| |
| (2) | |
| (4) |
|
![]() CAUTION
CAUTION
•Do not look into the laser light source of the remote control or direct the laser pointer toward a person or a mirror.
•Handling and adjusting other than described here may lead to dangerous exposure to laser.
Laser light | Remote control | |||
source | transmitter |
| ||
12 |
|
|
| |
( | ) | (4) |
| |
11 |
| |||
( | ) |
|
|
|
(5) | (10) |
| ||
(2) |
| |||
(6) | (3) | (19) | ||
| ||||
| Battery | |||
|
|
| ||
|
|
| cover | |
|
| (1) |
| |
|
| 13 |
| |
18 | ( | ) |
| |
( | ) | 14 |
| |
14 |
| |||
( | ) | ( | ) |
|
|
| 15 |
| |
|
| ( | ) |
|
|
| 16 |
| |
|
| ( | ) |
|
|
|
| Warning | |
(17) |
| label | ||
|
|
| ||
Preparations
| Name | : Main Function |
Control panel |
| |
(1) | ENTER button | : Accepts the selected mode. |
(2) | MENU button | : Displays menus. p.32 |
(3) | KEYSTONE button | : Adjusts keystone distortion. |
(4) | ON/STANDBY button | : Turns the power on/off (standby). p.26 |
(5) | INPUT button | : Selects input. p.27 |
(6) | Selection button | : Menu selections and adjustments. p.32 |
(7) | LAMP indicator | : Displays lamp mode. p.26 |
(8) | POWER indicator | : Displays power on/off mode. p.26 |
(9) | TEMP indicator | : Lights when internal temperature too high. p.41 |
Remote control |
| |
(1) | ENTER button | : Accepts the selected mode. |
(2) | MENU button | : Displays menus. p.32 |
(3) | KEYSTONE button | : Adjusts keystone distortion. |
(4) | ON/STANDBY button | : Turns the power on/off (standby). p.26 |
(5) | INPUT button | : Selects input. p.27 |
(6) | Selection button | : Menu selections and adjustments. p.32 |
(10) | LASER button | : Shows a laser pointer. |
(11) | AUTO SET button | : Sets up analog input from computer. |
17
