Using the menus (Continued)
Item | Description | Computer Y/PB/PR Video | |||
Position | Yes | No | No | No | |
Adjust the vertical position of the image.
Clamp 1 | Yes | No | No | No |
Adjusts the clamp pulse position. |
|
|
|
|
|
|
|
|
|
Clamp 2 | Yes | No | No | No |
Adjusts the clamp pulse width.
*1: [Noise reduction] may not work depending on signal type.
*2: [[NTSC mode] can be displayed and adjusted only when the video signal is set to [NTSC] or [NTSC4.43]. NTSC mode is set to JAPAN when the language is set to Japanese. It is set to US for other languages.
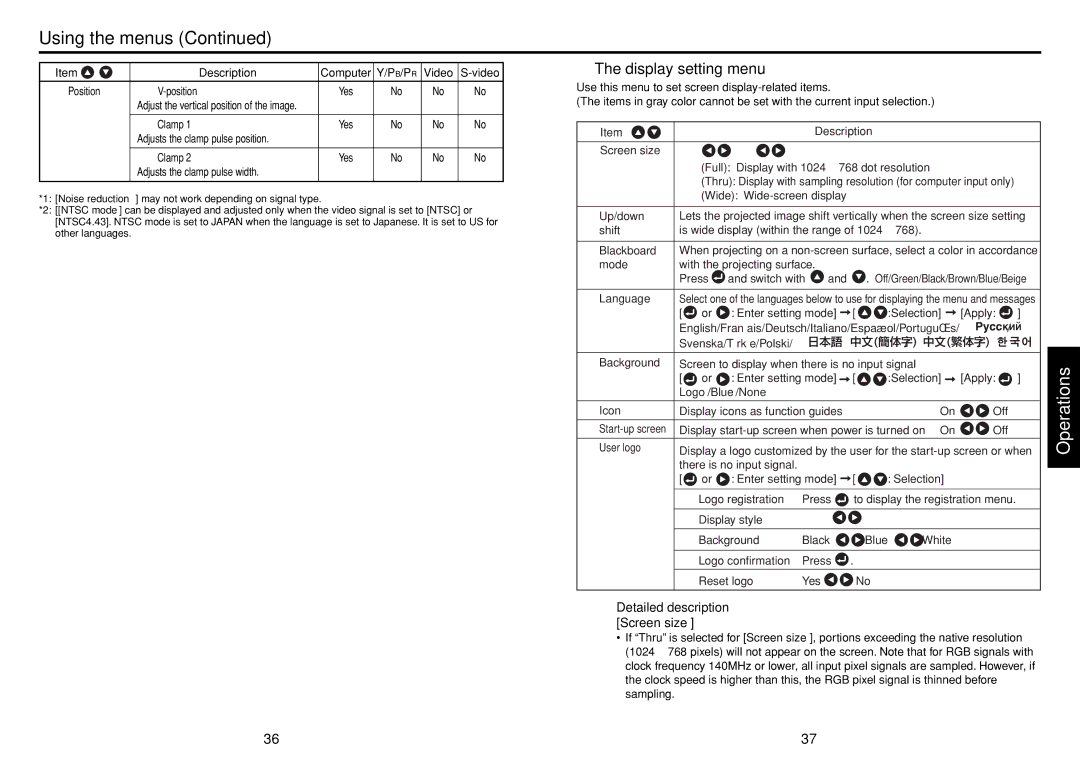
■The display setting menu
Use this menu to set screen
(The items in gray color cannot be set with the current input selection.)
Item |
|
|
| Description |
|
|
|
|
| |||
|
|
|
|
|
|
|
|
|
|
|
|
|
Screen size |
|
|
|
|
|
|
|
|
|
|
|
|
|
| (Full): Display with 1024 ⋅ 768 dot resolution |
|
|
|
| ||||||
|
| (Thru): Display with sampling resolution (for computer input only) |
| |||||||||
|
| (Wide): |
|
|
|
|
|
|
| |||
|
| |||||||||||
Up/down | Lets the projected image shift vertically when the screen size setting | |||||||||||
shift | is wide display (within the range of 1024 ⋅ 768). |
|
|
|
|
| ||||||
|
| |||||||||||
Blackboard | When projecting on a | |||||||||||
mode | with the projecting surface. |
|
|
|
|
|
|
|
| |||
| Press | and switch with | and |
| . Off/Green/Black/Brown/Blue/Beige | |||||||
|
| |||||||||||
Language | Select one of the languages below to use for displaying the menu and messages | |||||||||||
| [ | or | : Enter setting mode] | [ | :Selection] | [Apply: | ] | |||||
| English/Français/Deutsch/Italiano/Español/Português/ | / | ||||||||||
| Svenska/Türkçe/Polski/ | / |
| / |
| / |
|
|
| |||
|
|
|
|
|
| |||||||
|
|
|
|
|
|
| ||||||
Background | Screen to display when there is no input signal |
|
|
|
|
| ||||||
| [ | or | : Enter setting mode] | [ | :Selection] | [Apply: | ] | |||||
| Logo/Blue/None |
|
|
|
|
|
|
|
|
| ||
|
|
|
|
|
|
| ||||||
Icon | Display icons as function guides |
|
| On | Off |
| ||||||
|
|
|
|
| ||||||||
Display | On | Off |
| |||||||||
User logo | Display a logo customized by the user for the | |||||||||||
| ||||||||||||
| there is no input signal. |
|
|
|
|
|
|
|
|
| ||
| [ | or | : Enter setting mode] | [ | : Selection] |
|
|
|
| |||
|
|
|
|
|
| |||||||
|
| Logo registration | Press | to display the registration menu. |
| |||||||
|
|
|
|
|
|
|
|
|
|
|
| |
|
| Display style |
|
|
|
|
|
|
|
|
| |
|
|
|
|
|
|
|
|
|
|
| ||
|
| Background | Black |
| Blue | White |
|
|
|
| ||
|
|
|
|
|
|
|
|
|
|
| ||
|
| Logo confirmation | Press | . |
|
|
|
|
|
| ||
|
|
|
|
|
|
|
|
|
|
|
| |
|
| Reset logo | Yes |
|
| No |
|
|
|
|
| |
|
|
|
|
|
|
|
|
|
|
|
|
|
Detailed description [Screen size]
Operations
•If “Thru” is selected for [Screen size], portions exceeding the native resolution (1024 ⋅ 768 pixels) will not appear on the screen. Note that for RGB signals with clock frequency 140MHz or lower, all input pixel signals are sampled. However, if the clock speed is higher than this, the RGB pixel signal is thinned before sampling.
36 | 37 |
