Using handy features
■Using auto setting (Auto setting)
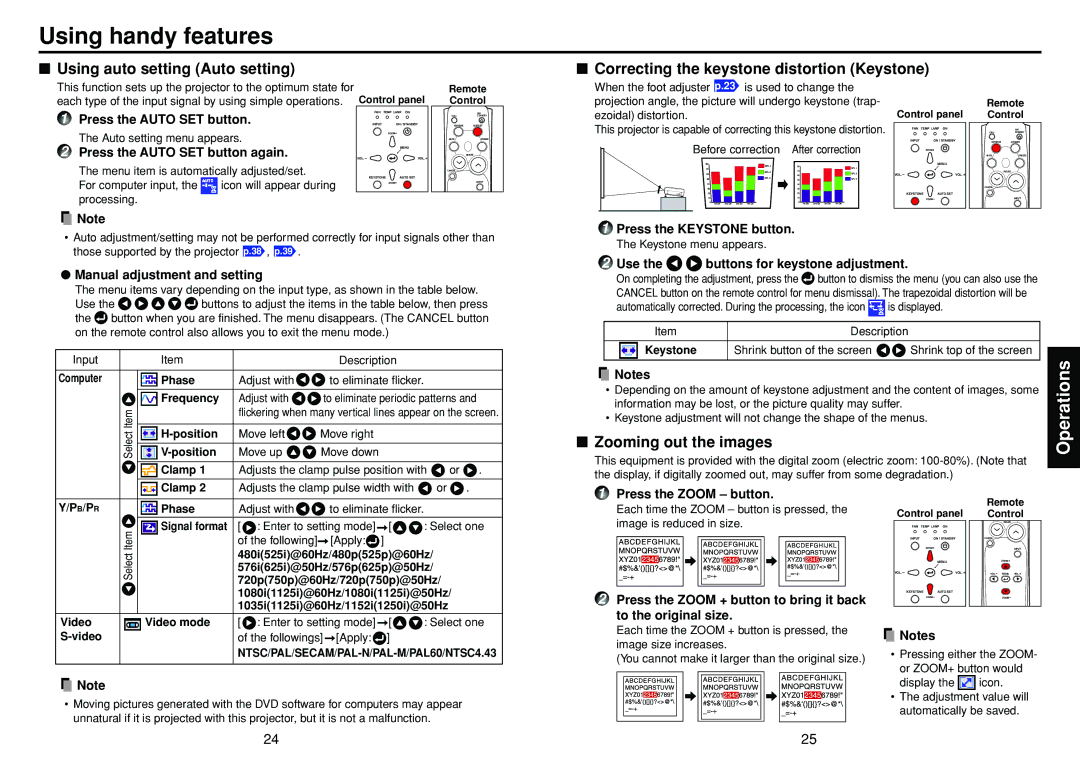
■Correcting the keystone distortion (Keystone)
This function sets up the projector to the optimum state for
each type of the input signal by using simple operations. Control panel
Remote
Control
When the foot adjuster p.23 is used to change the projection angle, the picture will undergo keystone (trap-
Remote
1 | Press the AUTO SET button. |
2 | The Auto setting menu appears. |
Press the AUTO SET button again. |
FAN TEMP LAMP ON
INPUT | ON / STANDBY |
| ZOOM+ |
| MENU |
VOL. - | VOL. + |
ON/
CALLSTANDBY
KEYSTONEAUTOSET
MUTE | FREEZE |
RESIZE
ezoidal) distortion.
This projector is capable of correcting this keystone distortion.
Before correction After correction
Control panel
FAN TEMP LAMP ON
INPUT | ON / STANDBY |
ZOOM+
Control
ON/
CALLSTANDBY
KEYSTONEAUTOSET
MUTE | FREEZE |
The menu item is automatically adjusted/set. | |
For computer input, the | icon will appear during |
processing. |
|
KEYSTONE | AUTO SET |
| ZOOM- |
CANCEL
INPUT
| MENU |
VOL. - | VOL. + |
KEYSTONE | AUTO SET |
| ZOOM- |
RESIZE
CANCEL
INPUT
![]() Note
Note
•Auto adjustment/setting may not be performed correctly for input signals other than those supported by the projector p.38 , p.39 .
●Manual adjustment and setting
The menu items vary depending on the input type, as shown in the table below.
Use the ![]()
![]()
![]()
![]()
![]() buttons to adjust the items in the table below, then press the
buttons to adjust the items in the table below, then press the ![]() button when you are finished. The menu disappears. (The CANCEL button on the remote control also allows you to exit the menu mode.)
button when you are finished. The menu disappears. (The CANCEL button on the remote control also allows you to exit the menu mode.)
Input | Item |
| Description | |
Computer | Phase | Adjust with | to eliminate flicker. | |
|
|
|
| |
| Frequency | Adjust with | to eliminate periodic patterns and | |
Item |
| flickering when many vertical lines appear on the screen. | ||
|
|
| ||
Move left | Move right | |||
Select | ||||
|
|
| ||
Move up | Move down | |||
![]() Clamp 1 Adjusts the clamp pulse position with
Clamp 1 Adjusts the clamp pulse position with ![]() or
or ![]() .
.
1Press the KEYSTONE button.
The Keystone menu appears.
2Use the 
 buttons for keystone adjustment.
On completing the adjustment, press the ![]() button to dismiss the menu (you can also use the CANCEL button on the remote control for menu dismissal). The trapezoidal distortion will be
button to dismiss the menu (you can also use the CANCEL button on the remote control for menu dismissal). The trapezoidal distortion will be
automatically corrected. During the processing, the icon ![]() is displayed.
is displayed.
Item | Description |
|
|
|
|
Keystone | Shrink button of the screen | Shrink top of the screen |
|
|
|
![]() Notes
Notes
•Depending on the amount of keystone adjustment and the content of images, some information may be lost, or the picture quality may suffer.
•Keystone adjustment will not change the shape of the menus.
■Zooming out the images
This equipment is provided with the digital zoom (electric zoom:
Operations
![]() Clamp 2 Adjusts the clamp pulse width with
Clamp 2 Adjusts the clamp pulse width with ![]() or
or ![]() .
.
Y/PB/PR |
| Phase | Adjust with | to eliminate flicker. |
| ||
|
| Signal format | [ | : Enter to setting mode] | [ | : Select one | |
| Item | of the following] | [Apply: | ] |
| ||
| 480i(525i)@60Hz/480p(525p)@60Hz/ | ||||||
| Select | ||||||
| 576i(625i)@50Hz/576p(625p)@50Hz/ | ||||||
| 720p(750p)@60Hz/720p(750p)@50Hz/ | ||||||
|
|
| |||||
|
|
| 1080i(1125i)@60Hz/1080i(1125i)@50Hz/ | ||||
|
|
| 1035i(1125i)@60Hz/1152i(1250i)@50Hz | ||||
Video |
| Video mode | [ | : Enter to setting mode] | [ | : Select one | |
1 Press the ZOOM – button. |
Each time the ZOOM – button is pressed, the |
image is reduced in size. |
2 Press the ZOOM + button to bring it back |
to the original size. |
Control panel
FAN TEMP LAMP ON
INPUT | ON / STANDBY |
| ZOOM+ |
| MENU |
VOL. - | VOL. + |
KEYSTONE | AUTO SET |
| ZOOM- |
Remote Control
RESIZE
CANCEL
INPUT
ZOOM+
VOL.- MENU VOL.+
ZOOM-
| of the followings] [Apply: ] |
|
|
![]() Note
Note
• Moving pictures generated with the DVD software for computers may appear unnatural if it is projected with this projector, but it is not a malfunction.
Each time the ZOOM + button is pressed, the |
image size increases. |
(You cannot make it larger than the original size.) |
![]() Notes
Notes
•Pressing either the ZOOM-
or ZOOM+ button would
display the ![]() icon.
icon.
•The adjustment value will automatically be saved.
24 | 25 |