CA8900 | 9 |
|
|
6 – Install AA Batteries
While the CA8900 requires the C wire (24VAC) to operate. It also requires 2AA batteries to
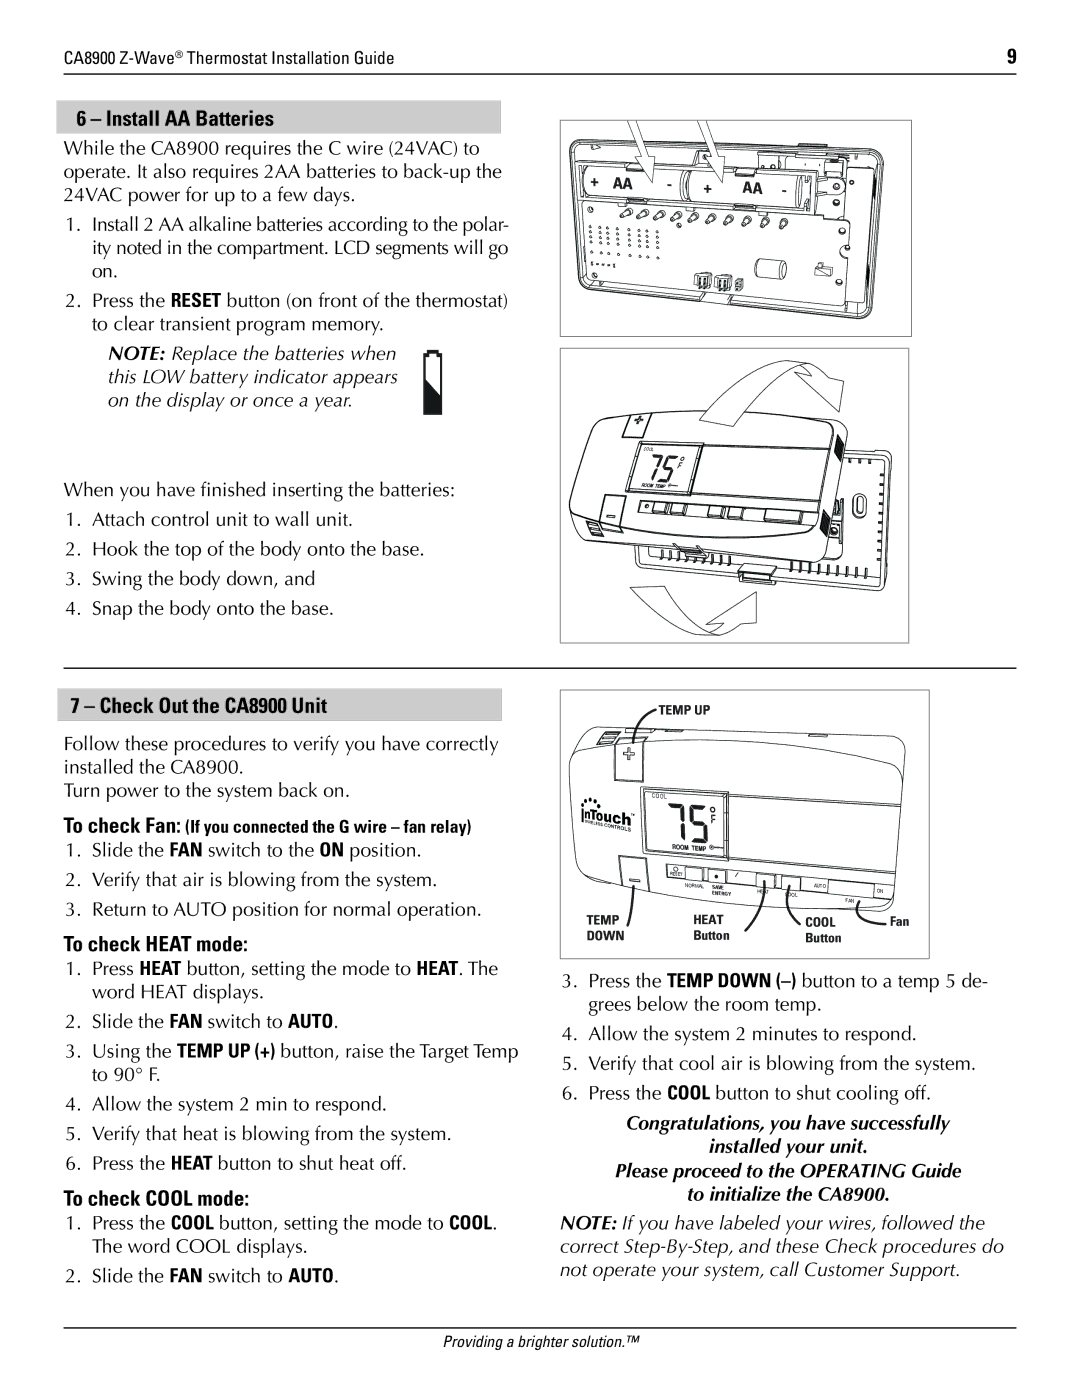
1.Install 2 AA alkaline batteries according to the polar- ity noted in the compartment. LCD segments will go on.
2.Press the RESET button (on front of the thermostat) to clear transient program memory.
NOTE: Replace the batteries when this LOW battery indicator appears on the display or once a year.
When you have finished inserting the batteries:
1.Attach control unit to wall unit.
2.Hook the top of the body onto the base.
3.Swing the body down, and
4.Snap the body onto the base.
7 – Check Out the CA8900 Unit
Follow these procedures to verify you have correctly installed the CA8900.
Turn power to the system back on.
To check Fan: (If you connected the G wire – fan relay)
1.Slide the FAN switch to the ON position.
2.Verify that air is blowing from the system.
3.Return to AUTO position for normal operation.
To check HEAT mode:
1.Press HEAT button, setting the mode to HEAT. The word HEAT displays.
2.Slide the FAN switch to AUTO.
3.Using the TEMP UP (+) button, raise the Target Temp to 90° F.
4.Allow the system 2 min to respond.
5.Verify that heat is blowing from the system.
6.Press the HEAT button to shut heat off.
To check COOL mode:
1.Press the COOL button, setting the mode to COOL. The word COOL displays.
2.Slide the FAN switch to AUTO.
+ | AA | - | + | AA | - |
|
|
|
COOL |
TEMP UP
COOL
| RESET |
|
|
|
|
| NORMAL SAVE | Y | HEAT | AUTO | ON |
|
| COOL | |||
| ENERG |
| FAN | ||
|
|
|
|
| |
TEMP | HEAT |
|
| COOL | Fan |
DOWN | Button |
| Button |
| |
3.Press the TEMP DOWN
4.Allow the system 2 minutes to respond.
5.Verify that cool air is blowing from the system.
6.Press the COOL button to shut cooling off.
Congratulations, you have successfully
installed your unit.
Please proceed to the OPERATING Guide
to initialize the CA8900.
NOTE: If you have labeled your wires, followed the correct
Providing a brighter solution.™