Manuals
/
Transcend Information
/
Computer Equipment
/
Computer Drive
Transcend Information
25P
user manual
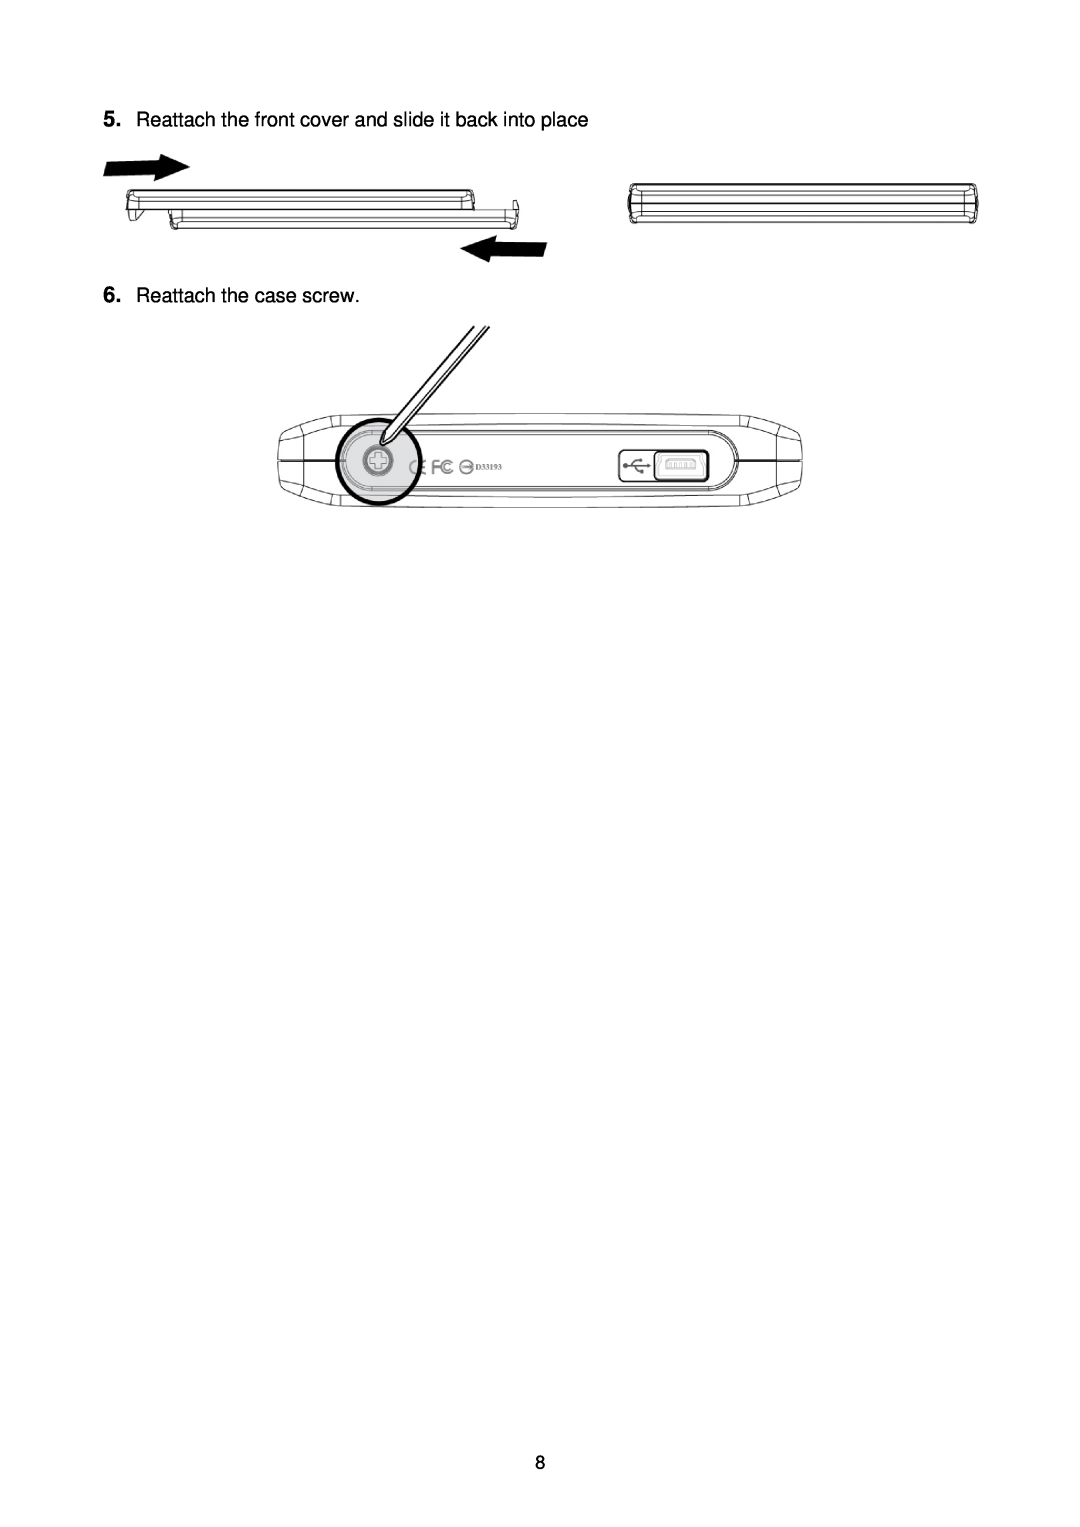
Reattach the front cover and slide it back into place
Models:
25P
1
10
26
26
Download
26 pages
10.18 Kb
7
8
9
10
11
12
13
14
Troubleshooting
Specs
Install
Run as administrator
Connecting to a Computer︱
Warranty
Page 10
Image 10
Page 9
Page 11
Page 10
Image 10
Page 9
Page 11
Contents
StoreJet 25P User’s Manual
Safety Precautions︱
Package Contents︱
Features︱
Power
The StoreJet 25 package includes the following items StoreJet 25P
1 Mini USB to 2 Standard-A USB cable USB Y cable Quick Start Guide
Desktop or notebook computer with a working USB port
General Use
Safety Precautions︱
Power
Backing Up Data
Reminders
Case Screw Mini USB Port
Figure 1 StoreJet 25P
Installing a Hard Drive︱
Installing a Hard Drive
5. Reattach the front cover and slide it back into place
6. Reattach the case screw
Figure 3 Connecting to a Computer
Connecting to a Computer︱
Figure 2 Mini USB to Standard-A USB cable USB Y-cable
3. When the StoreJet 25 is successfully connected to a computer, the StoreJet’s Power LED will
Disconnecting from a Computer︱
Linux Kernel 2.4 or Later
Figure 7 Drag StoreJet 25 drive icon into the Trashcan
Formatting the Hard Drive︱
Figure 9 Press “Start”
Figure 10 Format Complete
7. The program will automatically detect the StoreJet 25 drive
Figure 11 Run as administrator
Figure 12 Allow Transcend’s StoreJet Format Utility to run in Vista
Figure 13 The Utility will automatically detect the StoreJet 25 drive
8. Press “Start”
Figure 14 Press “Start”
10. Click the “Close” button to finish and exit
9. Click “Erase” again to confirm
Figure 17 Select a Volume Format file system
8. Click the “Erase” button in the bottom right corner of the window
Figure 18 Name your drive optional
9. Type mkdir /mnt/usbdrive 10. Type mount /mnt/usbdrive
7. Type mkfs.ext3 /dev/sda1
Figure 19 “Erase Disk” confirmation window
The Software CD does not auto-run in Windows
Troubleshooting︱
Spare USB connector provides additional power
My operating system cannot detect the StoreJet
I cannot detect the StoreJet 25 on my Mac
The StoreJet 25 does not Power-ON
I cannot detect the StoreJet 25 in Linux
Power Supply
Specifications︱
Weight with hard drive
Warranty
Transcend Limited Warranty︱
Transcend Information, Inc
All logos and marks are trademarks of their respective companies
Top
Page
Image
Contents