Manuals
/
TRENDnet
/
Computer Equipment
/
Server
TRENDnet
TE100-P1U
manual
1Select Custom, and click Settings
Models:
TE100-P1U
1
52
63
63
Download
63 pages
14.54 Kb
49
50
51
52
53
54
55
56
Install
Warranty
WEB Configuration
Factory Reset
Setup Wizard
Firmware Upgrade
General Features
Using the Utilities
Page 52
Image 52
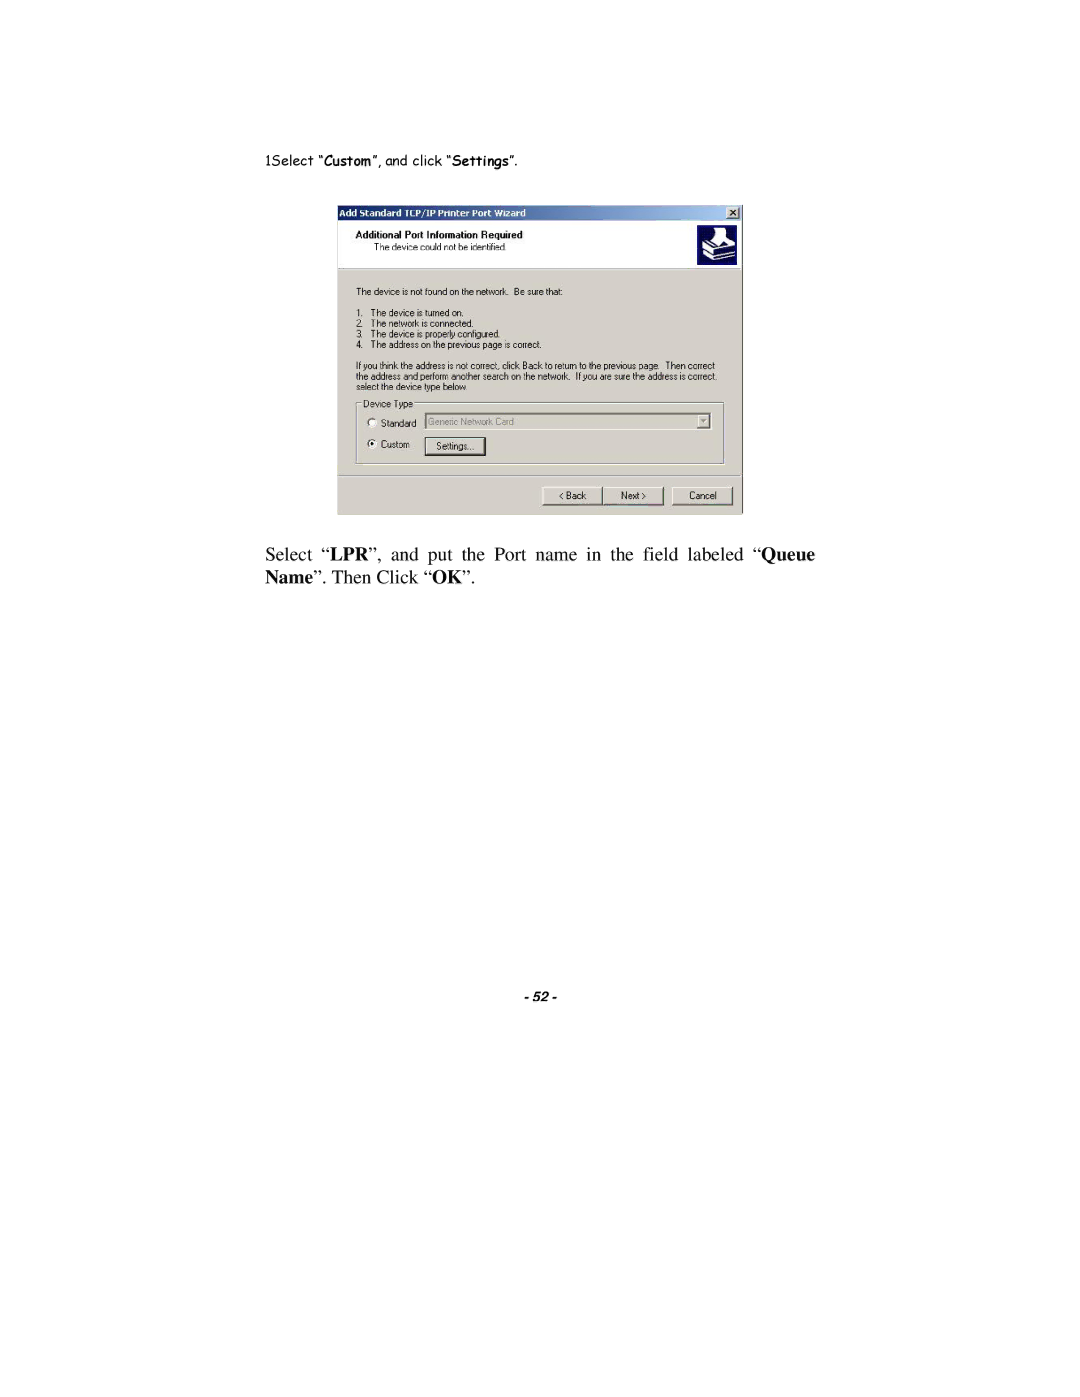
1Select “
Custom
”, and click “
Settings
”.
Select “
LPR
”, and put the Port name in the field labeled “
Queue Name
”. Then Click “
OK
”.
- 52 -
Page 51
Page 53
Page 52
Image 52
Page 51
Page 53
Contents
Page
Table of Contents
Printing in Windows 2000/XP
About this Guide
Introduction
Package Contents
System Requirements
General Features
Product View
Rear View
USB
Hardware Installation
Networking Application
Installing the Print Server
Using the Utilities
Auto-Run Installation
Installing PS-Utility
PS-Utility
Using PS-Utility
Component Features
Page
PS Wizard
Choose one connected printer port
WEB Configuration
Web Configuration Utility
Home
Setup Wizard
System
IP Address
Microsoft Network
Setup Wizard is now completed
Change IP Address
Printer Information
Factory Reset
Firmware Upgrade
About
95/98/ME
Installing the LPR for TCP/IP Printing Client
Page
Adding LPR Printer Ports
Page
Printing from Windows 95/98/Me
Page
Page
Setting TCP/IP Printing Settings
Page
2000/XP
Create a new Standard TCP/IP Port
Page
Page
Click Next Click Finish
Page
Select a Printer Name Sharing can be enabled here
Page
Setting Up Windows XP TCP/IP Printing
Select Local Printer Create a new Standard TCP/IP Port
Page
1Select Custom, and click Settings
Click Next
Click Finish
Page
Test Page can be printed to confirm proper configuration
Page
Printing in MAC OS
Rendezvous Uses in MAC OS
Connected printers
Page
Limited Warranty
Top
Page
Image
Contents