TRENDnet User’s Guide
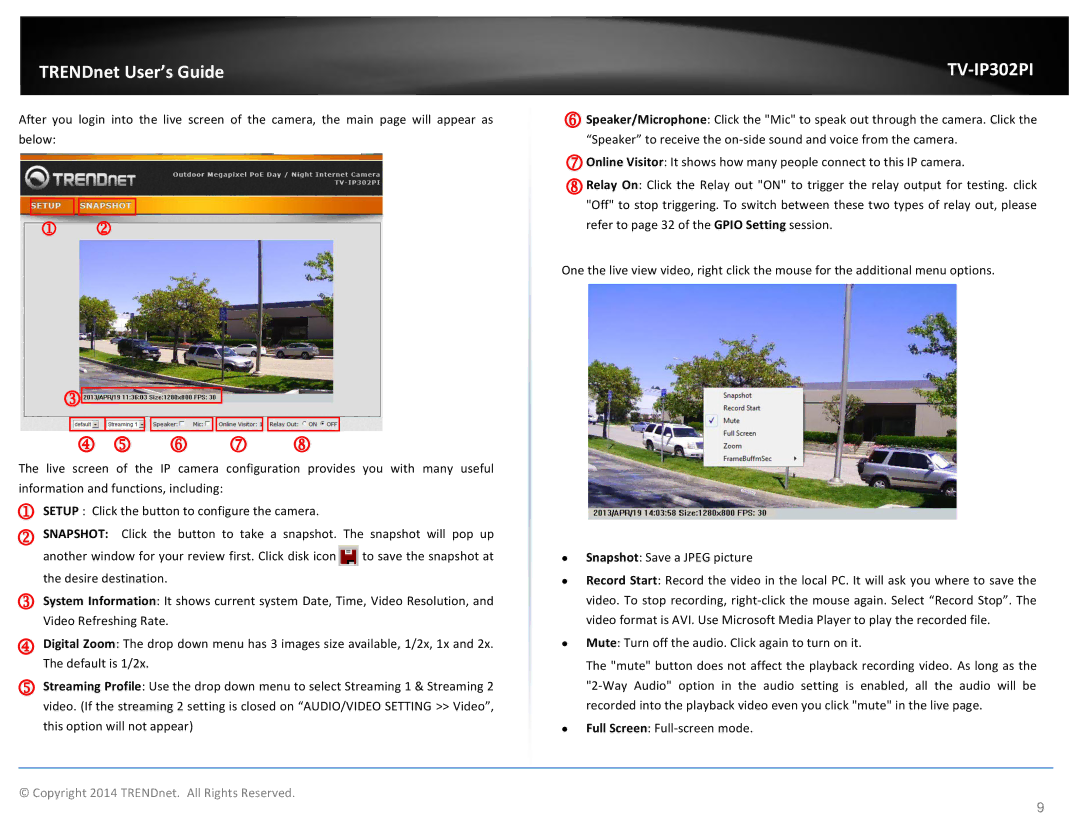
After you login into the live screen of the camera, the main page will appear as below:
The live screen of the IP camera configuration provides you with many useful information and functions, including:
SETUP : Click the button to configure the camera.
SNAPSHOT: Click the button to take a snapshot. The snapshot will pop up another window for your review first. Click disk icon ![]() to save the snapshot at the desire destination.
to save the snapshot at the desire destination.
System Information: It shows current system Date, Time, Video Resolution, and Video Refreshing Rate.
Digital Zoom: The drop down menu has 3 images size available, 1/2x, 1x and 2x. The default is 1/2x.
Streaming Profile: Use the drop down menu to select Streaming 1 & Streaming 2 video. (If the streaming 2 setting is closed on “AUDIO/VIDEO SETTING >> Video”, this option will not appear)
TV-IP302PI
Speaker/Microphone: Click the "Mic" to speak out through the camera. Click the “Speaker” to receive the
Online Visitor: It shows how many people connect to this IP camera.
Relay On: Click the Relay out "ON" to trigger the relay output for testing. click "Off" to stop triggering. To switch between these two types of relay out, please refer to page 32 of the GPIO Setting session.
One the live view video, right click the mouse for the additional menu options.
∙Snapshot: Save a JPEG picture
∙Record Start: Record the video in the local PC. It will ask you where to save the video. To stop recording,
∙Mute: Turn off the audio. Click again to turn on it.
The "mute" button does not affect the playback recording video. As long as the
∙Full Screen:
© Copyright 2014 TRENDnet. All Rights Reserved.
9