Features continued
FSURGE AND NOISE PROTECTED OUTLETS
Provide surge protection only. Plug non- or
GAC INLET (C14)
Accepts a
HUSB COMMUNICATION PORT (HID Compliant)
This port can connect your UPS to any computer for automatic file saves and unattended shutdown in the event of a power failure. Use with Tripp Lite’s PowerAlert software and appropriate USB cable. A PowerAlert CD and USB cable may be included with your UPS; if so, insert the CD into the CD tray of your computer and follow the installation instructions. If PowerAlert software and the appropriate cable did not come with your UPS, you can obtain the software FREE via the Web at www.tripplite.com. This port can also be used with the
CAUTION: Users must take proper care to minimize electrostatic events. In the event of a severe electrostatic discharge on or near the USB port, this UPS may shut down automatically. In the case of a shut down, the UPS will need to be turned back on.
ITEL/DSL PROTECTION JACKS
Stop surges on the phone or fax line. Connecting your equipment to these jacks is optional. Your UPS will work properly without this connection.
JGROUND CONNECTION
Use this to connect any equipment that requires a chassis ground.
KBATTERY REPLACEMENT DOOR (bottom panel, not shown)
Under normal conditions, the original battery in your UPS will last several years. Battery replacement should be performed only by qualified service personnel. Refer to “Battery Warnings” in the Safety section. Should your UPS require battery replacement, visit Tripp Lite on the Web at www.tripplite.com/support/battery/index.cfm to locate the specific replacement battery for your UPS.
Installation
1 |
2 |
3 |
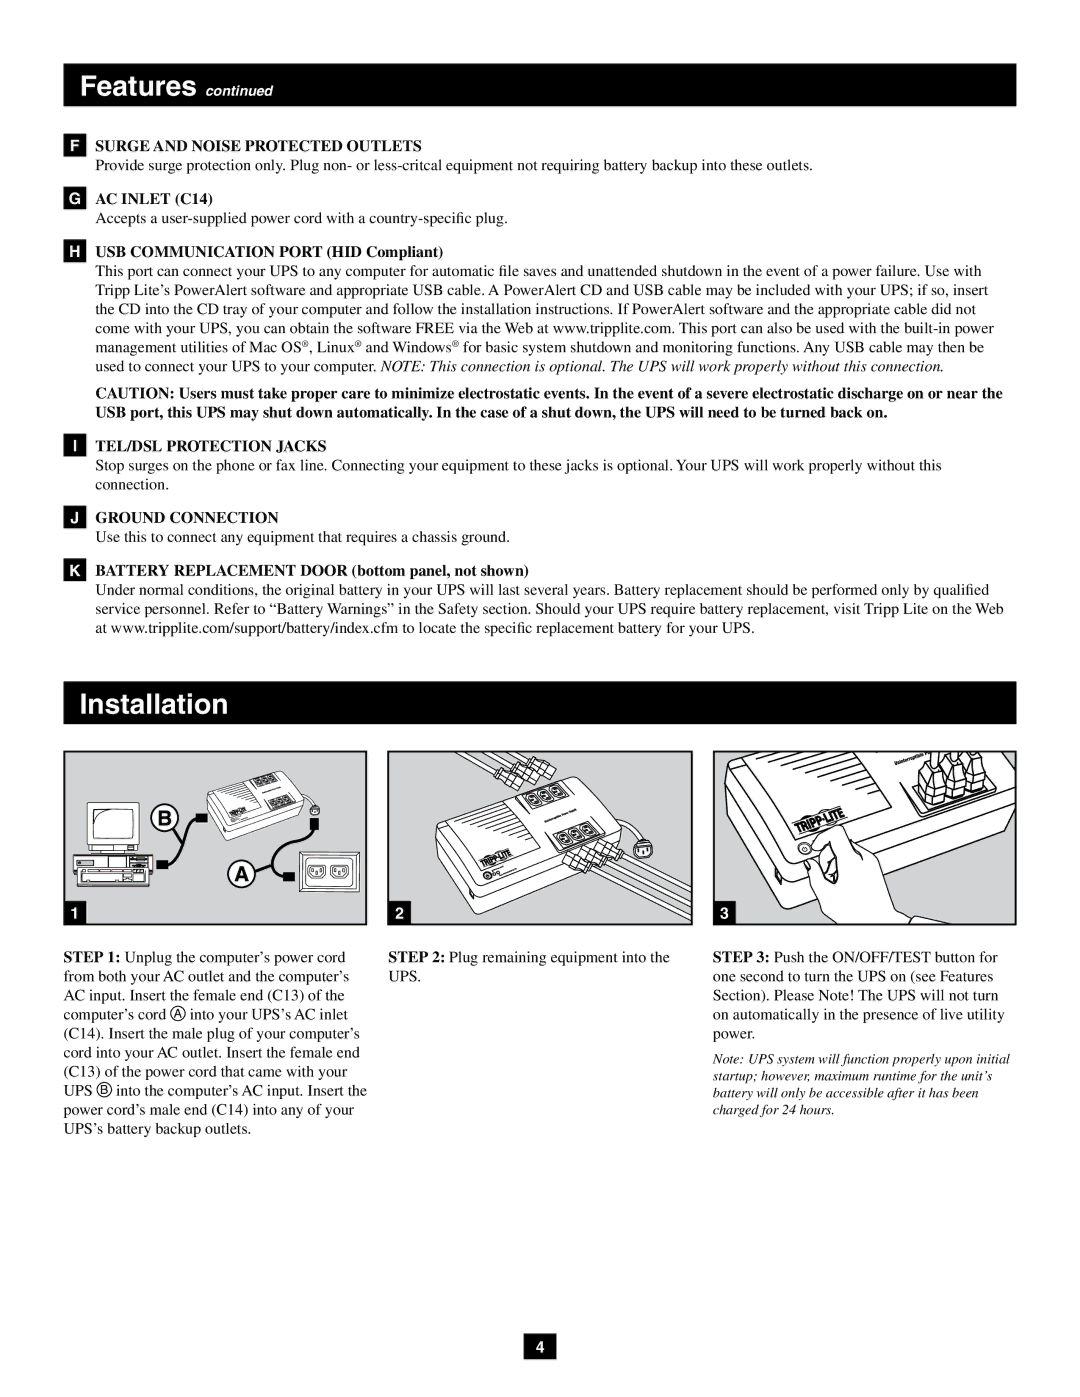
STEP 1: Unplug the computer’s power cord from both your AC outlet and the computer’s AC input. Insert the female end (C13) of the computer’s cord A into your UPS’s AC inlet (C14). Insert the male plug of your computer’s cord into your AC outlet. Insert the female end (C13) of the power cord that came with your UPS B into the computer’s AC input. Insert the power cord’s male end (C14) into any of your UPS’s battery backup outlets.
STEP 2: Plug remaining equipment into the UPS.
STEP 3: Push the ON/OFF/TEST button for one second to turn the UPS on (see Features Section). Please Note! The UPS will not turn on automatically in the presence of live utility power.
Note: UPS system will function properly upon initial startup; however, maximum runtime for the unit’s battery will only be accessible after it has been charged for 24 hours.
4
