Tripp Lite B022-U08-IP quick start Installation continued, Rack Mounting Instructions, Grounding

Models: B022-U08-IP

1 16
Download 16 pages 37.5 Kb
Page 6
Image 6
5.Installation (continued)

5.Installation (continued)

5.2Rack Mounting Instructions

Standard Rack Mounting

1.Depending on whether you want to mount the KVM switch to the front or back of the rack, attach the included rackmount brackets to the front or rear sides of the KVM switch.

2.Using user-supplied screws, mount the rackmount brackets of the KVM switch to the rack.

5.3Grounding

To prevent damage to your installation, it is important that all devices are properly grounded. Using a user-supplied grounding wire, ground the KVM switch by connecting one end of the wire to the grounding terminal on the unit, and the other end of the wire to a suitably grounded object.

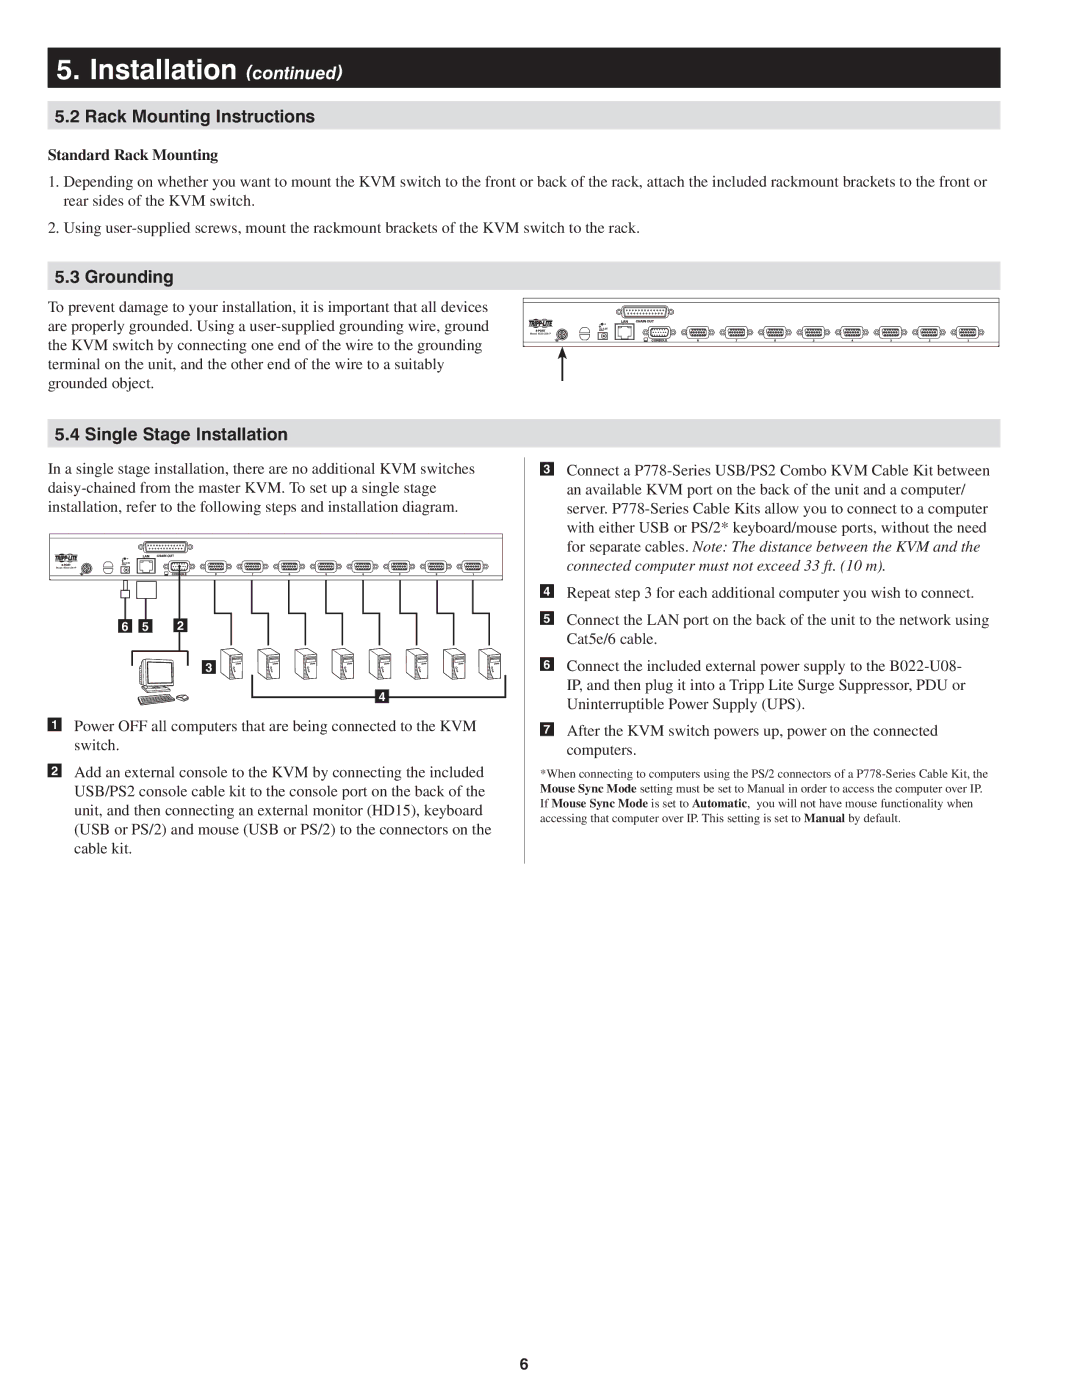
5.4 Single Stage Installation

In a single stage installation, there are no additional KVM switches daisy-chained from the master KVM. To set up a single stage installation, refer to the following steps and installation diagram.

6 5 2

3

4

Power OFF all computers that are being connected to the KVM switch.

Add an external console to the KVM by connecting the included USB/PS2 console cable kit to the console port on the back of the unit, and then connecting an external monitor (HD15), keyboard (USB or PS/2) and mouse (USB or PS/2) to the connectors on the cable kit.

Connect a P778-Series USB/PS2 Combo KVM Cable Kit between an available KVM port on the back of the unit and a computer/ server. P778-Series Cable Kits allow you to connect to a computer with either USB or PS/2* keyboard/mouse ports, without the need for separate cables. Note: The distance between the KVM and the connected computer must not exceed 33 ft. (10 m).

Repeat step 3 for each additional computer you wish to connect.

Connect the LAN port on the back of the unit to the network using Cat5e/6 cable.

Connect the included external power supply to the B022-U08- IP, and then plug it into a Tripp Lite Surge Suppressor, PDU or Uninterruptible Power Supply (UPS).

After the KVM switch powers up, power on the connected computers.

*When connecting to computers using the PS/2 connectors of a P778-Series Cable Kit, the Mouse Sync Mode setting must be set to Manual in order to access the computer over IP. If Mouse Sync Mode is set to Automatic, you will not have mouse functionality when accessing that computer over IP. This setting is set to Manual by default.

6

Page 6
Image 6
Tripp Lite B022-U08-IP quick start Installation continued, Rack Mounting Instructions, Grounding, Single Stage Installation