
B064-016-04-IP specifications
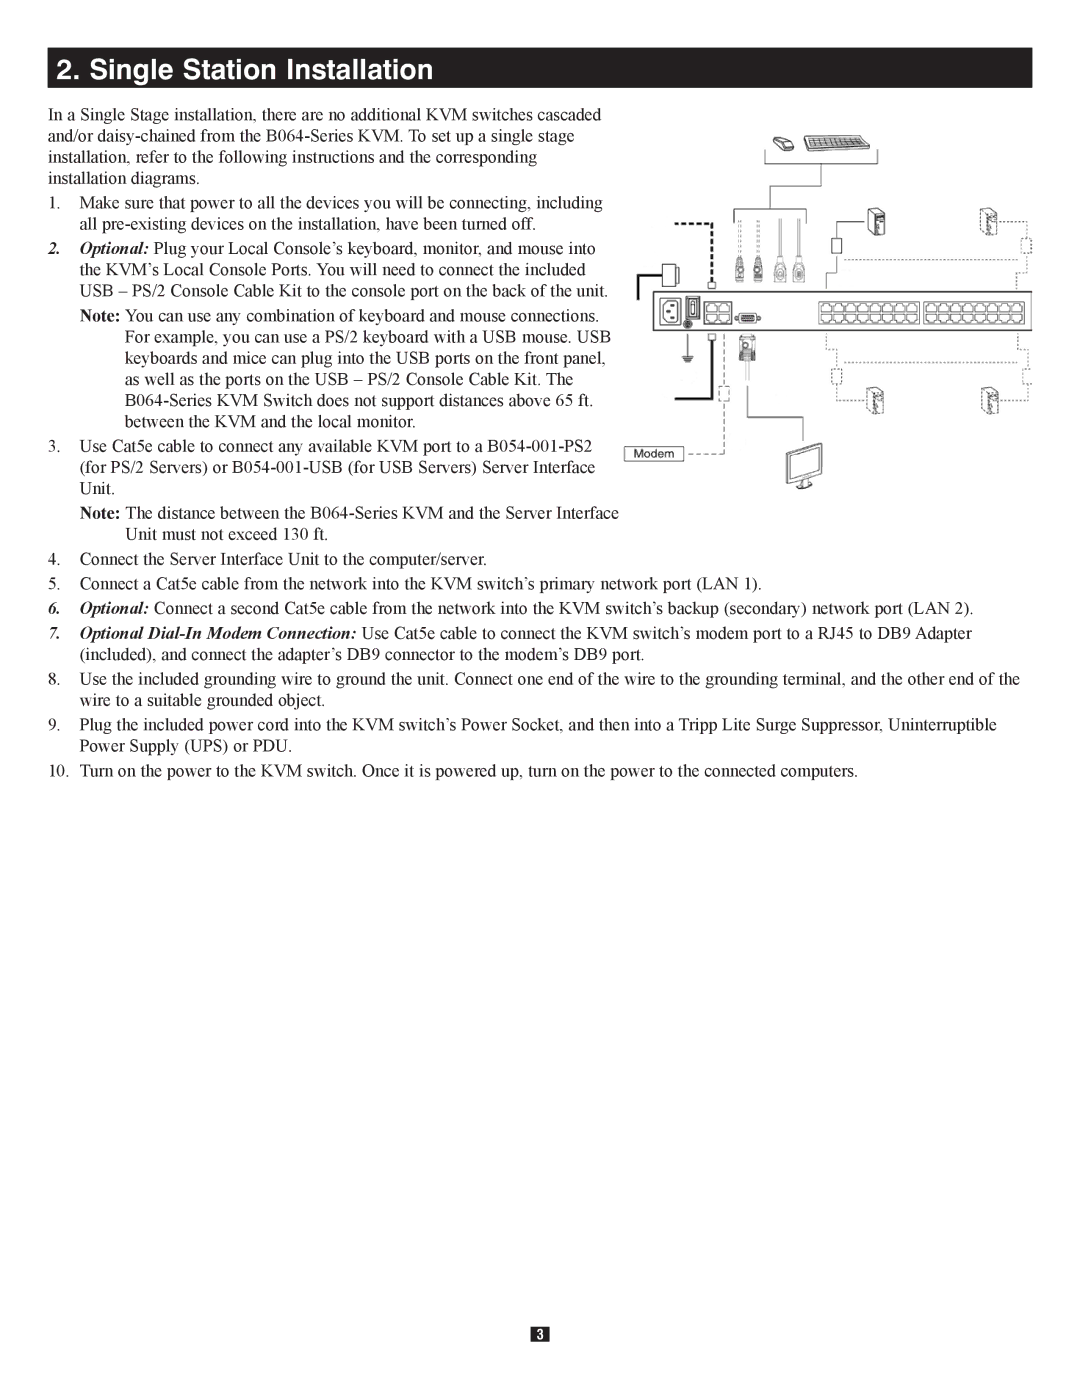
The Tripp Lite B064-016-04-IP is a robust and versatile KVM switch designed to enhance efficiency and streamline control in data centers and server rooms. This 16-port KVM switch allows users to manage multiple computers or servers through a single keyboard, mouse, and monitor setup, making it an essential tool for IT professionals and network administrators.One of the standout features of the B064-016-04-IP is its support for IP access, enabling remote management of connected devices over the network. This capability is crucial for managing servers located in different physical locations, as it allows administrators to troubleshoot and perform maintenance tasks without being physically present. The KVM switch supports multiple users, allowing simultaneous connections, which increases productivity and collaboration among IT staff.
The device is built with advanced technologies, including video resolutions up to 1920 x 1200 at 60Hz, ensuring that graphics are crisp and clear for both local and remote users. The B064-016-04-IP employs intuitive OSD (On-Screen Display) menus for easy access to configuration settings and system management. Users can quickly switch between connected devices using hotkeys or the OSD, enhancing operational efficiency.
In terms of security, this KVM switch features multi-level password protection, which restricts unauthorized access and ensures that only designated personnel can control critical systems. Additionally, it supports various authentication protocols, providing an extra layer of security for sensitive information and operations.
The B064-016-04-IP also includes a sturdy metal chassis, designed for durability and reliability in demanding environments. Its compact 1U design makes it suitable for rack-mounting, saving valuable space in server racks. The unit comes with a built-in web-based interface that simplifies configuration and enables easy management from any web browser.
Other notable features include support for USB and PS/2 interfaces for keyboard and mouse connectivity, as well as the ability to control both Windows and Mac systems. This versatility makes it an ideal solution for businesses operating across diverse IT environments.
In summary, the Tripp Lite B064-016-04-IP KVM switch combines performance, security, and convenience, making it a prime choice for organizations seeking to enhance their data management capabilities. Its robust features and advanced technologies make it an indispensable tool for modern IT infrastructure management.