Important Safety Instructions
SAVE THESE INSTRUCTIONS
This manual contains instructions and warnings that should be followed during the installation, operation and storage of all Tripp Lite UPS Systems. Failure to heed these warnings will void your warranty.
UPS Location Warnings
•The UPS is designed for indoor use only in a controlled environment, away from excess moisture, heat/cold, conductive contaminants, dust or direct sunlight.
•Leave adequate space around all sides of the UPS for proper ventilation.
UPS Connection Warnings
•Connect your UPS directly to a properly grounded AC power outlet. Do not plug the UPS into itself; this will damage the UPS.
•Do not modify the UPS’s plug, and do not use an adapter that would eliminate the UPS’s ground connection.
•Do not use extension cords to connect the UPS to an AC outlet. Your warranty will be voided if anything other than Tripp Lite surge suppressors are used to connect your UPS to an outlet.
•If the UPS receives power from a
Equipment Connection Warnings
•Do not use Tripp Lite UPS Systems for life support applications in which a malfunction or failure of a Tripp Lite UPS System could cause failure or significantly alter the performance of a life support device.
•Do not connect surge suppressors or extension cords to the output of your UPS. This might damage the UPS and will void the surge suppressor and UPS warranties.
Battery Warnings
•Your UPS does not require routine maintenance. Do not open your UPS for any reason. There are no
•Batteries can present a risk of electrical shock and burn from high
•Do not attempt to add external batteries to the UPS.
Quick Installation
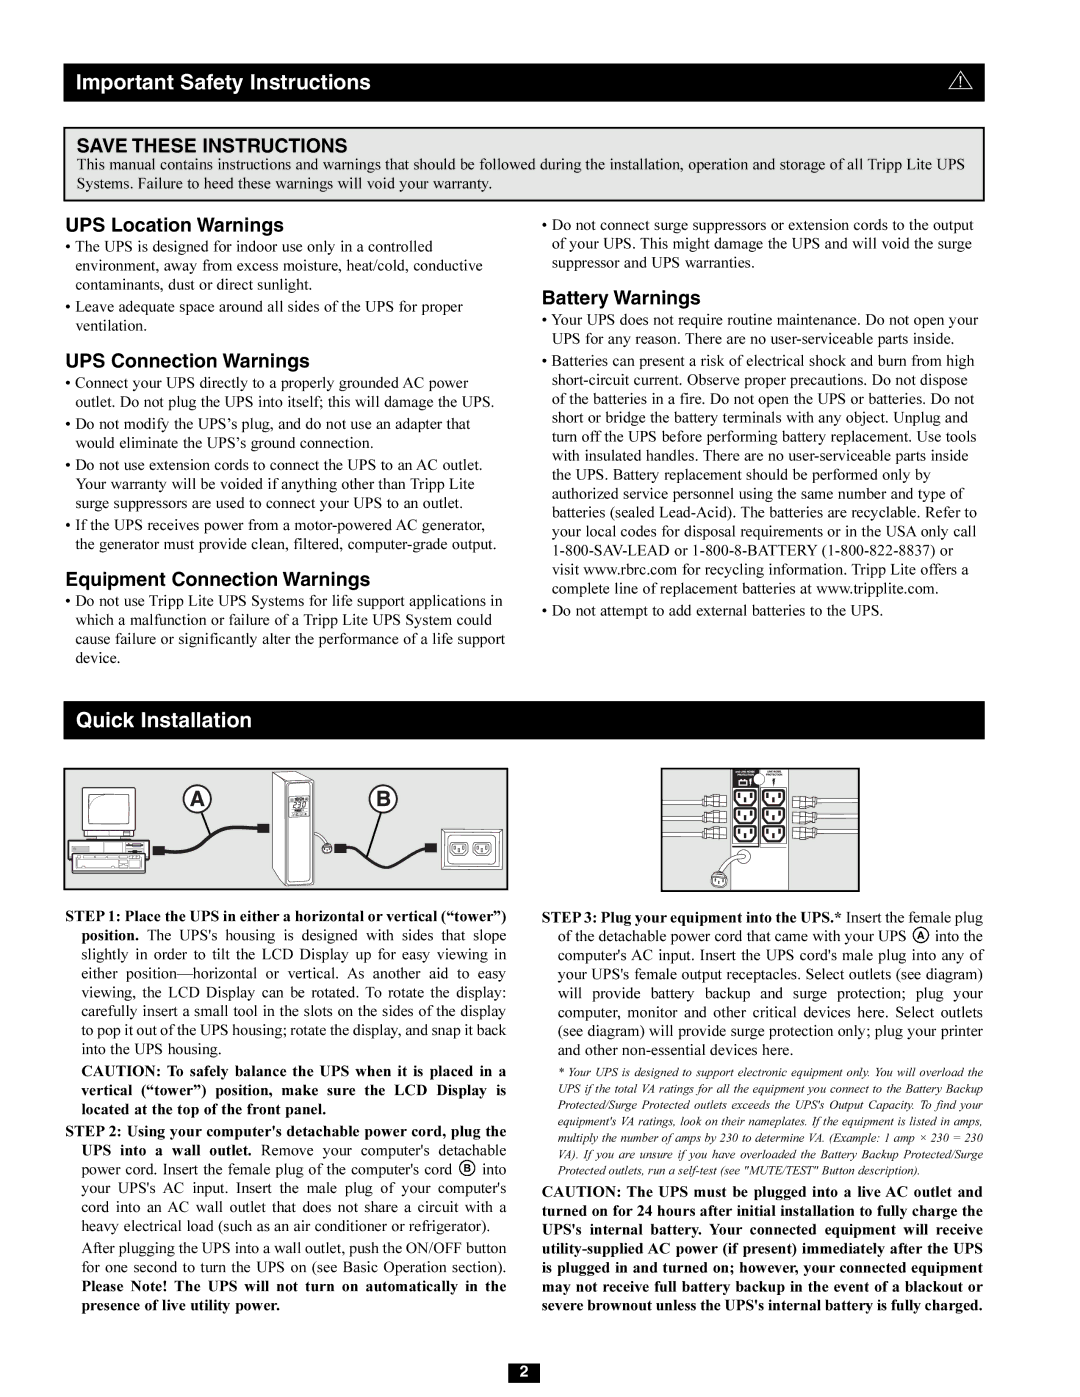
STEP 1: Place the UPS in either a horizontal or vertical (“tower”) position. The UPS's housing is designed with sides that slope slightly in order to tilt the LCD Display up for easy viewing in either
CAUTION: To safely balance the UPS when it is placed in a vertical (“tower”) position, make sure the LCD Display is located at the top of the front panel.
STEP 2: Using your computer's detachable power cord, plug the UPS into a wall outlet. Remove your computer's detachable power cord. Insert the female plug of the computer's cord B into your UPS's AC input. Insert the male plug of your computer's cord into an AC wall outlet that does not share a circuit with a heavy electrical load (such as an air conditioner or refrigerator).
After plugging the UPS into a wall outlet, push the ON/OFF button for one second to turn the UPS on (see Basic Operation section). Please Note! The UPS will not turn on automatically in the presence of live utility power.
STEP3: Plug your equipment into the UPS.* Insert the female plug of the detachable power cord that came with your UPS A into the computer's AC input. Insert the UPS cord's male plug into any of your UPS's female output receptacles. Select outlets (see diagram) will provide battery backup and surge protection; plug your computer, monitor and other critical devices here. Select outlets (see diagram) will provide surge protection only; plug your printer and other
*Your UPS is designed to support electronic equipment only. You will overload the UPS if the total VA ratings for all the equipment you connect to the Battery Backup Protected/Surge Protected outlets exceeds the UPS's Output Capacity. To find your equipment's VA ratings, look on their nameplates. If the equipment is listed in amps, multiply the number of amps by 230 to determine VA. (Example: 1 amp × 230 = 230 VA). If you are unsure if you have overloaded the Battery Backup Protected/Surge Protected outlets, run a
CAUTION: The UPS must be plugged into a live AC outlet and turned on for 24 hours after initial installation to fully charge the UPS's internal battery. Your connected equipment will receive
2