Replacing Rear Flap

To remove rear flap, cut off the flat end of the wire rod which secures it to the deck. See Figure 14 .

Attach the new flap and new rod to deck, bending the ends of the new rod over to secure to deck.


Rear Discharge


Handle

Door


Bracket


d


o


R


e


r


i


W


Handle


Rear Flap

Bracket


Figure 14

SECTION 8: MAKING ADJUSTMENTS

Adjusting Handle Height

Your mower is shipped with the handle in the higher height position. To lower height, proceed as follows:

Remove the starter rope from the rope guide.

Remove the upper handle by removing the hand knobs and carriage bolts. Lay upper handle out of the way, being careful not to bend or kink cables.

Remove the hairpin clips from the weld pins on the handle brackets. Refer to Figure 3 .

Remove the carriage bolts and wing nuts from the handle brackets. Press out on the legs of the lower handle. Remove lower handle from the mower.

Turn the lower handle around so the notch on

the bottom of the lower


handle is facing forward


as shown in the box


here. Reassemble,

Lower

Notch

placing the bottom


holes in the handle over Handle


the weld pins in the


handle mounting


bracket.


Reassemble the upper handle to the lower handle.

Insert hairpin clips in the inner holes of the weld pins and replace the carriage bolts and wing nuts on the handle brackets. Attach the starter rope as instructed in the “Assembling Your Lawn Mower” section.

Adjusting Cutting Height

IMPORTANT: All wheels must be placed in the same relative position. For rough or uneven lawns, move the height adjustment lever to a higher position. This will help stop scalping of the grass.

An adjusting plate and

Adjustment

thumb lever at each wheel

position provides cutting

Lever


height adjustment. Each


adjusting plate has nine


height positions. Height of


cut will change when you


move the thumb lever


from one position to


another.


Simply depress the lever towards the

wheel and move the lever assembly to desired position. See the illustration in the box above.

Adjusting Carburetor

NOTE: A dirty air cleaner may cause an engine to run rough too. Make sure that the air cleaner is clean and attached to the carburetor before deciding to adjust the carburetor.

WARNING: If any adjustments are made to the engine (e.g. carburetor) while the engine is running, keep clear of all moving parts. Be careful of heated surfaces like the muffler.

To adjust carburetor, please follow the engine manual.

14

Page 14
Image 14
Troy-Bilt 430 Series manual Making Adjustments, Replacing Rear Flap, Adjusting Handle Height, Adjusting Carburetor

430 Series specifications

The Troy-Bilt 430 Series represents a remarkable blend of performance, durability, and user-friendly technology in the realm of outdoor power equipment. Primarily designed for residential lawn care, this series caters to homeowners who demand reliability and efficiency in their garden maintenance tools.

One of the standout features of the Troy-Bilt 430 Series is its powerful 430cc engine. The engine delivers optimal power for maintaining a variety of terrains, from flat lawns to uneven landscapes. Paired with a robust transmission, the Troy-Bilt 430 ensures smooth operation and the ability to tackle thick grass and tough weeds without compromising performance. This power is further complemented by a range of cutting deck options, allowing users to select the ideal size to suit their mowing needs.

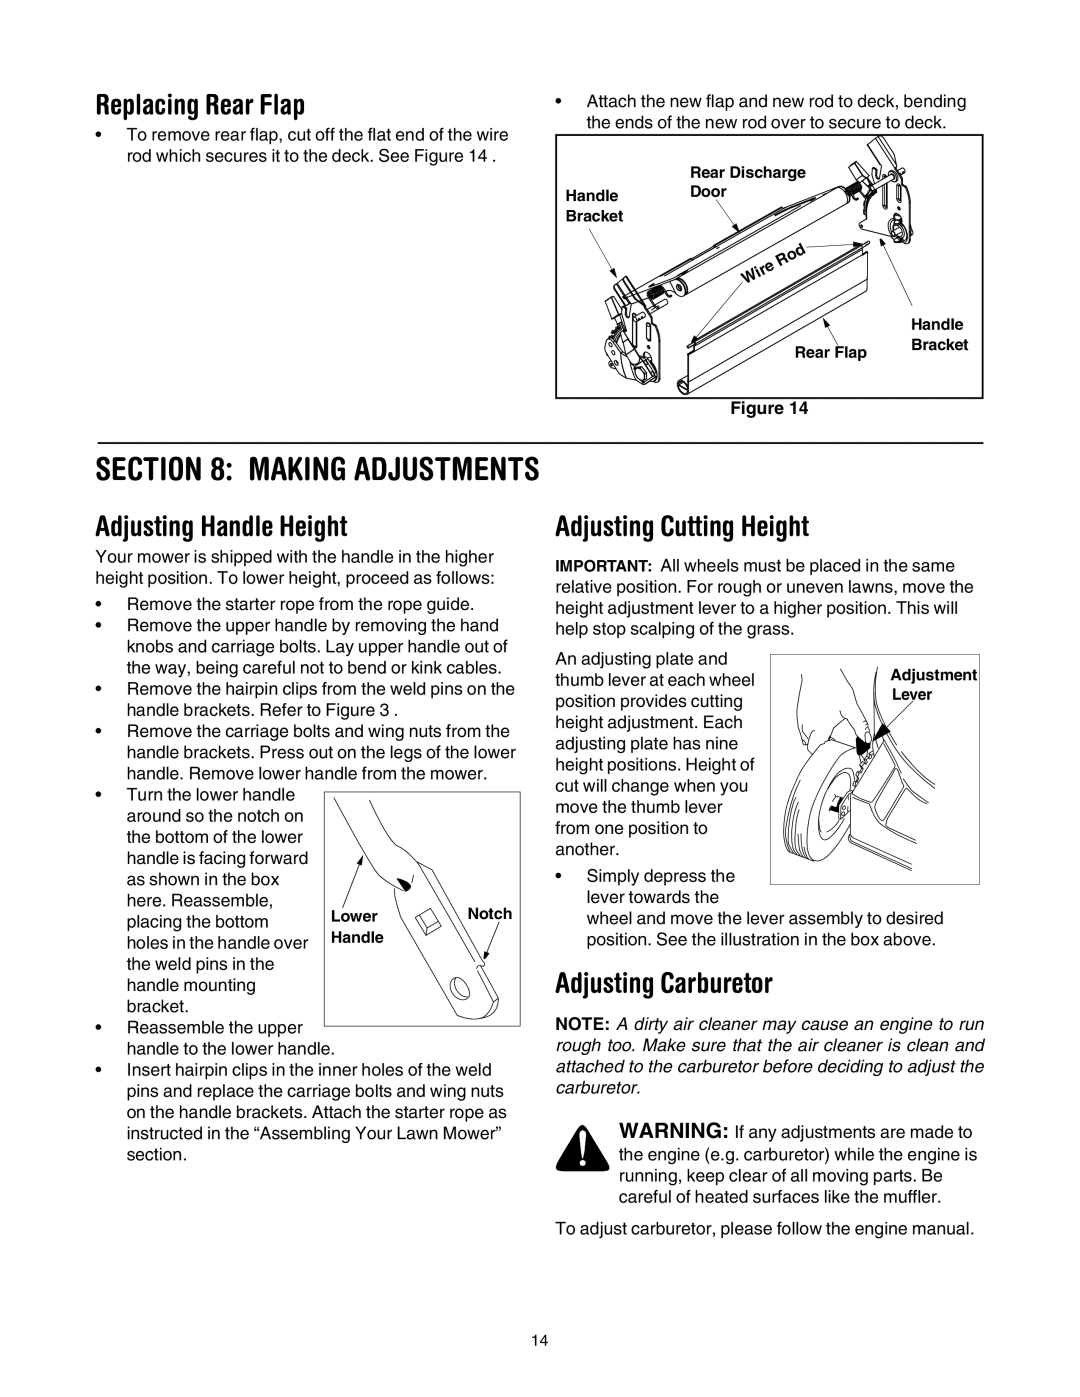
The engineering behind the 430 Series focuses on ease of use. The deck is designed for quick height adjustments, enabling users to switch mowing heights from one to another with minimal effort. The intuitive control panel allows for easy starting and operation, while comfortable handles reduce user fatigue, allowing for extended use without discomfort.

An important aspect of the design is the innovative Cleanout Port. This feature simplifies maintenance by providing quick access for cleaning grass clippings from the underside of the deck, ensuring optimal cutting performance and prolonged equipment life. Additionally, the Troy-Bilt 430 Series may incorporate advanced mulching capabilities, converting clippings into a fine mulch that nourishes the lawn while eliminating the need for bagging.

Safety is a top priority in the design of the Troy-Bilt 430 Series. Built-in safety features, such as a blade brake and safety switch, protect the user during operation and maintenance.

The Troy-Bilt 430 Series is not just about power and functionality; it also emphasizes durability. Designed with high-quality materials, the series is built to withstand the rigors of outdoor use, with rust-resistant components and reinforced frames.

In summary, the Troy-Bilt 430 Series is a comprehensive solution for homeowners seeking an effective and reliable lawn care tool. With its powerful engine, user-friendly features, and durable construction, it stands as a worthy investment for anyone looking to maintain an immaculate lawn with ease. Whether navigating tight corners or dealing with tough grass conditions, the 430 Series ensures professional-level results right at home.