Section4: Operation
Tilling Tips & Techniques
Let the tiller dothe work
•While tilling, relax and let the wheels pull the tiller along while the tines do the digging. Walk on the side that is not yet finished (to avoid making foot- prints in the freshly tilled soil) and lightly, but securely grip the handlebar with just one hand. SeeFigure
•Avoid the temptation to push down on the handlebarsin an attempt to force the tiller to dig deeper. Doing so takes the weight off the powered wheels, causing them to lose traction. Without the wheels helping to hold the tiller back, the tines will attempt to propel the tiller backward toward the operator- often causing the tiller to skip rapidly across the ground.
Avoidtilling soggy,wet soil
Tilling wet soil often results in large, hard clumps of soil that can interfere with planting. If time permits, wait a day or two after heavyrains to allow the soil to dry before tilling. Test soil by squeezing it into a ball. If it compresses too easily, it is too wet to till.
Avoidmakingfootprints
Wheneverpossible, walk on the untilled side of the unit to avoid making foot- prints in your freshly tilled or cultivated soil. Footprintscausesoil compaction that can hamper root penetrationand contribute to soil erosion. Theycan also "plant" unwantedweed seedsback into the freshly tilled ground.
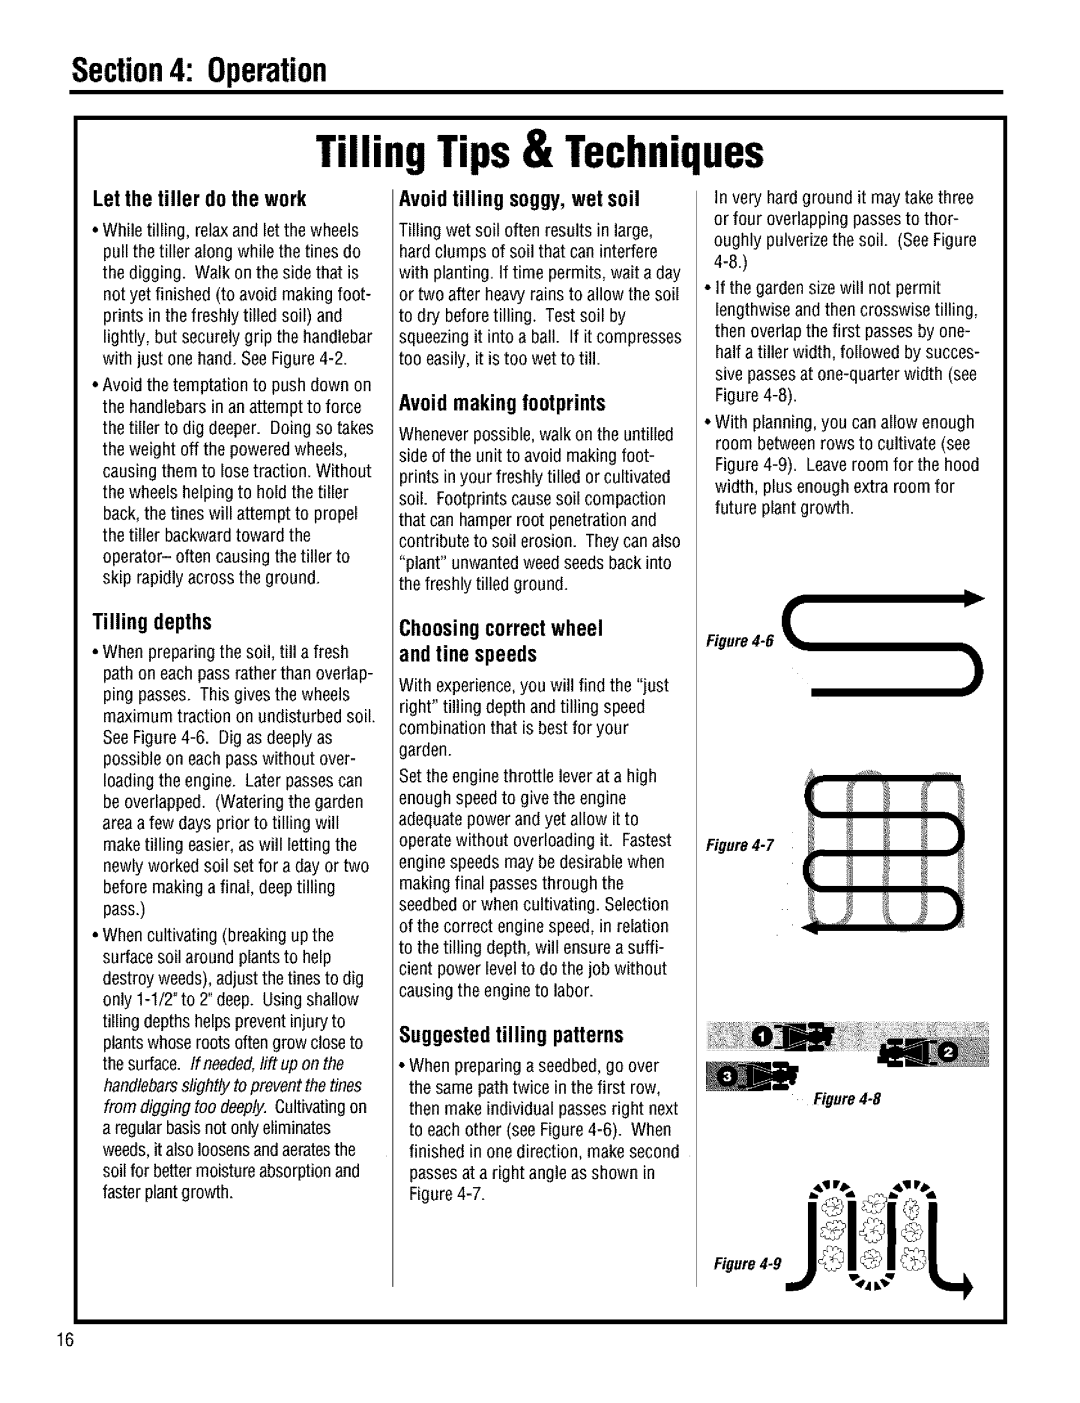
In very hard ground it may takethree or four overlapping passesto thor- oughly pulverizethe soil. (SeeFigure
•If the garden sizewill not permit lengthwise and then crosswise tilling, then overlap the first passesby one- half a tiller width, followed by succes- sive passesat
•With planning, you can allow enough room between rows to cultivate (see Figure
Tilling depths
•When preparing the soil, till a fresh path on each pass rather than overlap-
ping passes. This gives the wheels maximum traction on undisturbed soil.
See
•When cultivating (breaking upthe surface soil around plantsto help destroy weeds), adjustthe tines to dig only
Choosingcorrectwheel and tine speeds
With experience,you will find the "just right" tilling depth and tilling speed combination that is bestfor your garden.
Set the engine throttle lever at a high enough speed to give the engine adequate power and yet allow it to operate without overloading it. Fastest engine speedsmay bedesirable when makingfinal passesthrough the seedbed or when cultivating. Selection of the correct enginespeed, in relation to the tilling depth, will ensurea suffi- cient power levelto do the job without causing the engineto labor.
Suggestedtilling patterns
•When preparinga seedbed,go over the same path twice in the first row, then make individual passes right next to each other (see
Figure
16