Section 5: Maintenance
WARNING
Before inspecting, cleaning or servicing the machine, shut off engine, wait for all moving parts to come to a complete stop, disconnect spark plug wire and move wire away from spark plug. Remove ignition key, if so equipped.
Failure to follow these instructions can result in serious personal injury or property damage.
Single Tine Replacement
WARNING
The tines or tine hood edges may be sharp. Wear thick gloves to protect your hands from cuts or scrapes.
1.Move the Wheels/Tines/PTO Drive Lever to NEUTRAL, the Wheel Speed Lever to either FAST or SLOW position, and the Tines/PTO Clutch Lever to
ENGAGE.
2.Gently tilt the tiller forward until the engine rests on the ground.
3.Raise the hood flap at the back of the tiller and tie it up with string.
4.Before removing a tine, note in which direction the bent tip points. The new tine must be installed in the same direction.
5.Use two 9/16" wrenches to remove the two bolts and nuts securing the tine to the tine holder plate (Figure
Removing and Replacing A Tine Holder Assembly
WARNING
•The tines or tine hood edges may be sharp. Wear thick gloves to protect your hands.
•Wear safety goggles to protect your eyes. When loosening hardware, do not hit a wrench with a metal tool– this could shatter the tool or wrench, sending metal particles into your eyes.
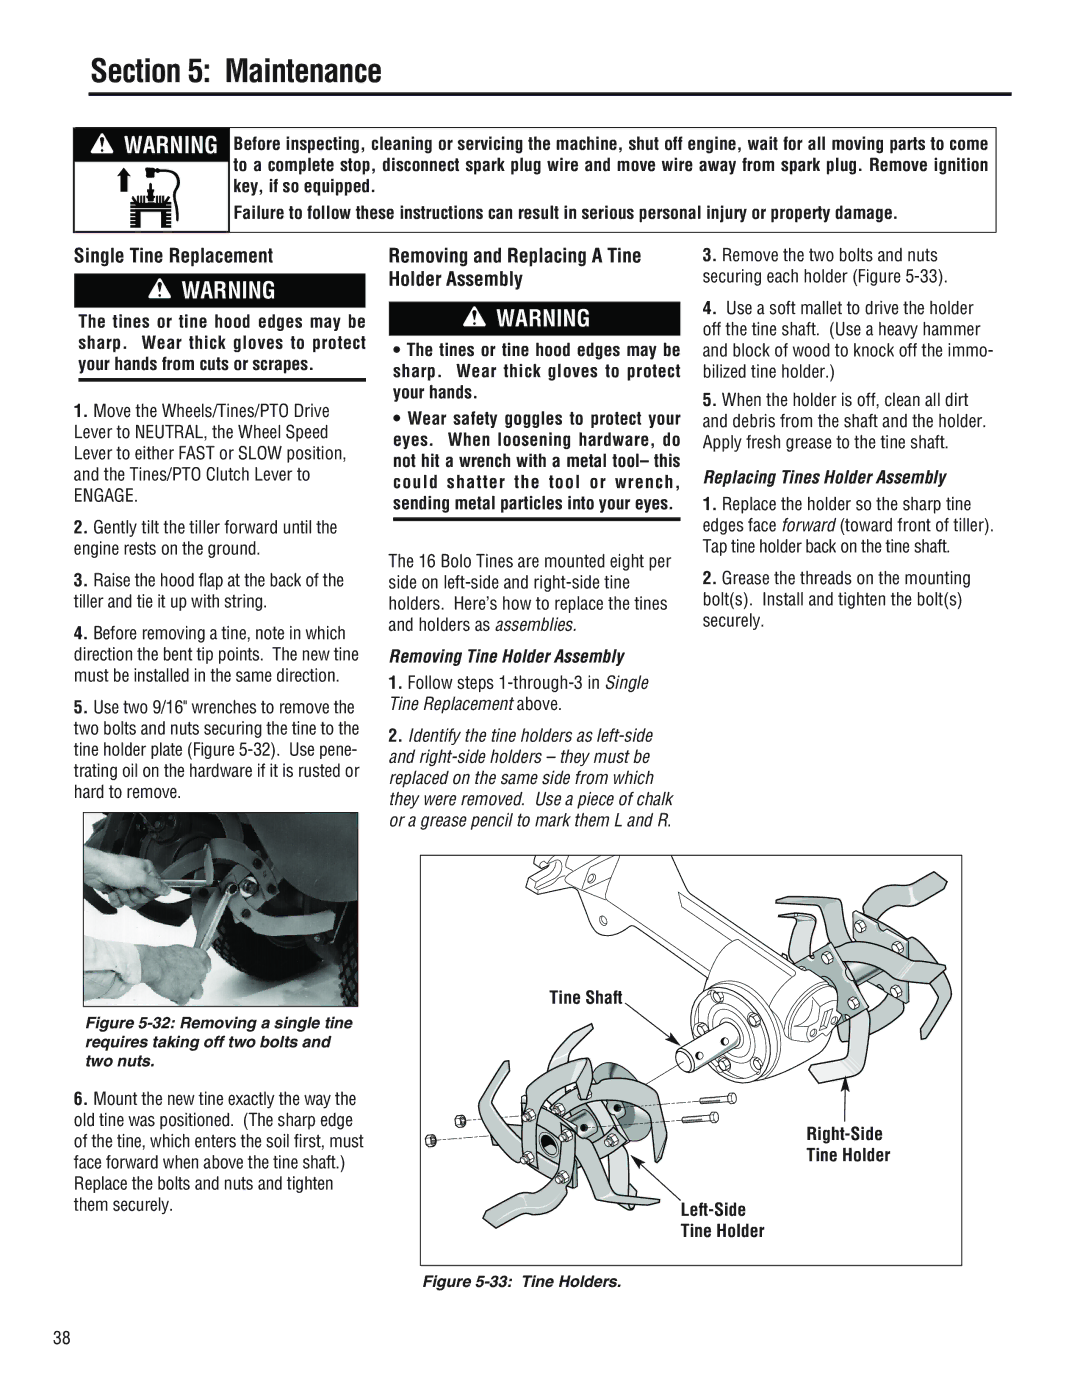
The 16 Bolo Tines are mounted eight per side on
Removing Tine Holder Assembly
1.Follow steps 1-through-3 in Single Tine Replacement above.
2.Identify the tine holders as
3.Remove the two bolts and nuts securing each holder (Figure
4.Use a soft mallet to drive the holder off the tine shaft. (Use a heavy hammer and block of wood to knock off the immo- bilized tine holder.)
5.When the holder is off, clean all dirt
and debris from the shaft and the holder. Apply fresh grease to the tine shaft.
Replacing Tines Holder Assembly
1.Replace the holder so the sharp tine edges face forward (toward front of tiller). Tap tine holder back on the tine shaft.
2.Grease the threads on the mounting bolt(s). Install and tighten the bolt(s) securely.
Figure 5-32: Removing a single tine requires taking off two bolts and two nuts.
6.Mount the new tine exactly the way the old tine was positioned. (The sharp edge of the tine, which enters the soil first, must face forward when above the tine shaft.) Replace the bolts and nuts and tighten them securely.
Tine Shaft |
Tine Holder |
Tine Holder |
Figure 5-33: Tine Holders.
38