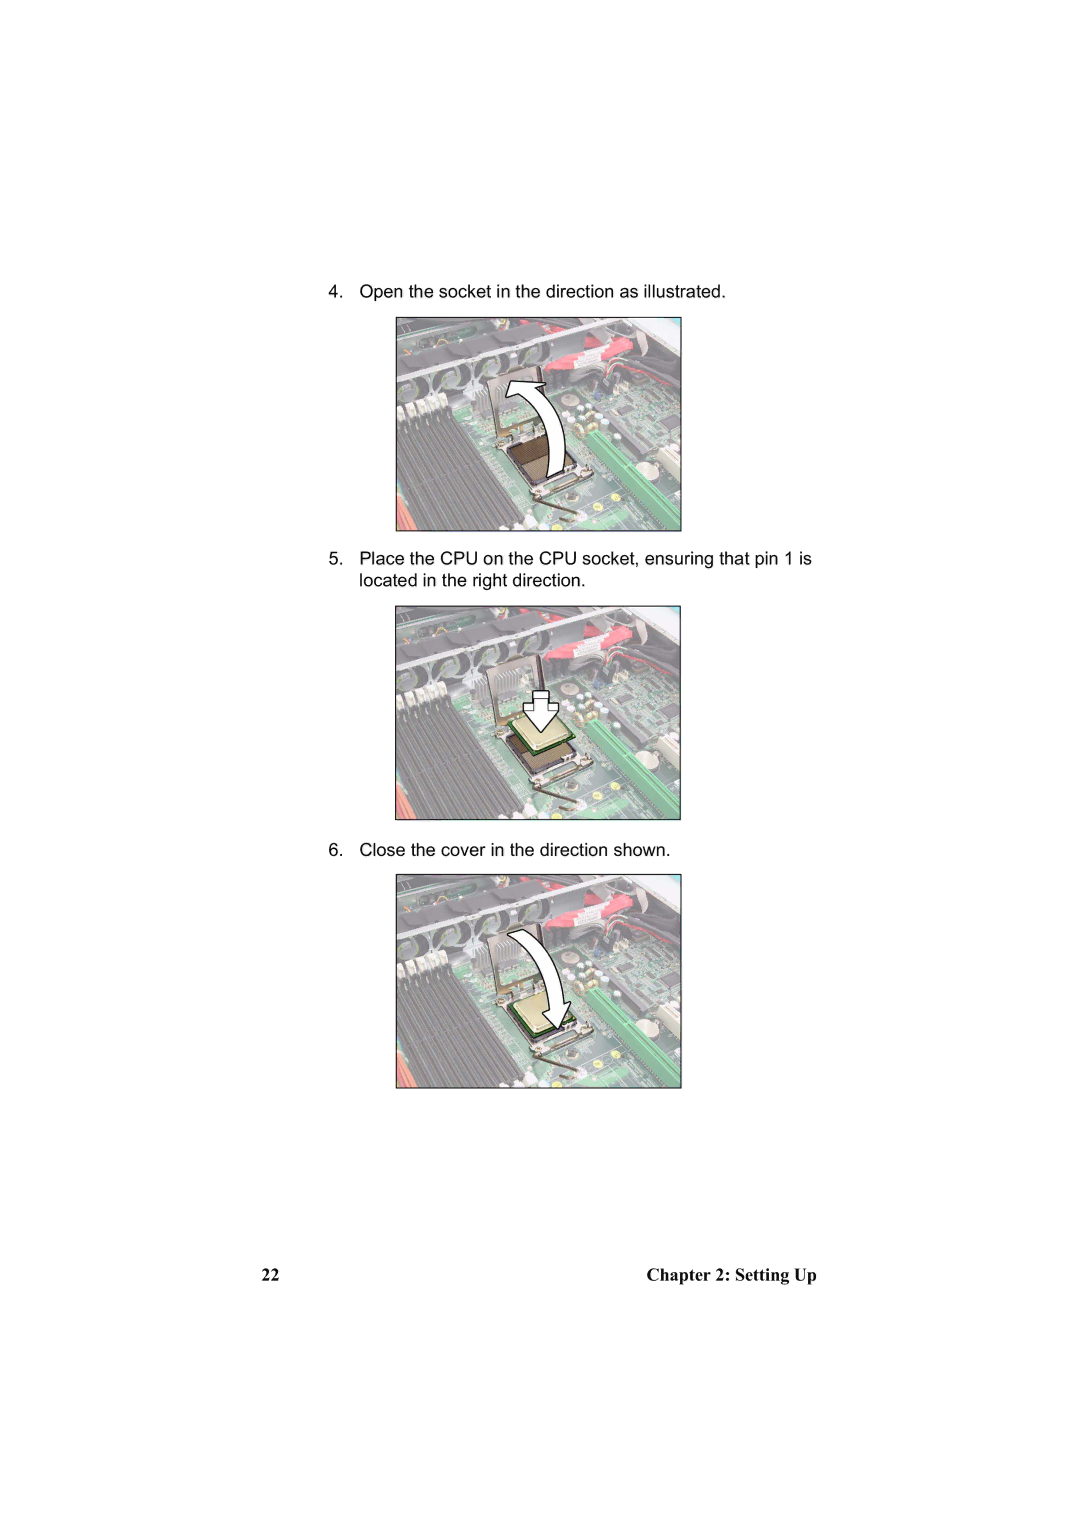
4. Open the socket in the direction as illustrated.
5.Place the CPU on the CPU socket, ensuring that pin 1 is located in the right direction.
6. Close the cover in the direction shown.
22 | Chapter 2: Setting Up |
4. Open the socket in the direction as illustrated.
5.Place the CPU on the CPU socket, ensuring that pin 1 is located in the right direction.
6. Close the cover in the direction shown.
22 | Chapter 2: Setting Up |