
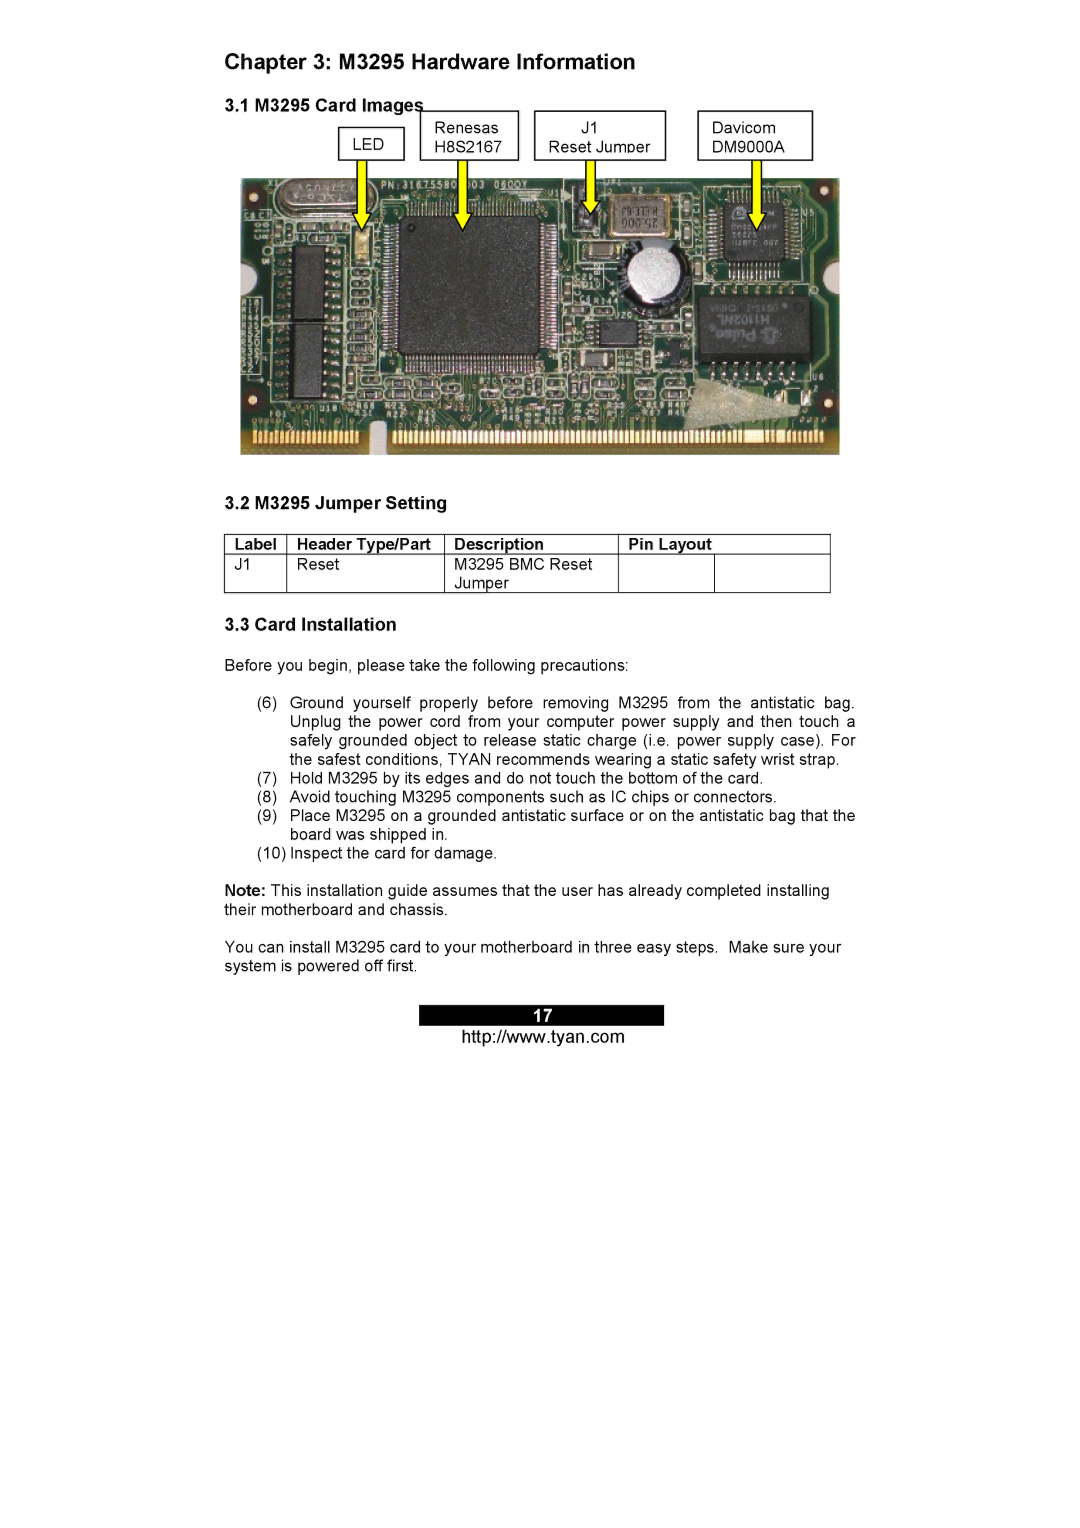
M3291, M3295 specifications
Tyan Computer is renowned for its specialized server and workstation solutions, and the Tyan M3291 and M3295 models exemplify the company's commitment to high performance and reliability in demanding computing environments. Both models cater to diverse applications, from cloud computing to data-intensive processing tasks, making them a popular choice among enterprises.The Tyan M3291 is a versatile motherboard designed to support the latest AMD EPYC processors. With its robust architecture, it can accommodate dual sockets, allowing users to leverage the power of multi-core computing. The M3291 excels in providing a highly scalable platform; it comes equipped with up to 16 DIMM slots that support RDIMM and LRDIMM memory types, offering high memory bandwidth and improved performance for memory-intensive applications. This model also supports PCIe 4.0, ensuring lightning-fast data transfer rates to and from connected devices.
Meanwhile, the Tyan M3295 takes performance to the next level by supporting both AMD EPYC processors and incorporating advanced technologies. Its dual-socket configuration maximizes processing capabilities and is ideal for virtualization and high-performance computing scenarios. The M3295 motherboard supports up to 64 cores, significantly enhancing the multitasking ability of an enterprise’s computing resources. With a focus on reliability, the board features redundant power options, enabling uninterrupted operation in mission-critical applications.
Both motherboards prioritize connectivity with various I/O ports and expansion slots, promoting integration with industry-standard components. The Tyan M3291 and M3295 integrate onboard networking options, including 10 GbE connectivity, which is essential for modern data centers looking to reduce latency and improve data throughput. Additionally, these motherboards come with enhanced thermal management features that ensure optimal cooling during intensive workloads, reducing the risk of overheating.
Moreover, Tyan’s commitment to security is evident in the M3291 and M3295 models, which incorporate features designed to protect against unauthorized access and ensure data integrity. These include hardware-based security features that are crucial for today’s cybersecurity landscape.
In summary, the Tyan M3291 and M3295 motherboards stand out for their robust performance, scalability, and reliability. With support for powerful AMD EPYC processors and modern technologies, they are engineered to meet the evolving demands of today’s data-driven environments, making them an excellent choice for organizations aiming to build efficient and high-performance server infrastructures.