Wireless Access Point Model | User Manual | Page 10 of 33 |
Getting Started
The access point is easy to install and will work with very little configuration.
Configuring your PC
To enable the access point to enter service, some basic configuration needs to be completed. The easiest way to configure the access point is to make a network connection between the Ethernet card in the configuration PC and the LAN port of the access point. This can be achieved by first changing the IP address of the PC to a default value that can be recognised by the access point.
The illustrations below are based on Windows XP operating system, but the same basic screens are displayed for other Windows operating systems. The sequence below is based on an access point having the factory default settings. If the IP address settings of the access point have been changed, then care will need to be taken when setting up the PC IP address.
1.First, click on the Local Area Connection icon in the lower
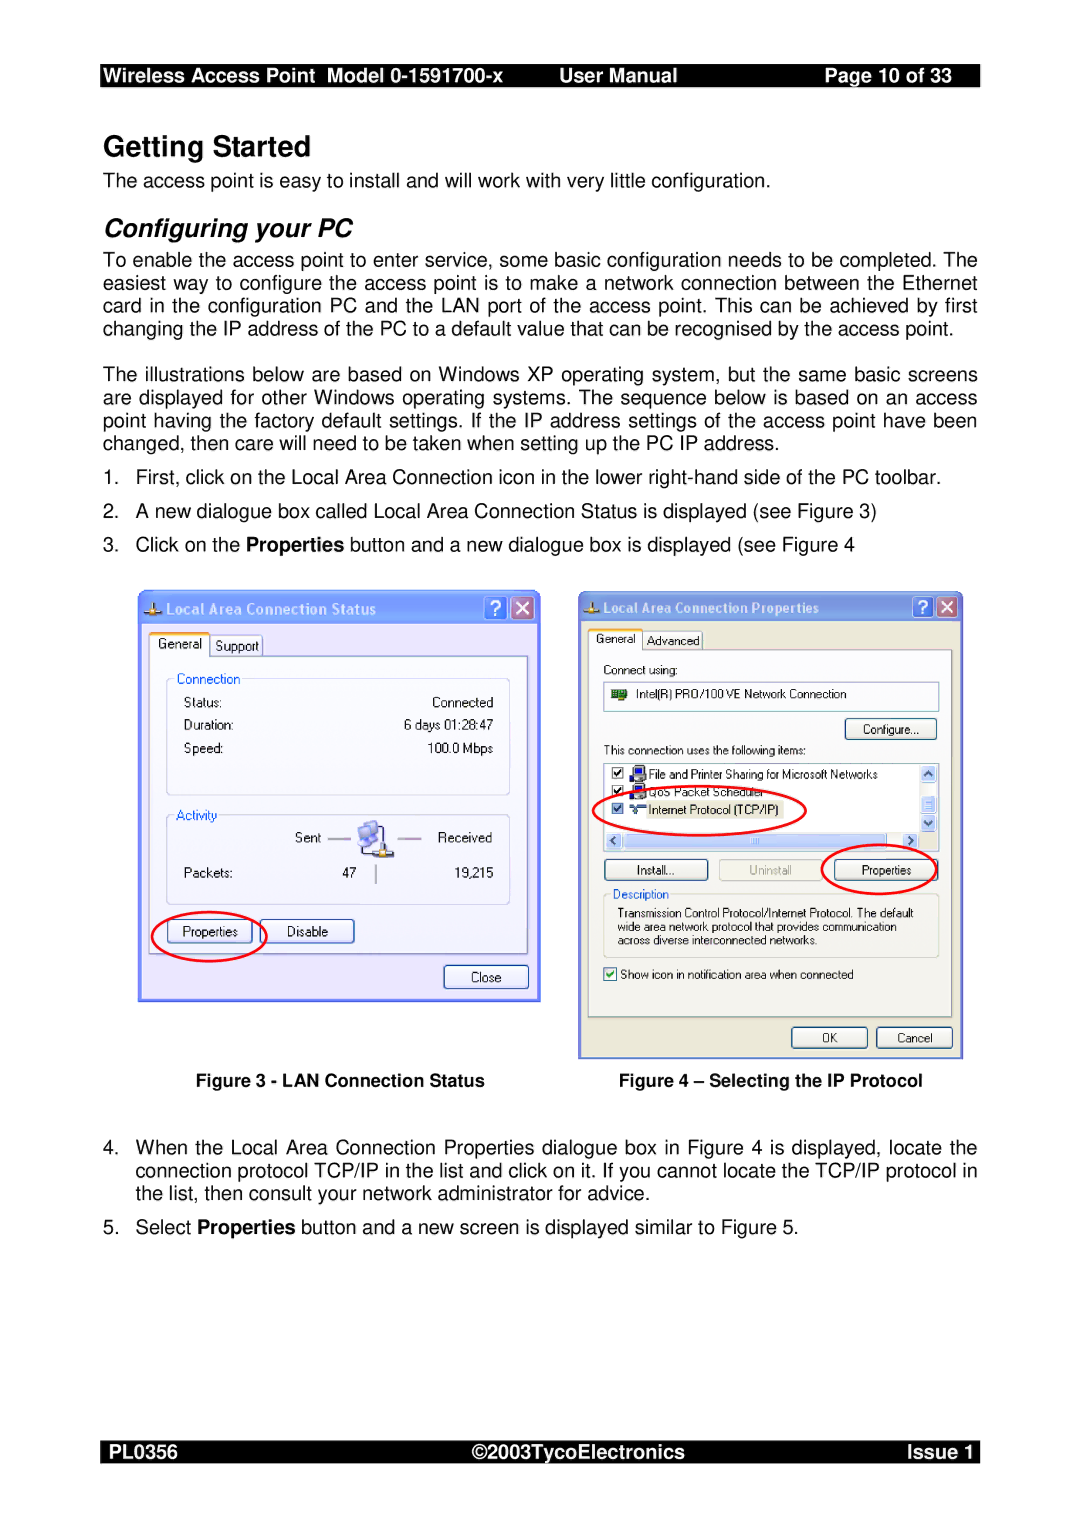
2.A new dialogue box called Local Area Connection Status is displayed (see Figure 3)
3.Click on the Properties button and a new dialogue box is displayed (see Figure 4
Figure 3 - LAN Connection Status | Figure 4 – Selecting the IP Protocol |
4.When the Local Area Connection Properties dialogue box in Figure 4 is displayed, locate the connection protocol TCP/IP in the list and click on it. If you cannot locate the TCP/IP protocol in the list, then consult your network administrator for advice.
5.Select Properties button and a new screen is displayed similar to Figure 5.
PL0356 | ©2003TycoElectronics | Issue 1 |
