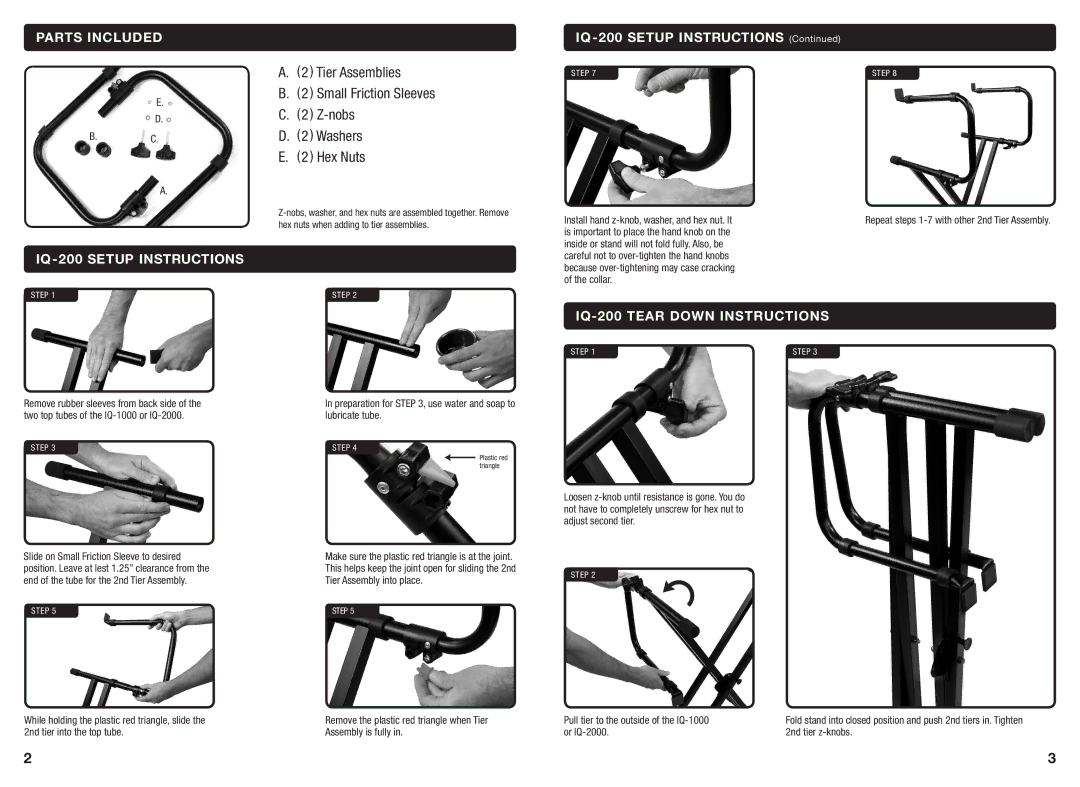
PARTS INCLUDED
E.
D.
B.C.
A.
IQ-200 SETUP INSTRUCTIONS
STEP 1
Remove rubber sleeves from back side of the two top tubes of the
STEP 3
Slide on Small Friction Sleeve to desired position. Leave at lest 1.25” clearance from the end of the tube for the 2nd Tier Assembly.
STEP 5
While holding the plastic red triangle, slide the 2nd tier into the top tube.
A.(2 ) Tier Assemblies
B.(2 ) Small Friction Sleeves
C.(2 )
D.(2 ) Washers
E.(2 ) Hex Nuts
STEP 2
In preparation for STEP 3, use water and soap to lubricate tube.
STEP 4
Plastic red triangle
Make sure the plastic red triangle is at the joint. This helps keep the joint open for sliding the 2nd Tier Assembly into place.
STEP 5
Remove the plastic red triangle when Tier
Assembly is fully in.
IQ-200 SETUP INSTRUCTIONS (Continued)
STEP 7 | STEP 8 |
Install hand | Repeat steps |
is important to place the hand knob on the |
|
inside or stand will not fold fully. Also, be |
|
careful not to |
|
because |
|
of the collar. |
|
| |
STEP 1 | STEP 3 |
Loosen
STEP 2
Pull tier to the outside of the | Fold stand into closed position and push 2nd tiers in. Tighten |
or | 2nd tier |
2 | 3 |