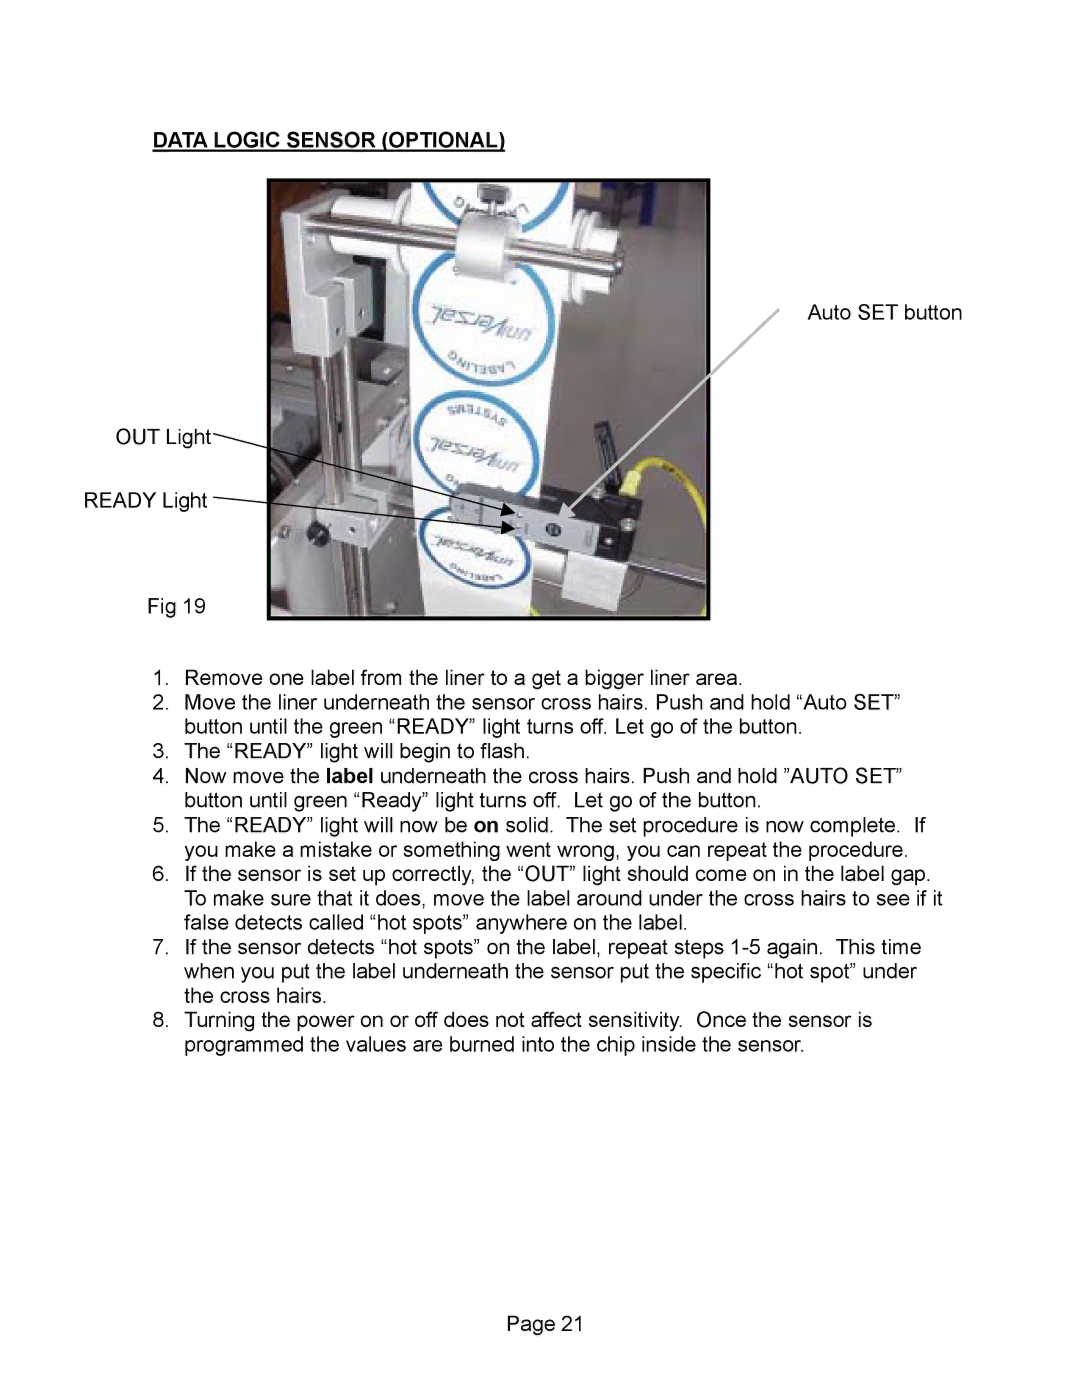
DATA LOGIC SENSOR (OPTIONAL)
OUT Light
READY Light ![]()
Fig 19
Auto SET button
1.Remove one label from the liner to a get a bigger liner area.
2.Move the liner underneath the sensor cross hairs. Push and hold “Auto SET” button until the green “READY” light turns off. Let go of the button.
3.The “READY” light will begin to flash.
4.Now move the label underneath the cross hairs. Push and hold ”AUTO SET” button until green “Ready” light turns off. Let go of the button.
5.The “READY” light will now be on solid. The set procedure is now complete. If you make a mistake or something went wrong, you can repeat the procedure.
6.If the sensor is set up correctly, the “OUT” light should come on in the label gap. To make sure that it does, move the label around under the cross hairs to see if it false detects called “hot spots” anywhere on the label.
7.If the sensor detects “hot spots” on the label, repeat steps
8.Turning the power on or off does not affect sensitivity. Once the sensor is programmed the values are burned into the chip inside the sensor.
Page 21