RUNNING THE L60
1.Turn the main switch ON (01).
2.Turn motor switch ON (02).
3.Connect air supply. CAUTION: This may bring the Tamp Head up abruptly. Keep fingers clear.
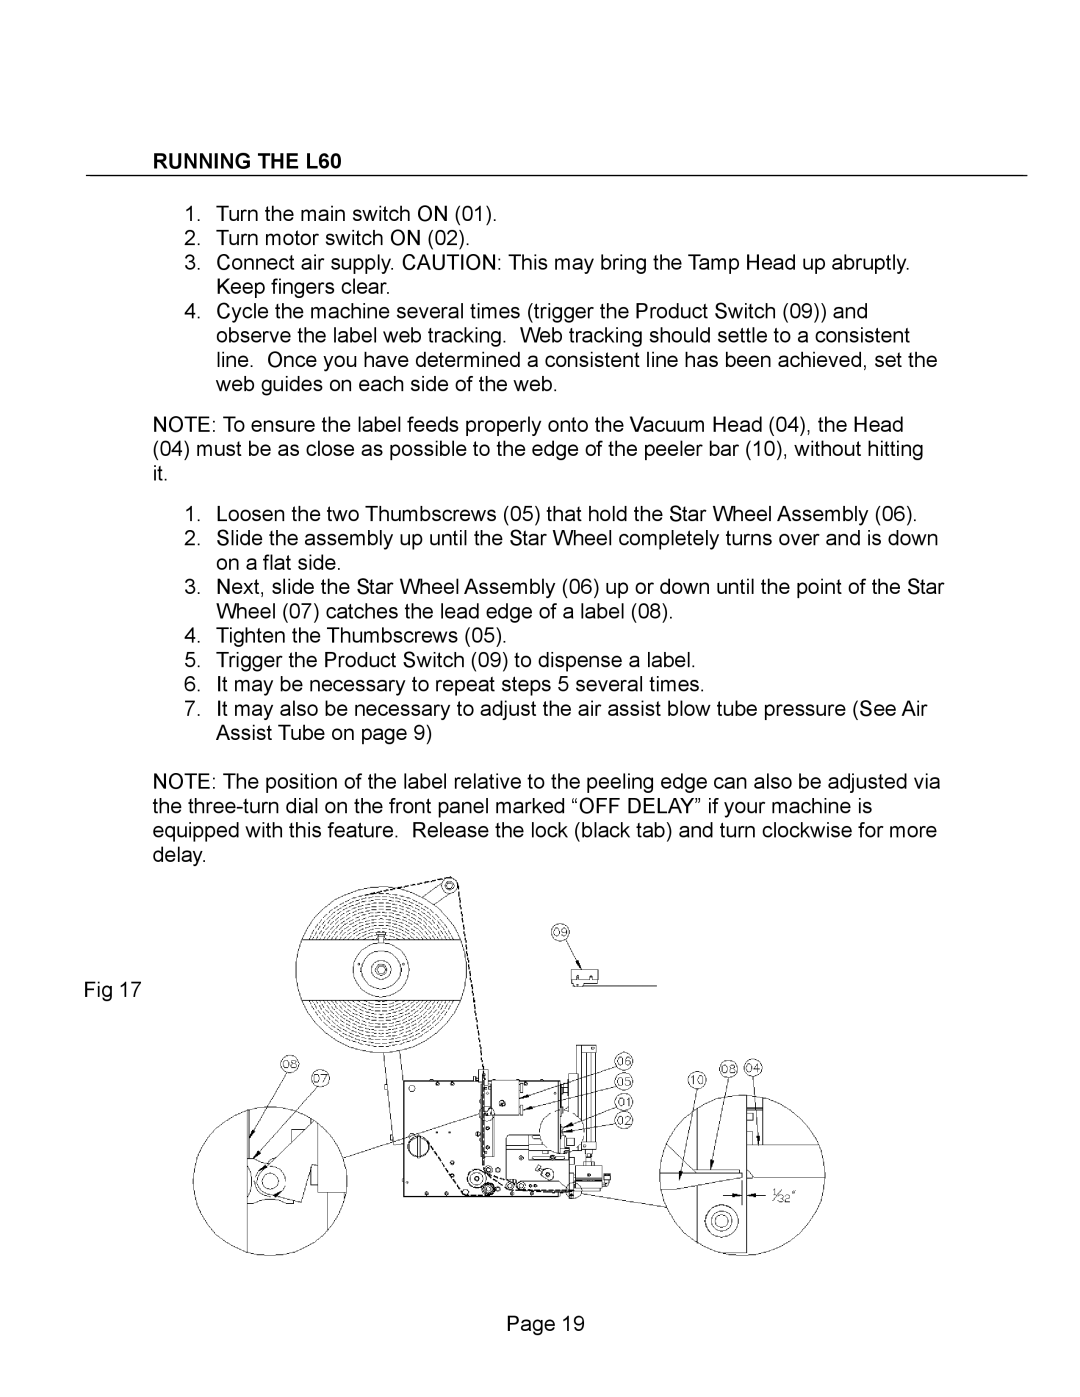
4.Cycle the machine several times (trigger the Product Switch (09)) and observe the label web tracking. Web tracking should settle to a consistent line. Once you have determined a consistent line has been achieved, set the web guides on each side of the web.
NOTE: To ensure the label feeds properly onto the Vacuum Head (04), the Head
(04)must be as close as possible to the edge of the peeler bar (10), without hitting
it.
1.Loosen the two Thumbscrews (05) that hold the Star Wheel Assembly (06).
2.Slide the assembly up until the Star Wheel completely turns over and is down on a flat side.
3.Next, slide the Star Wheel Assembly (06) up or down until the point of the Star Wheel (07) catches the lead edge of a label (08).
4.Tighten the Thumbscrews (05).
5.Trigger the Product Switch (09) to dispense a label.
6.It may be necessary to repeat steps 5 several times.
7.It may also be necessary to adjust the air assist blow tube pressure (See Air Assist Tube on page 9)
NOTE: The position of the label relative to the peeling edge can also be adjusted via the
Fig 17
Page 19