Changing ear tips
Select the type and size of eartip that provides you with the best comfort and fit.
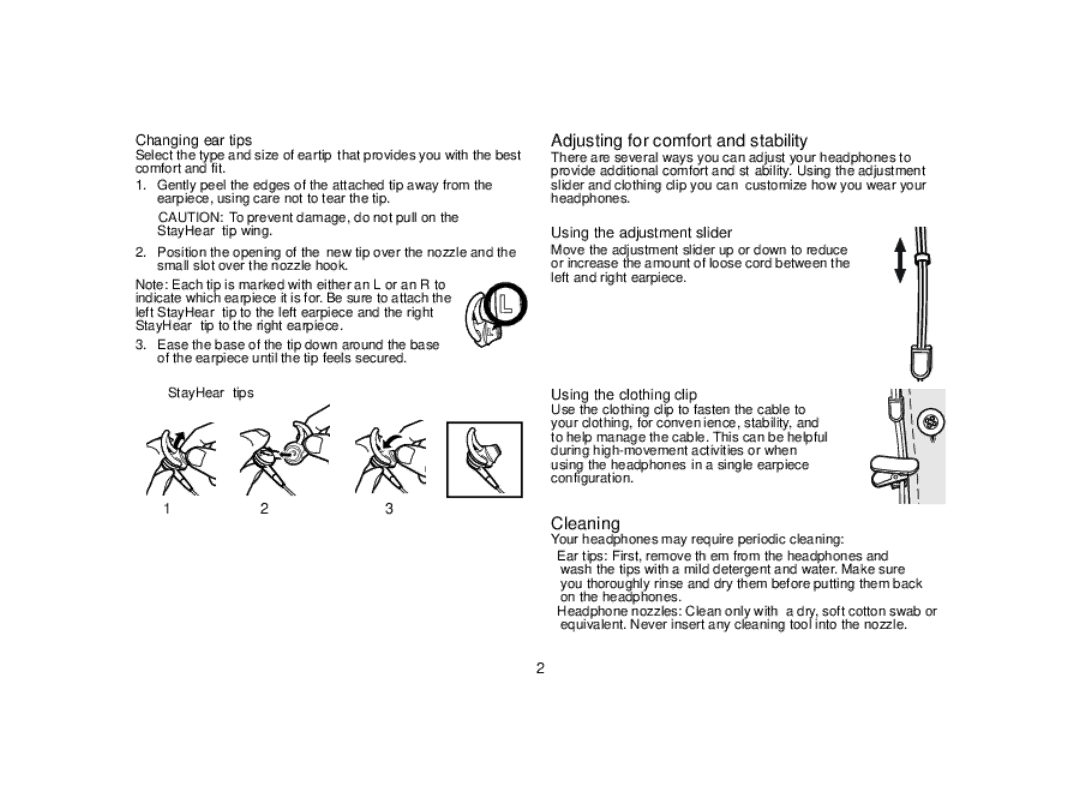
1.Gently peel the edges of the attached tip away from the earpiece, using care not to tear the tip.
CAUTION: To prevent damage, do not pull on the StayHear™ tip wing.
2.Position the opening of the new tip over the nozzle and the small slot over the nozzle hook.
Note: Each tip is marked with either an L or an R to indicate which earpiece it is for. Be sure to attach the left StayHear™ tip to the left earpiece and the right StayHear™ tip to the right earpiece.
3. Ease the base of the tip down around the base of the earpiece until the tip feels secured.
StayHear™ tips
1 | 2 | 3 |
Adjusting for comfort and stability
There are several ways you can adjust your headphones to provide additional comfort and stability. Using the adjustment slider and clothing clip you can customize how you wear your headphones.
Using the adjustment slider
Move the adjustment slider up or down to reduce or increase the amount of loose cord between the left and right earpiece.
Using the clothing clip
Use the clothing clip to fasten the cable to your clothing, for convenience, stability, and to help manage the cable. This can be helpful during
Cleaning
Your headphones may require periodic cleaning:
•Ear tips: First, remove them from the headphones and wash the tips with a mild detergent and water. Make sure you thoroughly rinse and dry them before putting them back on the headphones.
•Headphone nozzles: Clean only with a dry, soft cotton swab or equivalent. Never insert any cleaning tool into the nozzle.
2
