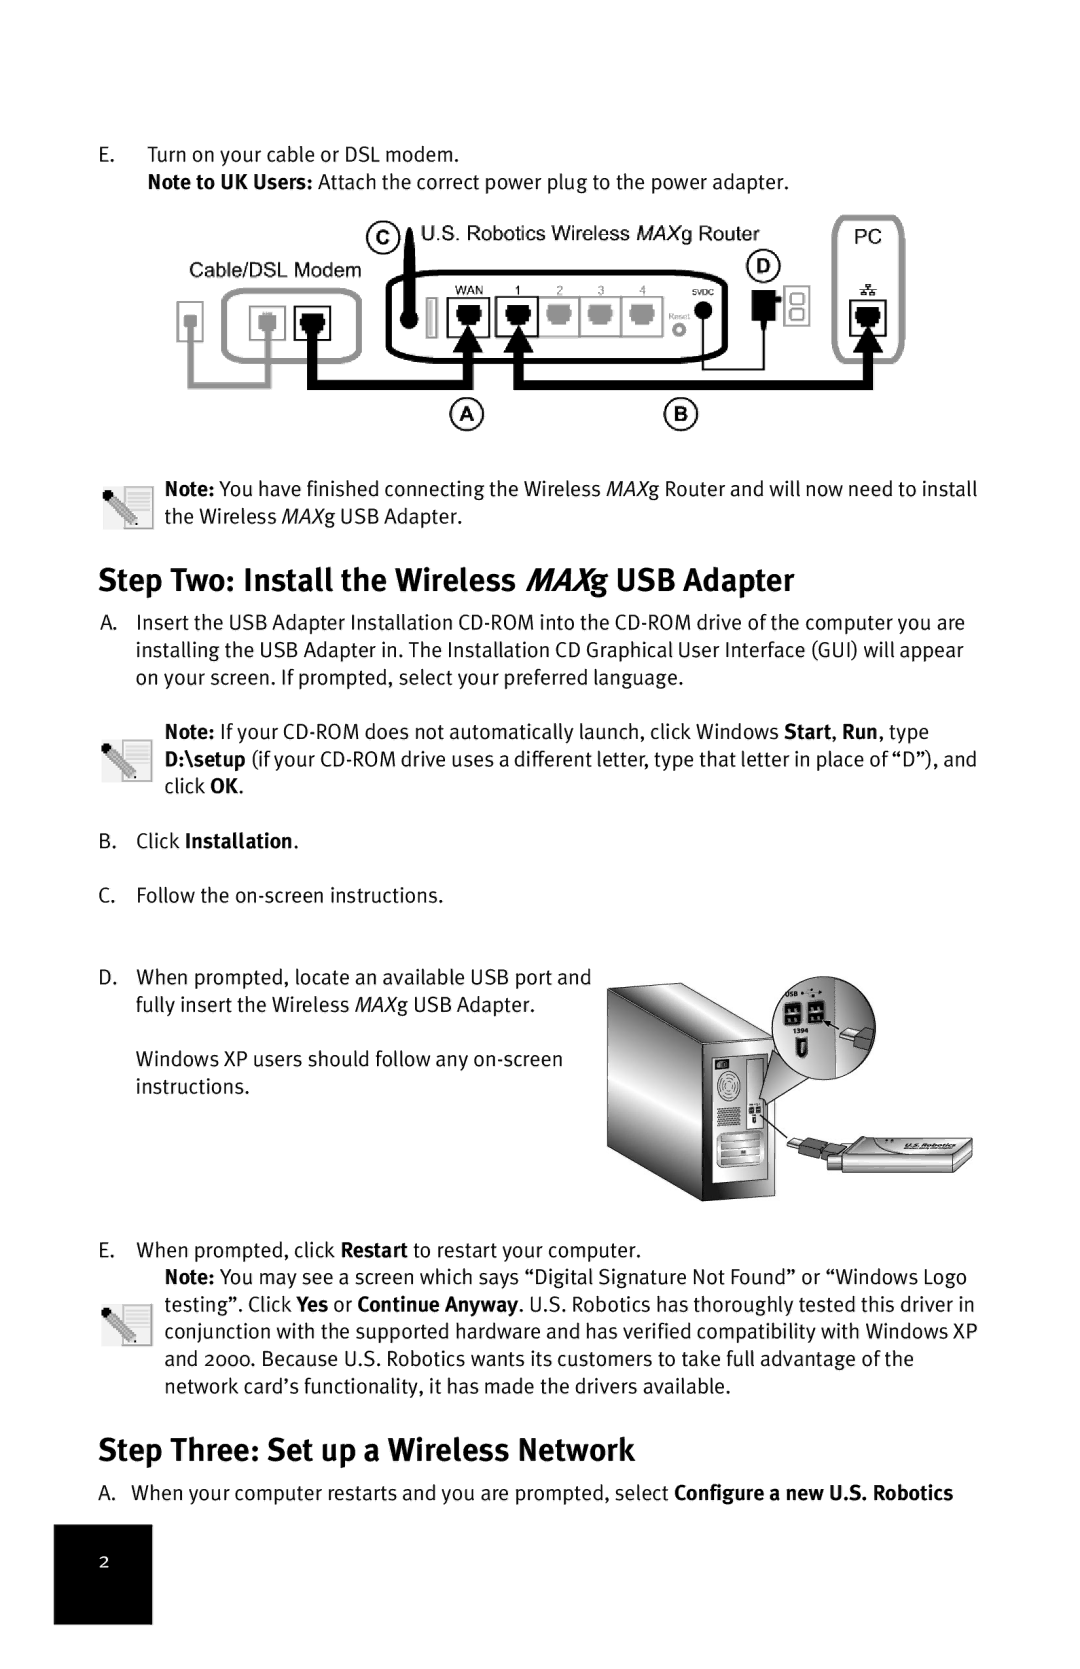
E.Turn on your cable or DSL modem.
Note to UK Users: Attach the correct power plug to the power adapter.
Note: You have finished connecting the Wireless MAXg Router and will now need to install the Wireless MAXg USB Adapter.
Step Two: Install the Wireless MAXg USB Adapter
A.Insert the USB Adapter Installation
Note: If your
B.Click Installation.
C.Follow the on-screen instructions.
D.When prompted, locate an available USB port and fully insert the Wireless MAXg USB Adapter.
Windows XP users should follow any
E.When prompted, click Restart to restart your computer.
Note: You may see a screen which says “Digital Signature Not Found” or “Windows Logo testing”. Click Yes or Continue Anyway. U.S. Robotics has thoroughly tested this driver in conjunction with the supported hardware and has verified compatibility with Windows XP and 2000. Because U.S. Robotics wants its customers to take full advantage of the network card’s functionality, it has made the drivers available.
Step Three: Set up a Wireless Network
A. When your computer restarts and you are prompted, select Configure a new U.S. Robotics
2