10
INSTALLING TO WALL
Continued
For convenience and efficiency, install heater
•where there is easy access for operation, inspection, and service
•in coldest part of room
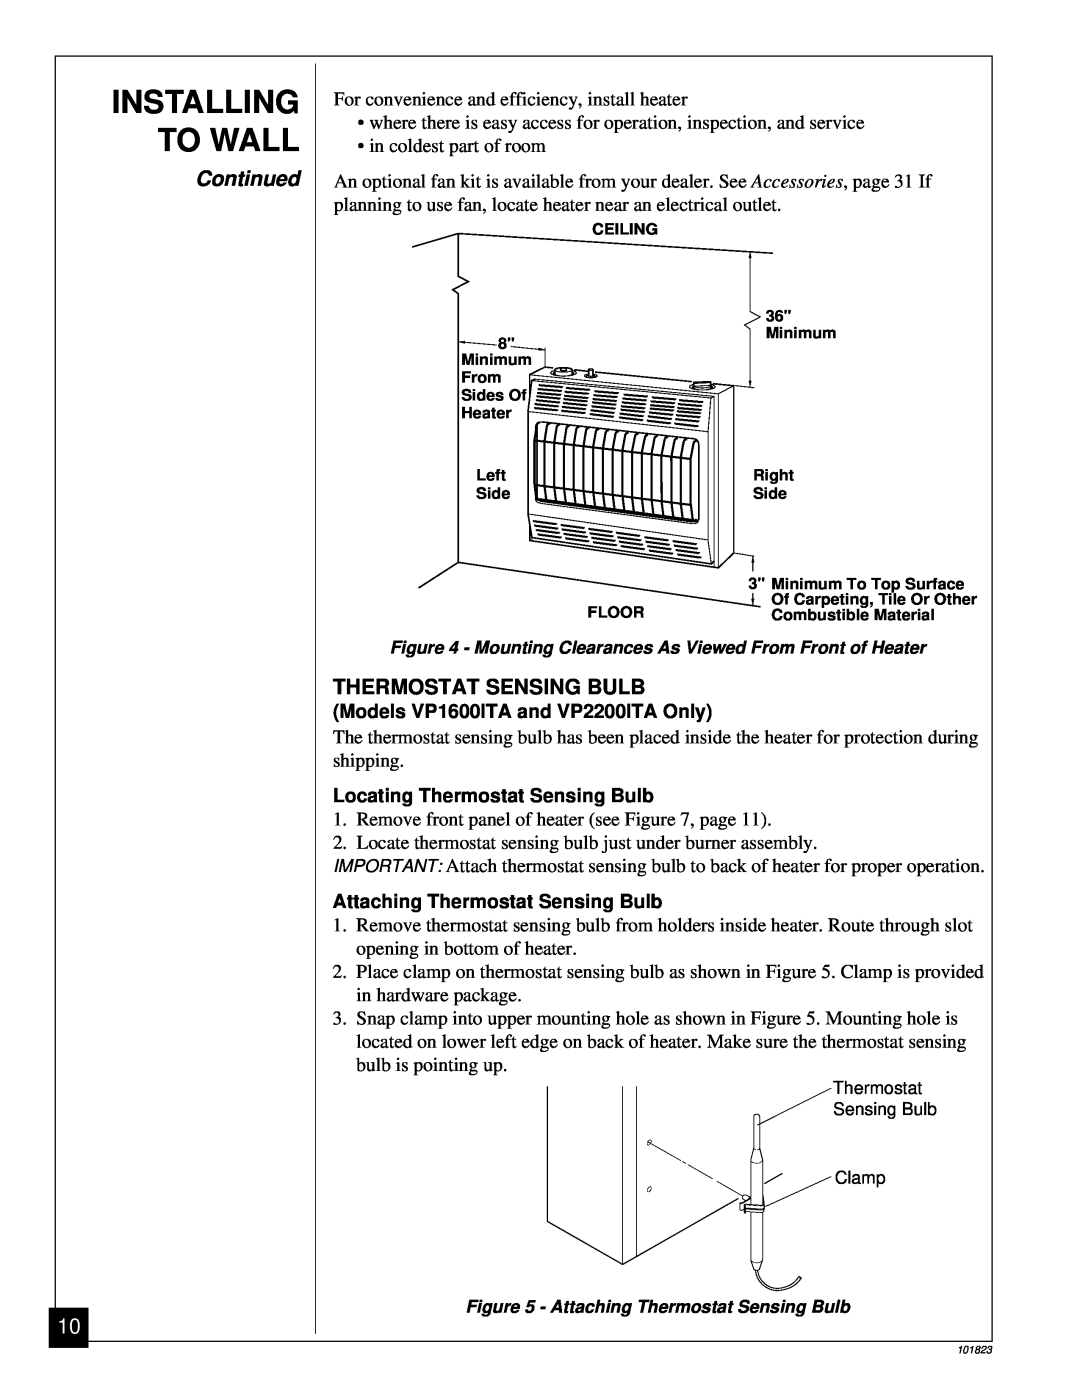
An optional fan kit is available from your dealer. See Accessories, page 31 If planning to use fan, locate heater near an electrical outlet.
CEILING
| 36" |
8" | Minimum |
| |
Minimum |
|
From |
|
Sides Of |
|
Heater |
|
Left | Right |
Side | Side |
| 3" Minimum To Top Surface |
FLOOR | Of Carpeting, Tile Or Other |
Combustible Material |
Figure 4 - Mounting Clearances As Viewed From Front of Heater
THERMOSTAT SENSING BULB
(Models VP1600ITA and VP2200ITA Only)
The thermostat sensing bulb has been placed inside the heater for protection during shipping.
Locating Thermostat Sensing Bulb
1.Remove front panel of heater (see Figure 7, page 11).
2.Locate thermostat sensing bulb just under burner assembly.
IMPORTANT: Attach thermostat sensing bulb to back of heater for proper operation.
Attaching Thermostat Sensing Bulb
1.Remove thermostat sensing bulb from holders inside heater. Route through slot opening in bottom of heater.
2.Place clamp on thermostat sensing bulb as shown in Figure 5. Clamp is provided in hardware package.
3.Snap clamp into upper mounting hole as shown in Figure 5. Mounting hole is located on lower left edge on back of heater. Make sure the thermostat sensing bulb is pointing up.
Thermostat
Sensing Bulb
![]() Clamp
Clamp
Figure 5 - Attaching Thermostat Sensing Bulb
101823