VCS4007 / VCS4017 / VCS4027 / VCS4037 / VCS5007 / VCS5017 / VCS5027 / VCS5037 Assembly
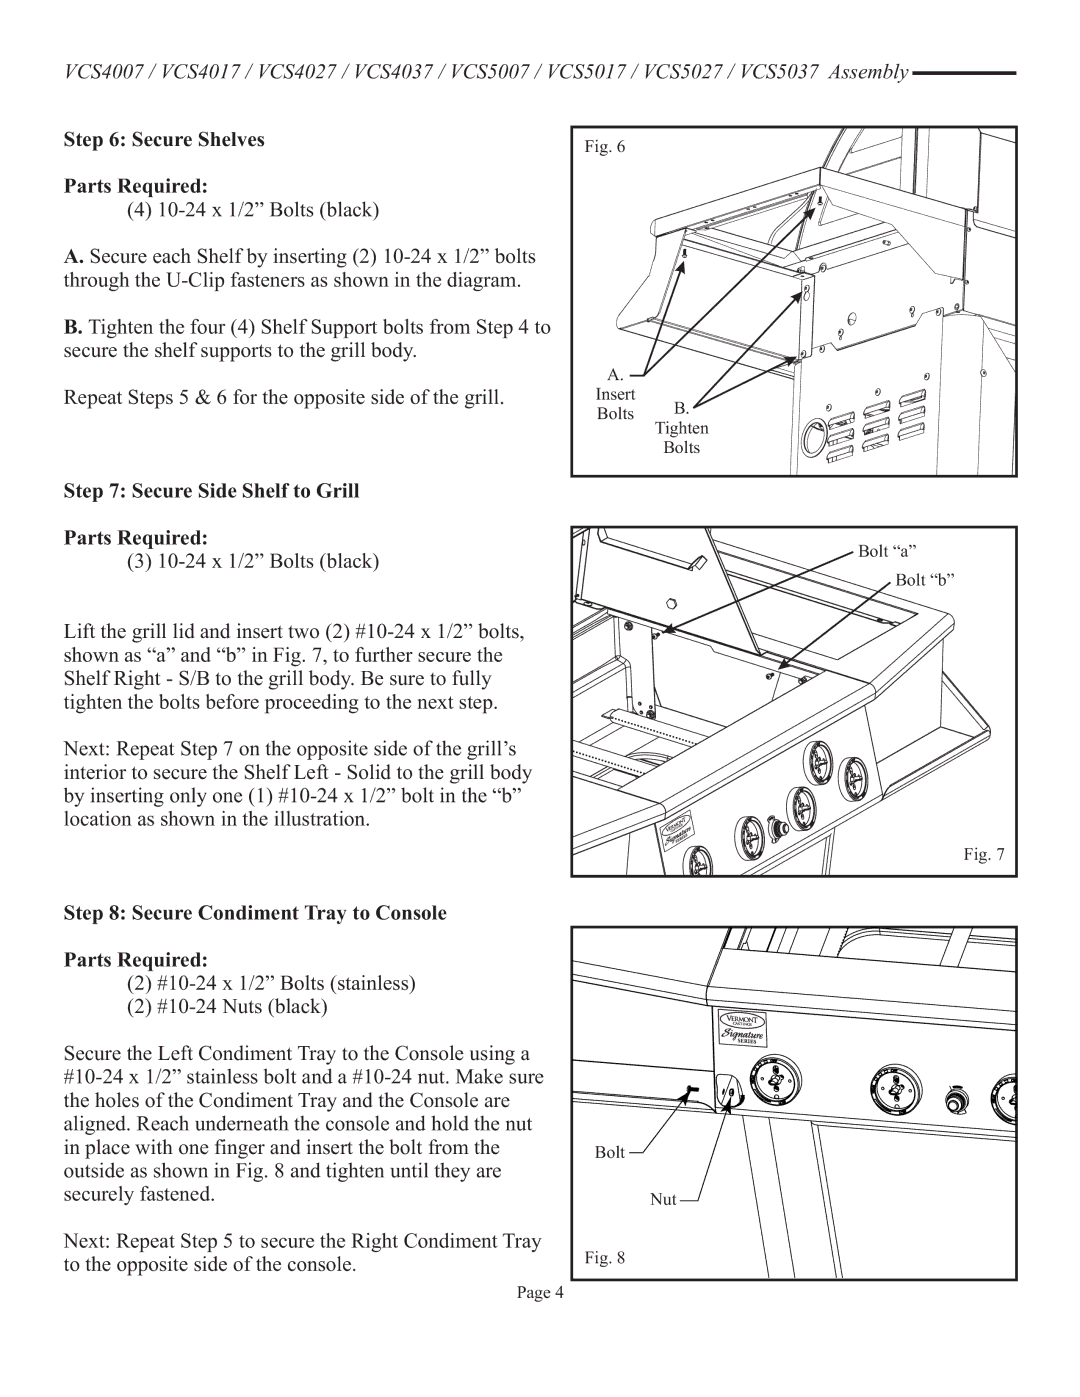
Step 6: Secure Shelves
Parts Required:
(4)
A.Secure each Shelf by inserting (2)
B.Tighten the four (4) Shelf Support bolts from Step 4 to secure the shelf supports to the grill body.
Repeat Steps 5 & 6 for the opposite side of the grill.
Fig. 6 |
| |
A. |
| |
Insert | B. | |
Bolts | ||
Tighten | ||
| ||
| Bolts |
Step 7: Secure Side Shelf to Grill
Parts Required:
(3)
Lift the grill lid and insert two (2)
Next: Repeat Step 7 on the opposite side of the grill’s interior to secure the Shelf Left - Solid to the grill body by inserting only one (1)
Bolt “a” |
Bolt “b” |
Fig. 7 |
Step 8: Secure Condiment Tray to Console
Parts Required:
(2)
(2)
Secure the Left Condiment Tray to the Console using a
Next: Repeat Step 5 to secure the Right Condiment Tray to the opposite side of the console.
Bolt
Nut
Fig. 8
Page 4
