VCS4007 / VCS4017 / VCS4027 / VCS4037 / VCS5007 / VCS5017 / VCS5027 / VCS5037 Assembly
Step 15: Install the Internal Components
Parts Required: |
|
|
VCS4007 / VCS4017 : | (4) | Sear Plates |
VCS4027 / VCS4037 | (3) | Cooking Grates |
| (1) Warming Rack | |
VCS5007 / VCS5017 : | (5) | Sear Plates |
VCS5027 / VCS5037 | (4) | Cooking Grates |
| (1) Warming Rack | |
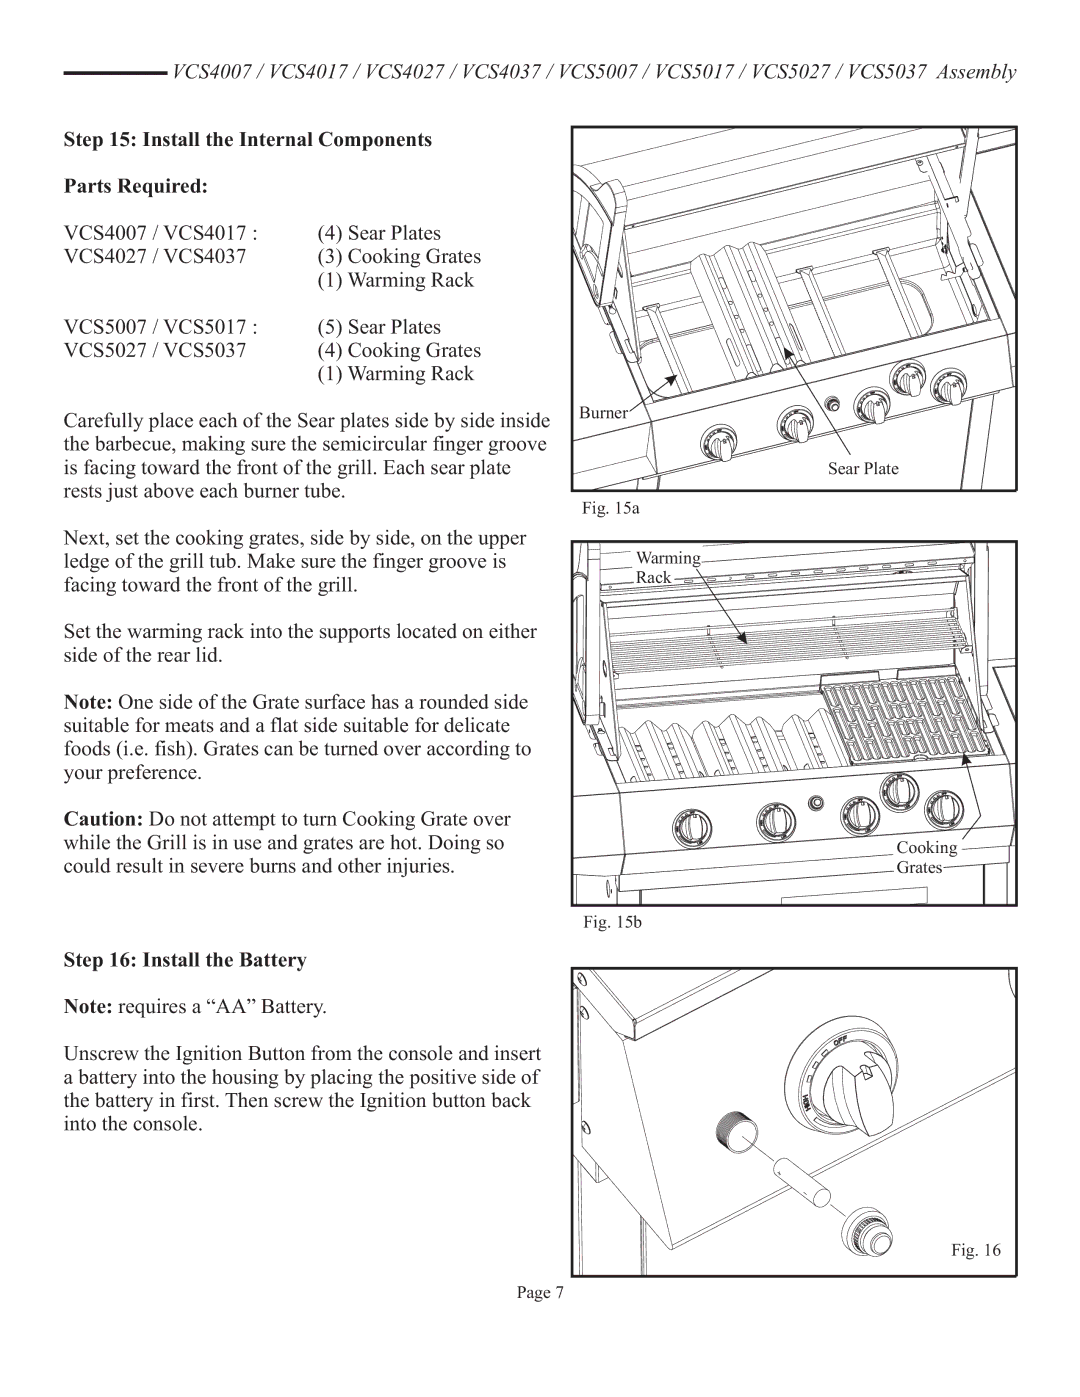
Carefully place each of the Sear plates side by side inside the barbecue, making sure the semicircular finger groove is facing toward the front of the grill. Each sear plate rests just above each burner tube.
Next, set the cooking grates, side by side, on the upper ledge of the grill tub. Make sure the finger groove is facing toward the front of the grill.
Set the warming rack into the supports located on either side of the rear lid.
Note: One side of the Grate surface has a rounded side suitable for meats and a flat side suitable for delicate foods (i.e. fish). Grates can be turned over according to your preference.
Caution: Do not attempt to turn Cooking Grate over while the Grill is in use and grates are hot. Doing so could result in severe burns and other injuries.
Burner
Sear Plate
Fig. 15a
Warming
Rack
Cooking
Grates
Fig. 15b
Step 16: Install the Battery
Note: requires a “AA” Battery.
Unscrew the Ignition Button from the console and insert a battery into the housing by placing the positive side of the battery in first. Then screw the Ignition button back into the console.
Fig. 16
Page 7
