Manuals
/
ViewSonic
/
Computer Equipment
/
Projector
ViewSonic
PJ402D
manual
Connecting to a Video Source
Models:
PJ402D
1
14
42
42
Download
42 pages
1.21 Kb
11
12
13
14
15
16
17
18
Specifications
Install
Indicator Messages
Connecting to a Video Source
Warranty
Maintenance
Preset Signals
Interface Connector
Adjusting the Projected Image
Remote Control Components
Page 14
Image 14
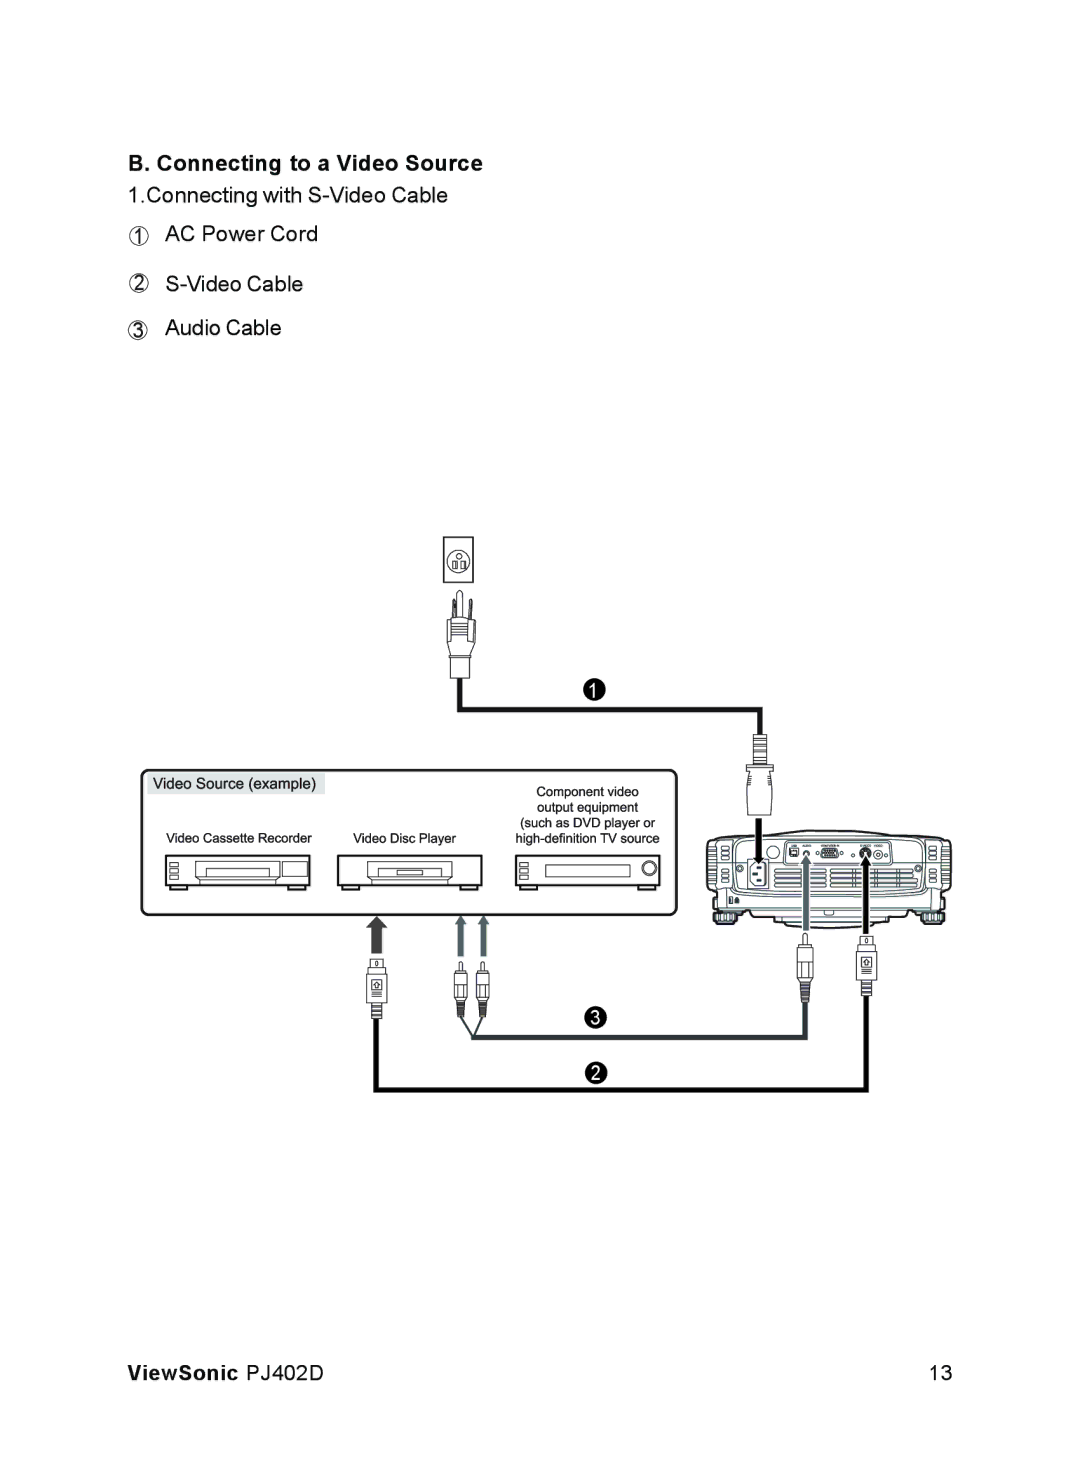
B. Connecting to a Video Source
1.Connecting with
S-Video
Cable
1
AC Power Cord
2
S-Video
Cable
3
Audio Cable
1
3
2
ViewSonic
PJ402D
13
Page 13
Page 15
Page 14
Image 14
Page 13
Page 15
Contents
9LHZ6RQLFŠ
For U.S.A
ViewSonic PJ402D
Important Safety Instructions
Page
For Australia Mainland China
Contents
Projector Features
Product Introduction
Package Contents
Front View
Getting to Know the Projector
Projector Components
Rear View
Bottom View
Auto
Interface Connector
Control Panel
Enter button Keystone c/d buttons
Remote Control Components
Power button
Source button
Connecting to a computer
Installation
Connecting the Projector
Connecting to a Video Source
ViewSonic PJ402D
ViewSonic PJ402D
Powering Off the Projector
Powering On/Off the Projector
Powering On the Projector
Adjusting the Projected Image
Adjusting the Projector Height
Adjusting the Projector Zoom and Focus
Adjusting Projection Image Size
110.0
Button Function
Using the Projector
Control Panel
Remote Control
Battery Replacement
Remote Control Operation
Menu Options
Image
Adjusts the color temperature. With the higher
Gamma Selects Gamma Mode
White Peaking White Peaking can be adjusted between 0
Temperature, the screen looks colder with the lower
Manually adjusts blue
Manually adjusts red
Manually adjusts green
Red Green Blue
Video
Tint Adjusts the color balance of red and green
Sharpness Adjusts the sharpness of the image
Option Actions/Descriptions Saturation
Display
Language
YCbCr YPbPr ViewSonic PJ402D
Advanced
Lamp Hours
Audio
Cleaning the Projector Housing
Maintenance
Cleaning the Lens
Replacing the Lamp
ViewSonic PJ402D
Technical Specifications
PAL,NTSC,SECAM
LED Type Color Status Meaning
Indicator Messages
Appendix
Preset Signals
Preset signal FH kHz FV Hz Sync Size
Hdtv Preset Signals
Limited Warranty
9LHZ6RQLFŠ
Top
Page
Image
Contents