E3100/3200 Assembly
Step 4 • Console Mast and Top Cap
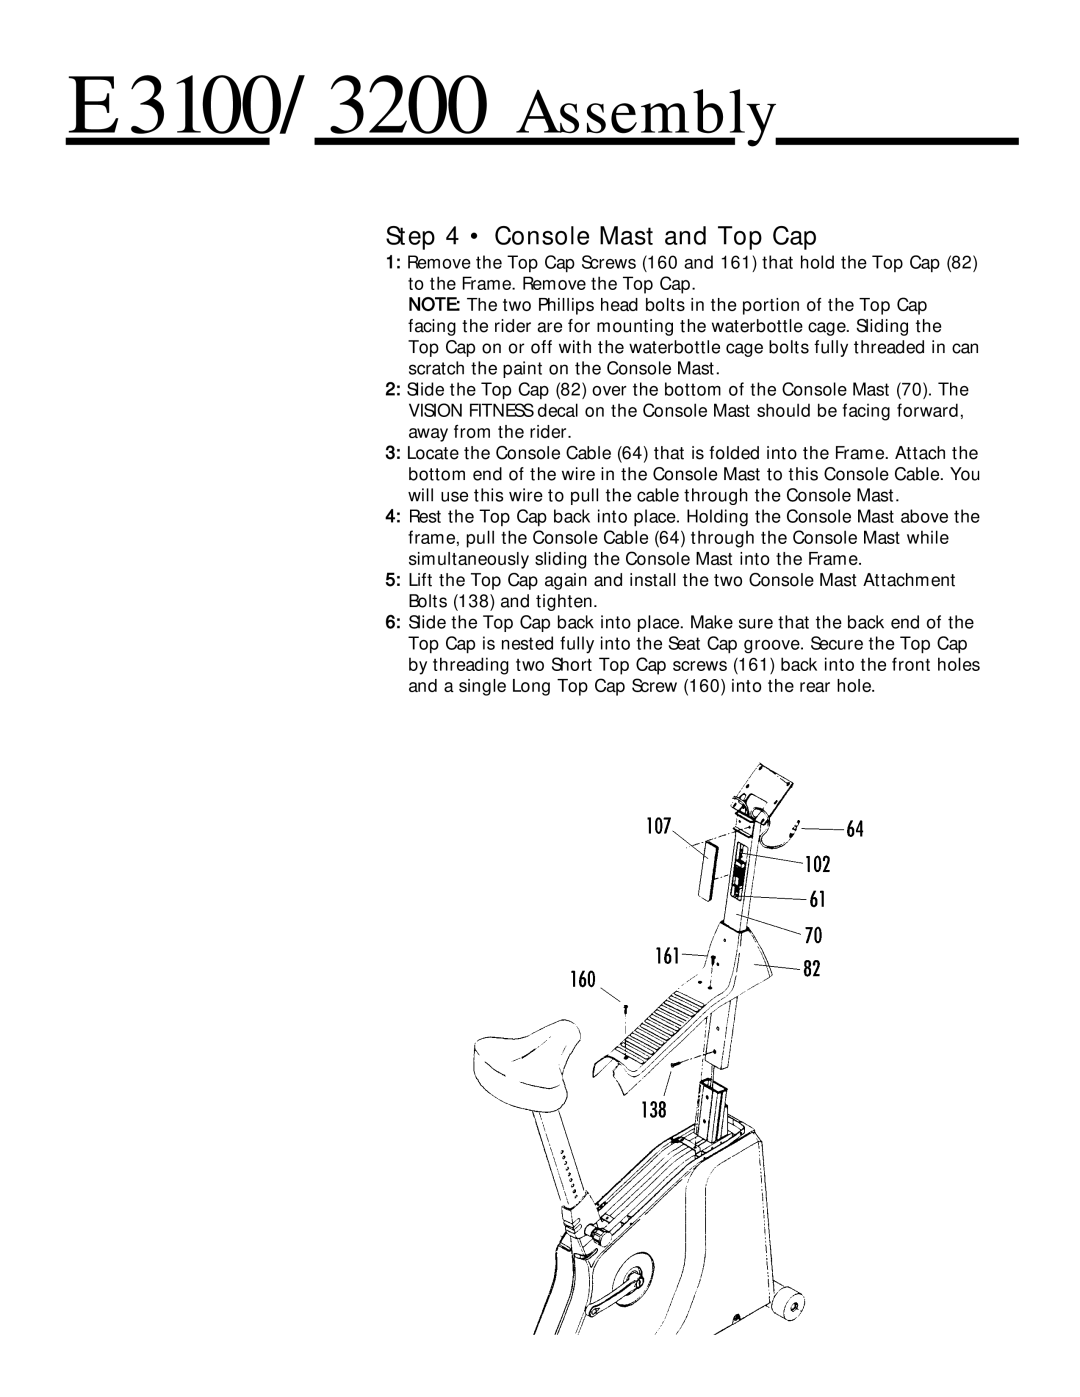
1:Remove the Top Cap Screws (160 and 161) that hold the Top Cap (82) to the Frame. Remove the Top Cap.
NOTE: The two Phillips head bolts in the portion of the Top Cap facing the rider are for mounting the waterbottle cage. Sliding the Top Cap on or off with the waterbottle cage bolts fully threaded in can scratch the paint on the Console Mast.
2:Slide the Top Cap (82) over the bottom of the Console Mast (70). The VISION FITNESS decal on the Console Mast should be facing forward, away from the rider.
3:Locate the Console Cable (64) that is folded into the Frame. Attach the bottom end of the wire in the Console Mast to this Console Cable. You will use this wire to pull the cable through the Console Mast.
4:Rest the Top Cap back into place. Holding the Console Mast above the frame, pull the Console Cable (64) through the Console Mast while simultaneously sliding the Console Mast into the Frame.
5:Lift the Top Cap again and install the two Console Mast Attachment Bolts (138) and tighten.
6:Slide the Top Cap back into place. Make sure that the back end of the Top Cap is nested fully into the Seat Cap groove. Secure the Top Cap by threading two Short Top Cap screws (161) back into the front holes and a single Long Top Cap Screw (160) into the rear hole.
