When powering the camera ON for the first time you may manually go through and setup some of the features of your camera.
Powering the Camera ON
1)Make sure the battery has been inserted properly into your digital camera. First, open the battery compartment on the side of the camera.
Insert the battery in accordance with the polarity indicated. Then return and close the battery cover.
2)Make sure an SD card has been inserted into your camera. First, locate the SD card slot on the bottom of the camera.
Insert a compatible SD memory card correctly in the direction shown. Then press the memory card until you hear a “Click” sound.
3)Flip and twist the LCD Screen open.
NOTE: The the LCD Screen can also be turned facing out so that you can see yourself within the scene you are capturing.
4)Press the POWER ![]() button to turn on the camera.
button to turn on the camera.
Setting the Camera Language
To select a language for the camera, press the OK/Menu button. Press the Right/ViviLink Button until the Language menu is viewed. Select the language of your choice and press the OK button to confirm the selection.
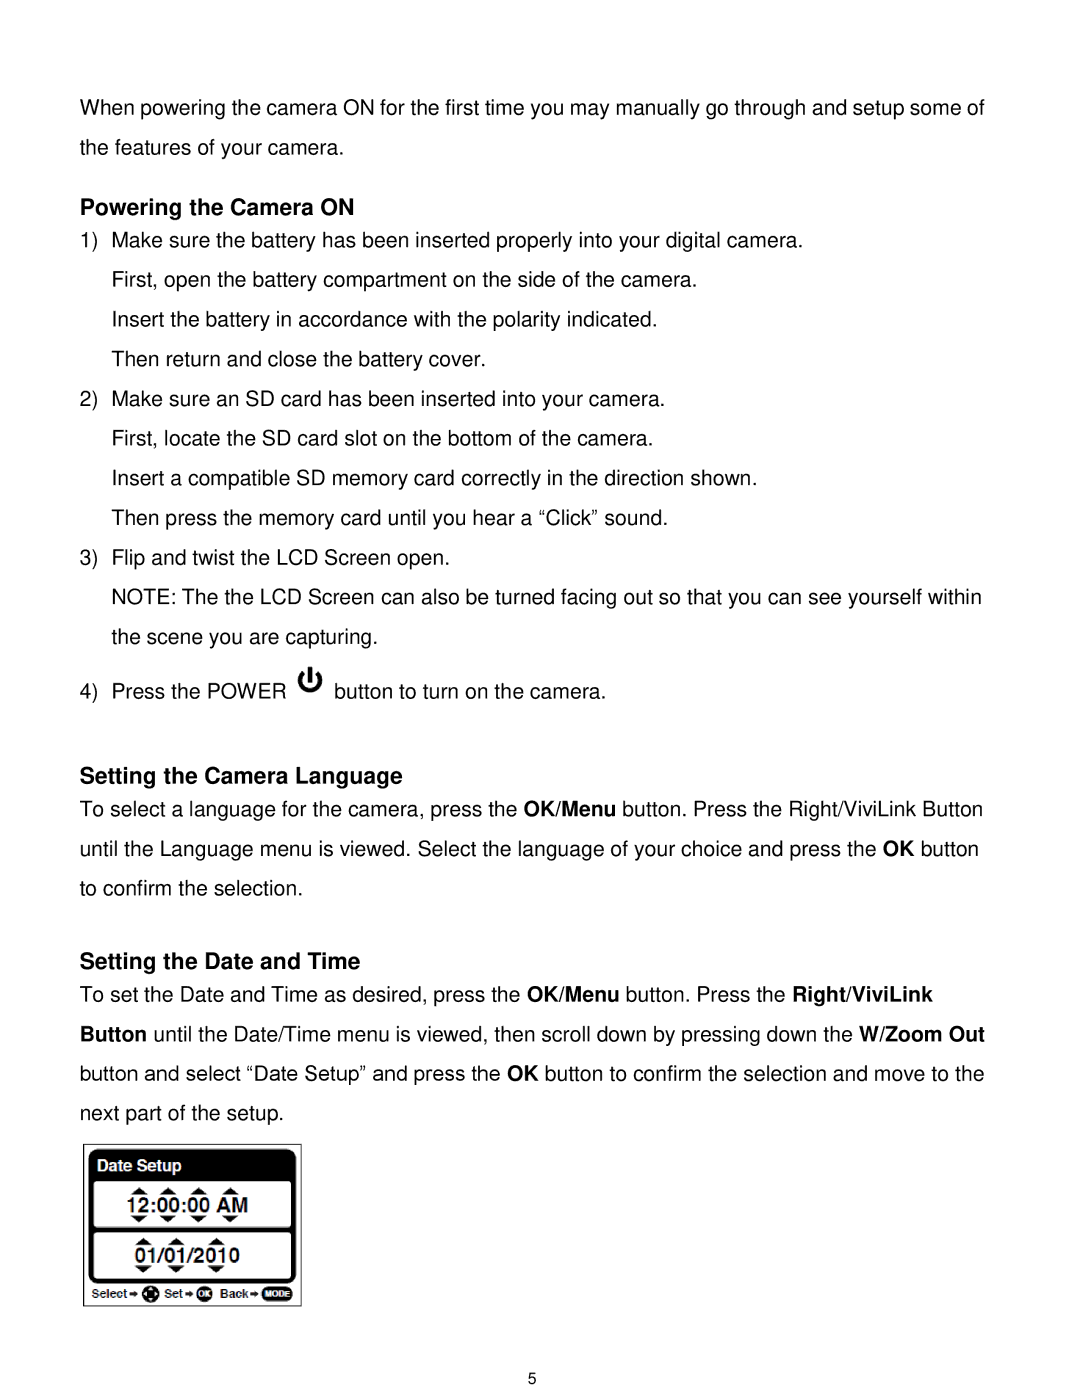
Setting the Date and Time
To set the Date and Time as desired, press the OK/Menu button. Press the Right/ViviLink Button until the Date/Time menu is viewed, then scroll down by pressing down the W/Zoom Out button and select “Date Setup” and press the OK button to confirm the selection and move to the next part of the setup.
5