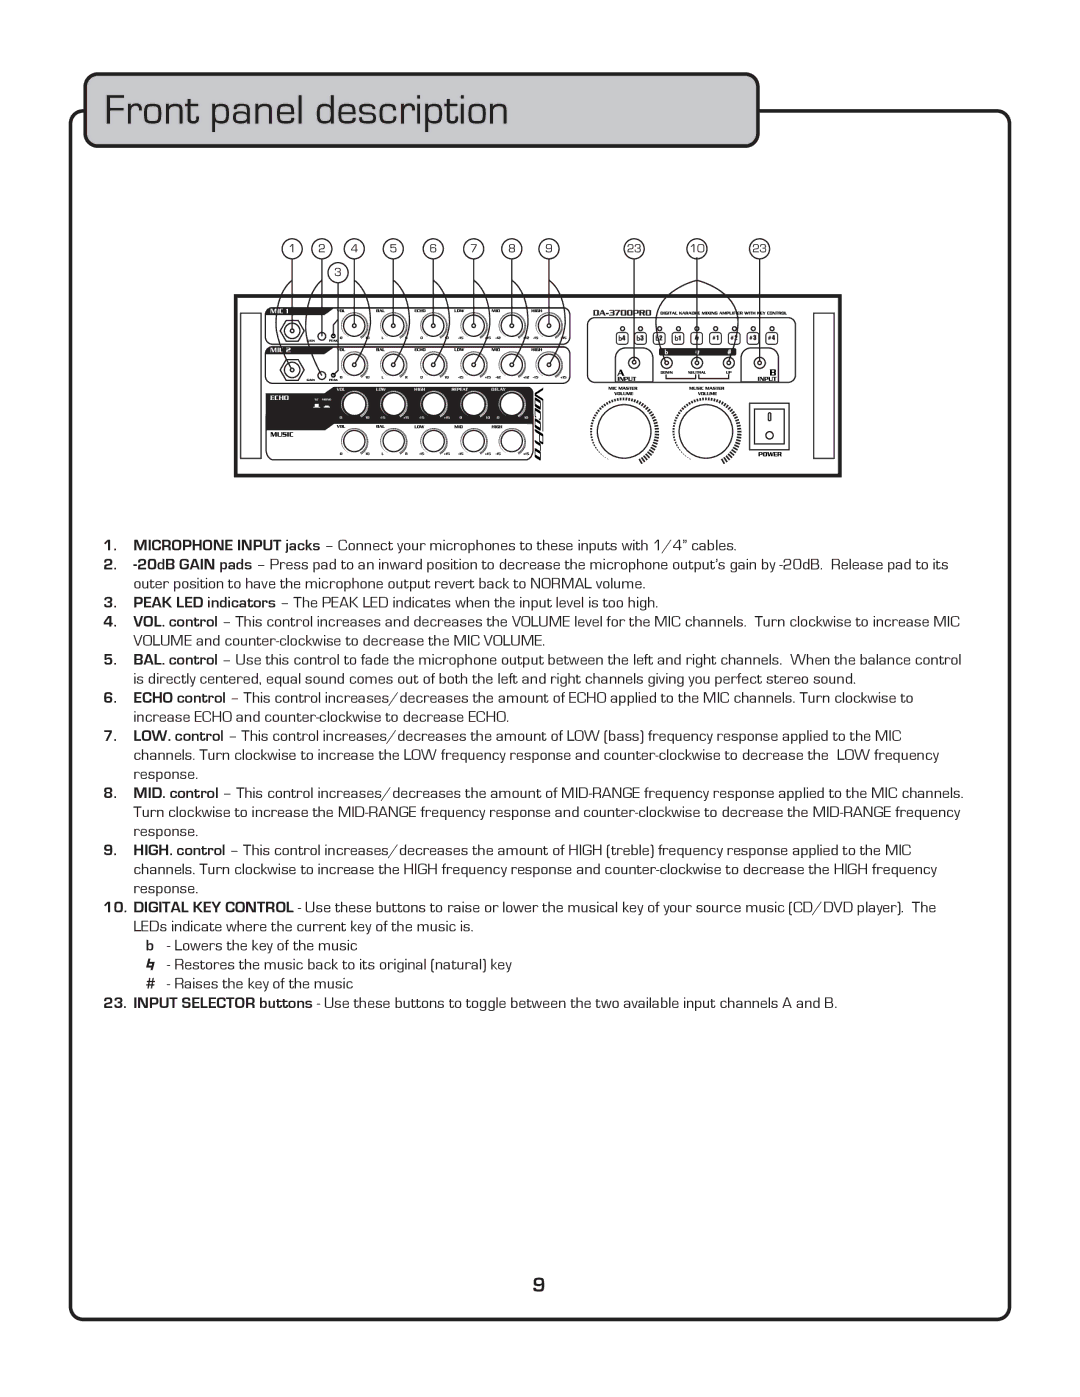
Front panel description
1 | 2 | 4 |
| 5 |
| 6 |
| 7 |
| 8 | 9 | 23 | 10 | 23 |
|
| 3 |
|
|
|
|
|
|
|
|
|
|
|
|
MIC 1 |
|
|
|
|
|
|
|
|
|
|
|
|
|
|
MIC 2 |
|
|
|
|
|
|
|
|
|
|
|
|
|
|
|
| VOL |
| LOW |
| HIGH |
| REPEAT |
| DELAY |
|
|
|
|
ECHO | ST MONO |
|
|
|
|
|
|
|
|
|
|
|
|
|
|
| 0 | 10 | +15 | +15 | 0 | 10 | 0 | 10 |
|
|
|
1.MICROPHONE INPUT jacks – Connect your microphones to these inputs with 1/4” cables.
2.
3.PEAK LED indicators – The PEAK LED indicates when the input level is too high.
4.VOL. control – This control increases and decreases the VOLUME level for the MIC channels. Turn clockwise to increase MIC VOLUME and
5.BAL. control – Use this control to fade the microphone output between the left and right channels. When the balance control is directly centered, equal sound comes out of both the left and right channels giving you perfect stereo sound.
6.ECHO control – This control increases/decreases the amount of ECHO applied to the MIC channels. Turn clockwise to increase ECHO and
7.LOW. control – This control increases/decreases the amount of LOW (bass) frequency response applied to the MIC channels. Turn clockwise to increase the LOW frequency response and
8.MID. control – This control increases/decreases the amount of
9.HIGH. control – This control increases/decreases the amount of HIGH (treble) frequency response applied to the MIC channels. Turn clockwise to increase the HIGH frequency response and
10.DIGITAL KEY CONTROL - Use these buttons to raise or lower the musical key of your source music (CD/DVD player). The LEDs indicate where the current key of the music is.
b - Lowers the key of the music
![]() - Restores the music back to its original (natural) key
- Restores the music back to its original (natural) key
#- Raises the key of the music
23.INPUT SELECTOR buttons - Use these buttons to toggle between the two available input channels A and B.
9
