Setting the Date and Time Cont…..
•Use the following buttons to set the correct Date and Time (DAY / MONTH / YEAR / HOUR / MIN / SEC)
“▲▼◄► “ to move the cursor.
“+”, “-” to choose the numbers / selections.
“ENTER “ to go to the submenu / to confirm the selection
“MENU “ to go to the menu OSD / to confirm the change / to exit the menu OSD
IMPORTANT NOTE: Please DO NOT change the date or time on your DVR after the recording function is activated. The recorded data will be disordered and you will not be able to find the recorded file to backup by time search.
NOTE: If users change the date or time accidentally when the recording function is activated, it’s recommended to clear all HDD data, and start recording again.
Daylight Saving
•Specify whether to use daylight saving time and time period. (START / END)
•Daylight saving time can be adjusted manually.
•Enter the daylight saving menu mode to set the start time and the end time, and adjust hours of the daylight saving.
DAYLIGHT SAVING
START
END |
ADJUST 01 : 00
NOTE: The illustrated setting means: During the daylight saving time period (start from the 4th Sunday of October, end on the 4th Sunday of March), the DVR system time will add one hour.
To Begin Recording
Once you have successfully set the Date and Time, exit the OSD Menu by pressing the “ MENU “ button until you return to normal viewing.
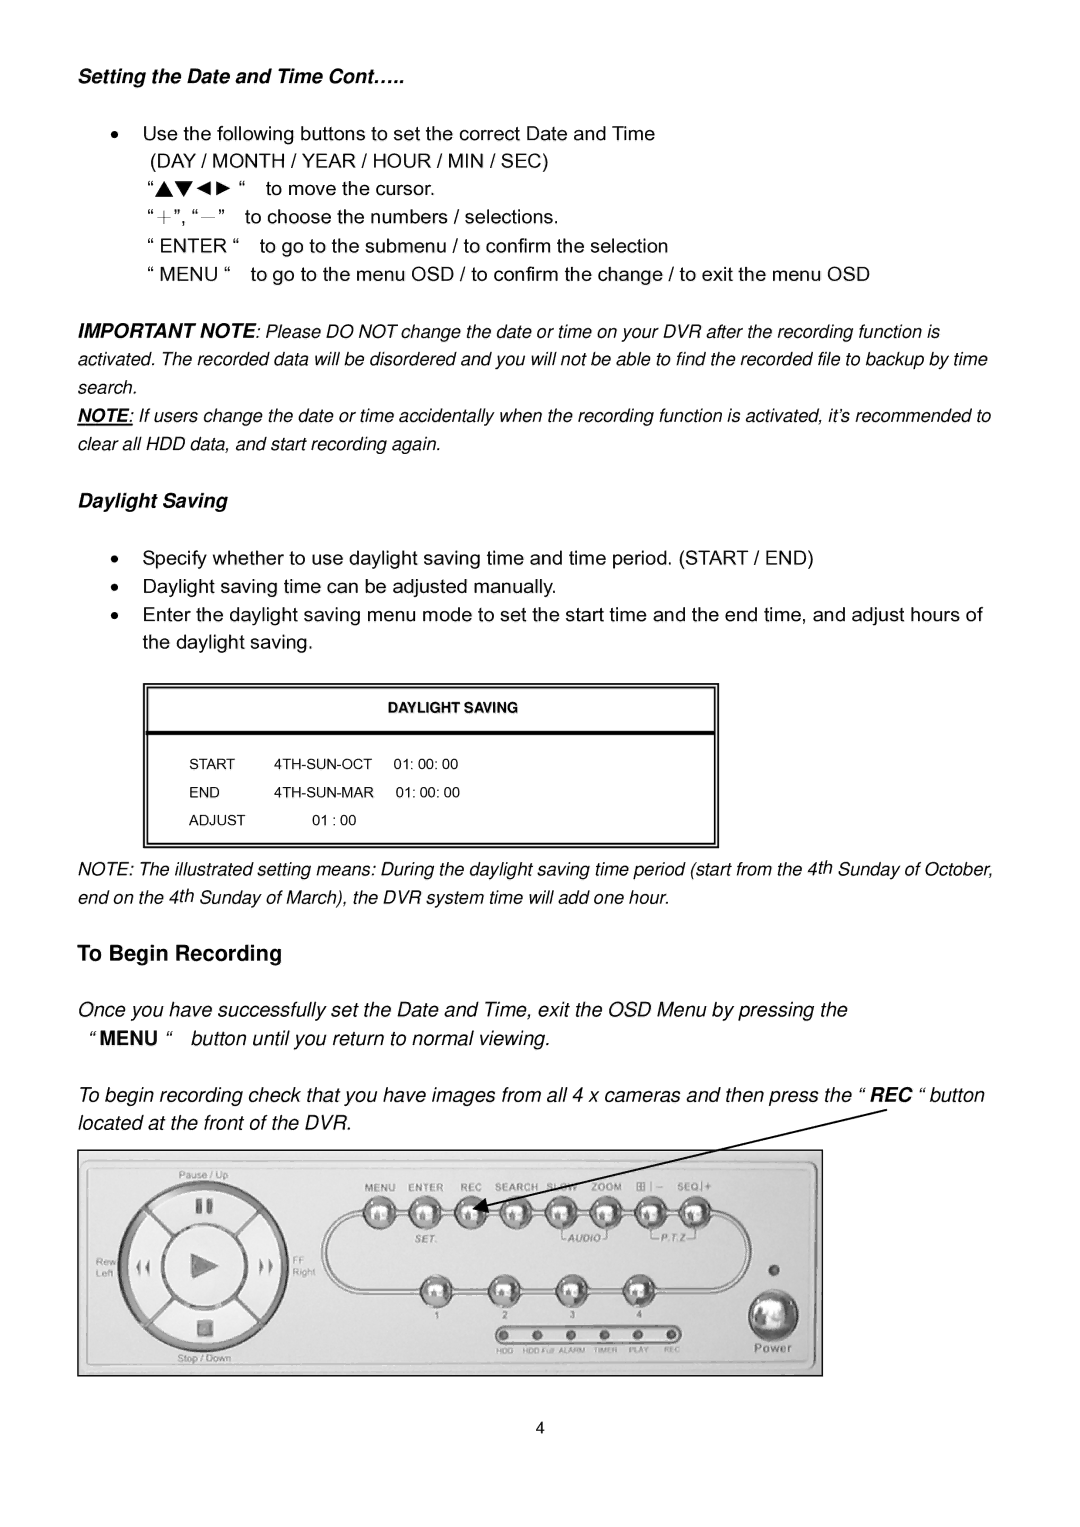
To begin recording check that you have images from all 4 x cameras and then press the “ REC “ button located at the front of the DVR.
4