Installation
Before installing this unit, please read through the following points:
•Do not place cords from the AC adapter where they can be pinched or stepped on.
•Do not place heavy objects on cords, or cover cords with rugs or carpet.
•Never immerse any component in water, and do not spray cleaners of solvents on the unit. Unplug units before cleaning. When cleaning, use a damp,
•Do not expose the DVR or Camera’s to excessive heat, cold, or moisture
•Leave at least a 2” space between the DVR and other objects to allow air circulation around the unit.
•Service should be handled by qualified technicians.
1 |
Impedance | 2 |
matching not |
|
required with |
|
this camera |
|
package |
|
Not used with |
|
this camera |
|
package | Optional – Input/Output sensing |
| Not used with this package |
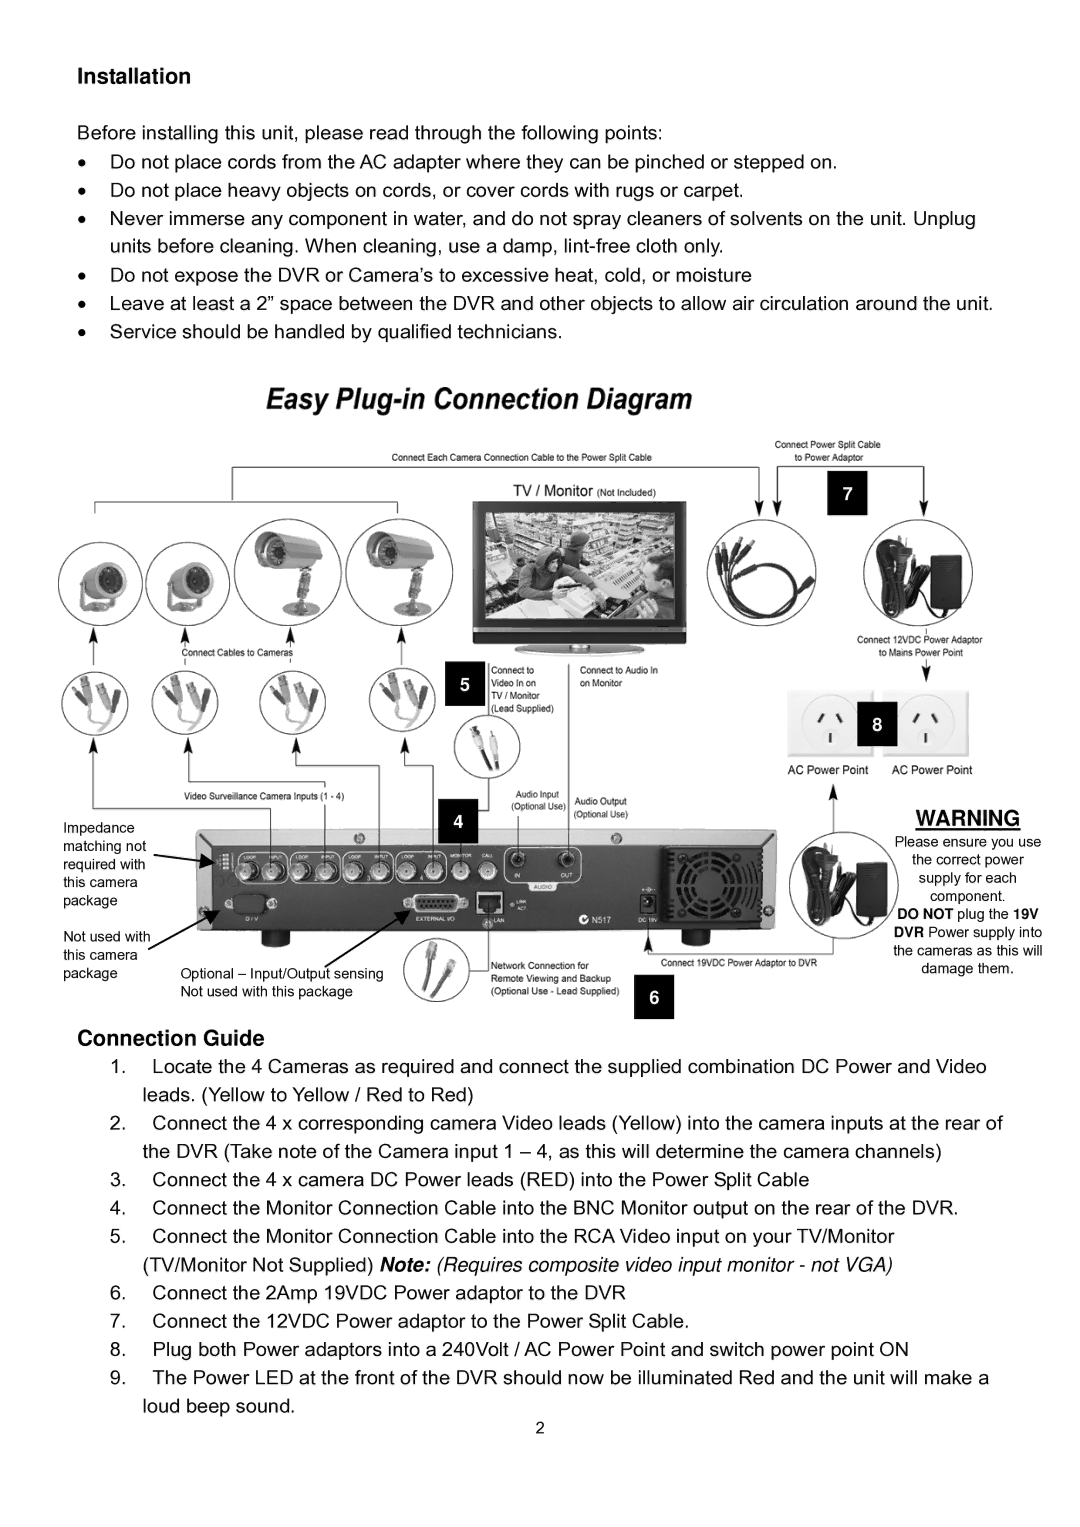
Connection Guide
5 |
4 |
3 |
6 |
7 |
8 |
WARNING
Please ensure you use
the correct power
supply for each
component.
DO NOT plug the 19V DVR Power supply into the cameras as this will damage them.
1.Locate the 4 Cameras as required and connect the supplied combination DC Power and Video leads. (Yellow to Yellow / Red to Red)
2.Connect the 4 x corresponding camera Video leads (Yellow) into the camera inputs at the rear of the DVR (Take note of the Camera input 1 – 4, as this will determine the camera channels)
3.Connect the 4 x camera DC Power leads (RED) into the Power Split Cable
4.Connect the Monitor Connection Cable into the BNC Monitor output on the rear of the DVR.
5.Connect the Monitor Connection Cable into the RCA Video input on your TV/Monitor (TV/Monitor Not Supplied) Note: (Requires composite video input monitor - not VGA)
6.Connect the 2Amp 19VDC Power adaptor to the DVR
7.Connect the 12VDC Power adaptor to the Power Split Cable.
8.Plug both Power adaptors into a 240Volt / AC Power Point and switch power point ON
9.The Power LED at the front of the DVR should now be illuminated Red and the unit will make a
loud beep sound.
2