OPERATING THE HOB
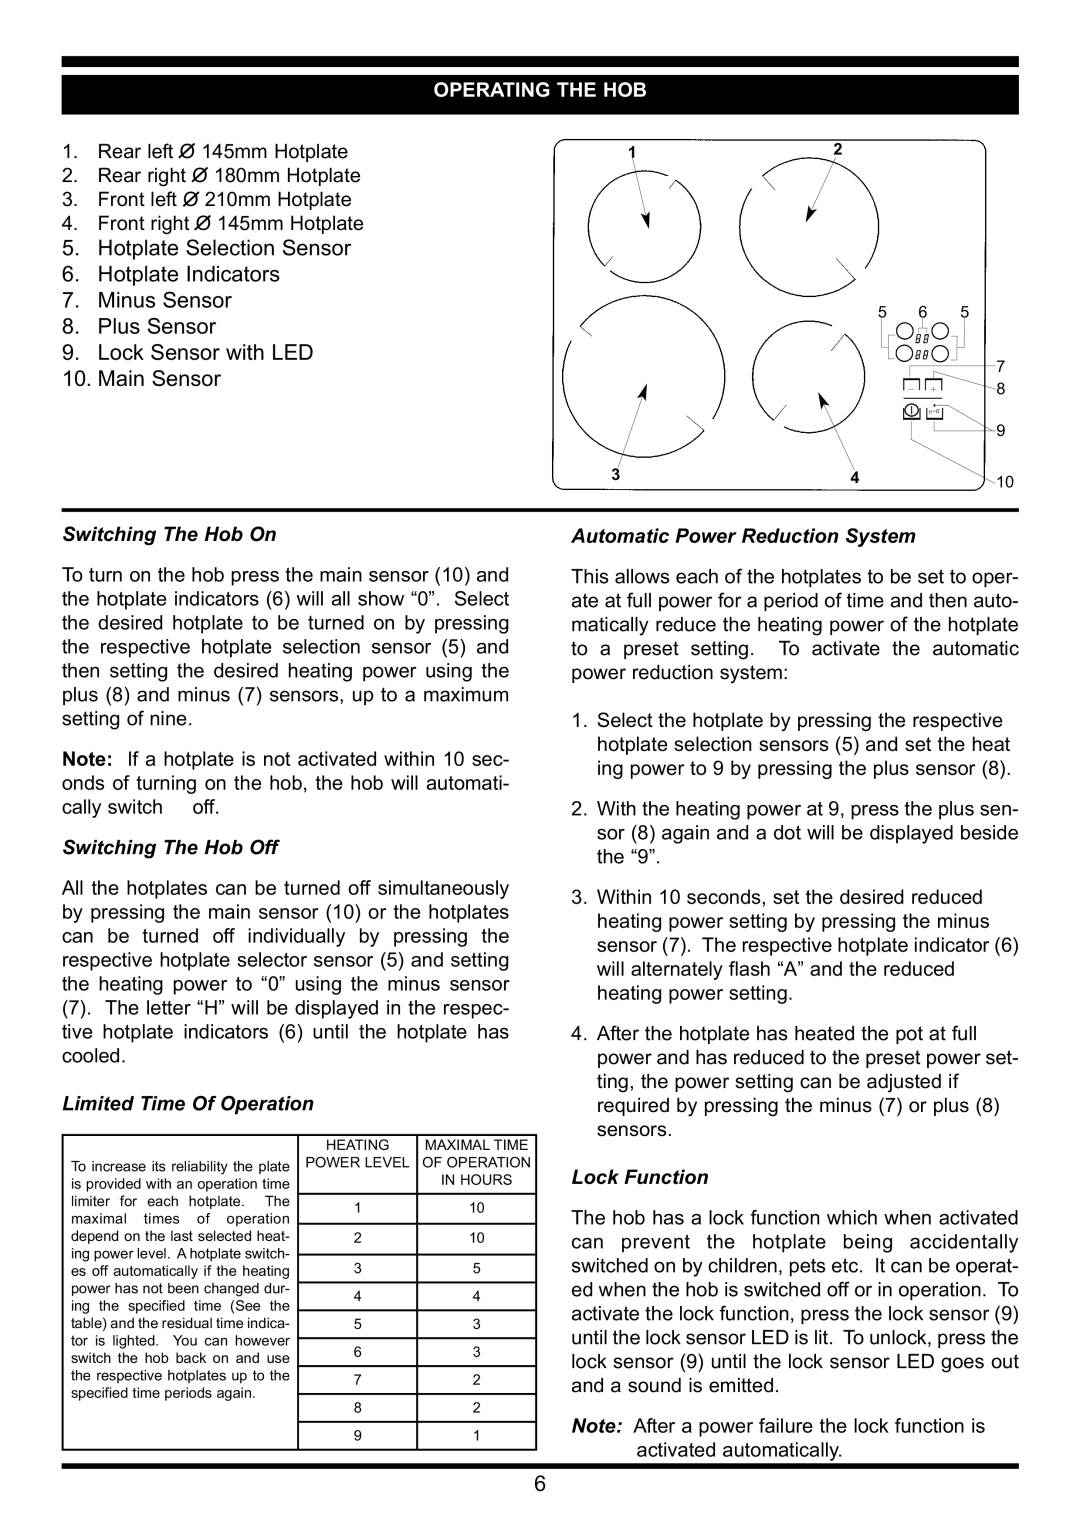
1.Rear left O 145mm Hotplate
2.Rear right O 180mm Hotplate
3.Front left O 210mm Hotplate
4.Front right O 145mm Hotplate
5.Hotplate Selection Sensor
6.Hotplate Indicators
7.Minus Sensor
8.Plus Sensor
9.Lock Sensor with LED
10.Main Sensor
12
5 6 5
7
![]()
![]()
![]()
![]()
![]()
![]() 8
8
![]() 9
9
3 | 4 | 10 |
|
|
Switching The Hob On | Automatic Power Reduction System |
To turn on the hob press the main sensor (10) and the hotplate indicators (6) will all show “0”. Select the desired hotplate to be turned on by pressing the respective hotplate selection sensor (5) and then setting the desired heating power using the plus (8) and minus (7) sensors, up to a maximum setting of nine.
Note: If a hotplate is not activated within 10 sec- onds of turning on the hob, the hob will automati- cally switch off.
Switching The Hob Off
All the hotplates can be turned off simultaneously by pressing the main sensor (10) or the hotplates can be turned off individually by pressing the respective hotplate selector sensor (5) and setting the heating power to “0” using the minus sensor
(7). The letter “H” will be displayed in the respec- tive hotplate indicators (6) until the hotplate has cooled.
Limited Time Of Operation
|
|
| HEATING | MAXIMAL TIME | |
To increase its reliability the plate | POWER LEVEL | OF OPERATION | |||
is provided with an operation time |
| IN HOURS | |||
|
| ||||
limiter for | each | hotplate. The | 1 | 10 | |
maximal | times | of operation | |||
|
| ||||
depend on the last selected heat- | 2 | 10 | |||
ing power level. A hotplate switch- |
|
| |||
3 | 5 | ||||
es off automatically if the heating | |||||
power has not been changed dur- |
|
| |||
4 | 4 | ||||
ing the specified time (See the | |||||
|
| ||||
table) and the residual time indica- | 5 | 3 | |||
tor is lighted. You can however |
|
| |||
6 | 3 | ||||
switch the hob back on and use | |||||
|
| ||||
the respective hotplates up to the | 7 | 2 | |||
specified time periods again. | |||||
|
| ||||
8 | 2 | ||||
|
|
| |||
|
|
|
|
| |
|
|
| 9 | 1 | |
|
|
|
|
| |
This allows each of the hotplates to be set to oper- ate at full power for a period of time and then auto- matically reduce the heating power of the hotplate to a preset setting. To activate the automatic power reduction system:
1.Select the hotplate by pressing the respective hotplate selection sensors (5) and set the heat ing power to 9 by pressing the plus sensor (8).
2.With the heating power at 9, press the plus sen- sor (8) again and a dot will be displayed beside the “9”.
3.Within 10 seconds, set the desired reduced heating power setting by pressing the minus sensor (7). The respective hotplate indicator (6) will alternately flash “A” and the reduced heating power setting.
4.After the hotplate has heated the pot at full power and has reduced to the preset power set- ting, the power setting can be adjusted if required by pressing the minus (7) or plus (8) sensors.
Lock Function
The hob has a lock function which when activated can prevent the hotplate being accidentally switched on by children, pets etc. It can be operat- ed when the hob is switched off or in operation. To activate the lock function, press the lock sensor (9) until the lock sensor LED is lit. To unlock, press the lock sensor (9) until the lock sensor LED goes out and a sound is emitted.
Note: After a power failure the lock function is activated automatically.
6