Model LG & LD Pool and Spa Heater | Page 13 |
|
|
|
|
•When chemical feeders are used, plumb the feeder downstream of the heater and install an in- line check valve between the heater and the feeder (a minimum of 18" is required between the heater and the check valve).
•Never deposit chemicals directly in the pool skimmer.
2G-4a. Water Chemistry
Proper chemical balances are necessary for sanitary bathing conditions as well as ensuring your heater's long life. Be sure to keep your chemical levels within the values indicated in Table 7. Waterpik
Laars does not warrant heat exchangers damaged by corrosive chemical levels or excess dissolved solids in pool or spa water.
For spas, it is also necessary to perform water changes in addition to chemical treatment. It is recom- mended to change the spa water every 60 days for light usage and every 30 days if usage is heavy.
Table 7. Mineral Concentration Levels
Test | Recommended Level |
|
|
Free chlorine | 1.0 to 3.0 ppm |
Bromine | 3.0 to 5.0 ppm |
pH | 7.2 to 7.8 |
Total alkalinity (TA) | 80 to 120 ppm |
Calcium hardness (CH) | 200 to 400 ppm |
Langelier saturation index (LSI) | |
Total dissolved solids (TDS) | Less than 2000 ppm |
Cyanuric acid | 30 to 150 ppm |
Copper | 0 ppm |
|
|
2G-5. Pressure Relief Valve
A pressure relief valve is not furnished with the Laars Lite 2 heater. However, it is recommended that a pressure relief valve be installed and may even be required by local codes.
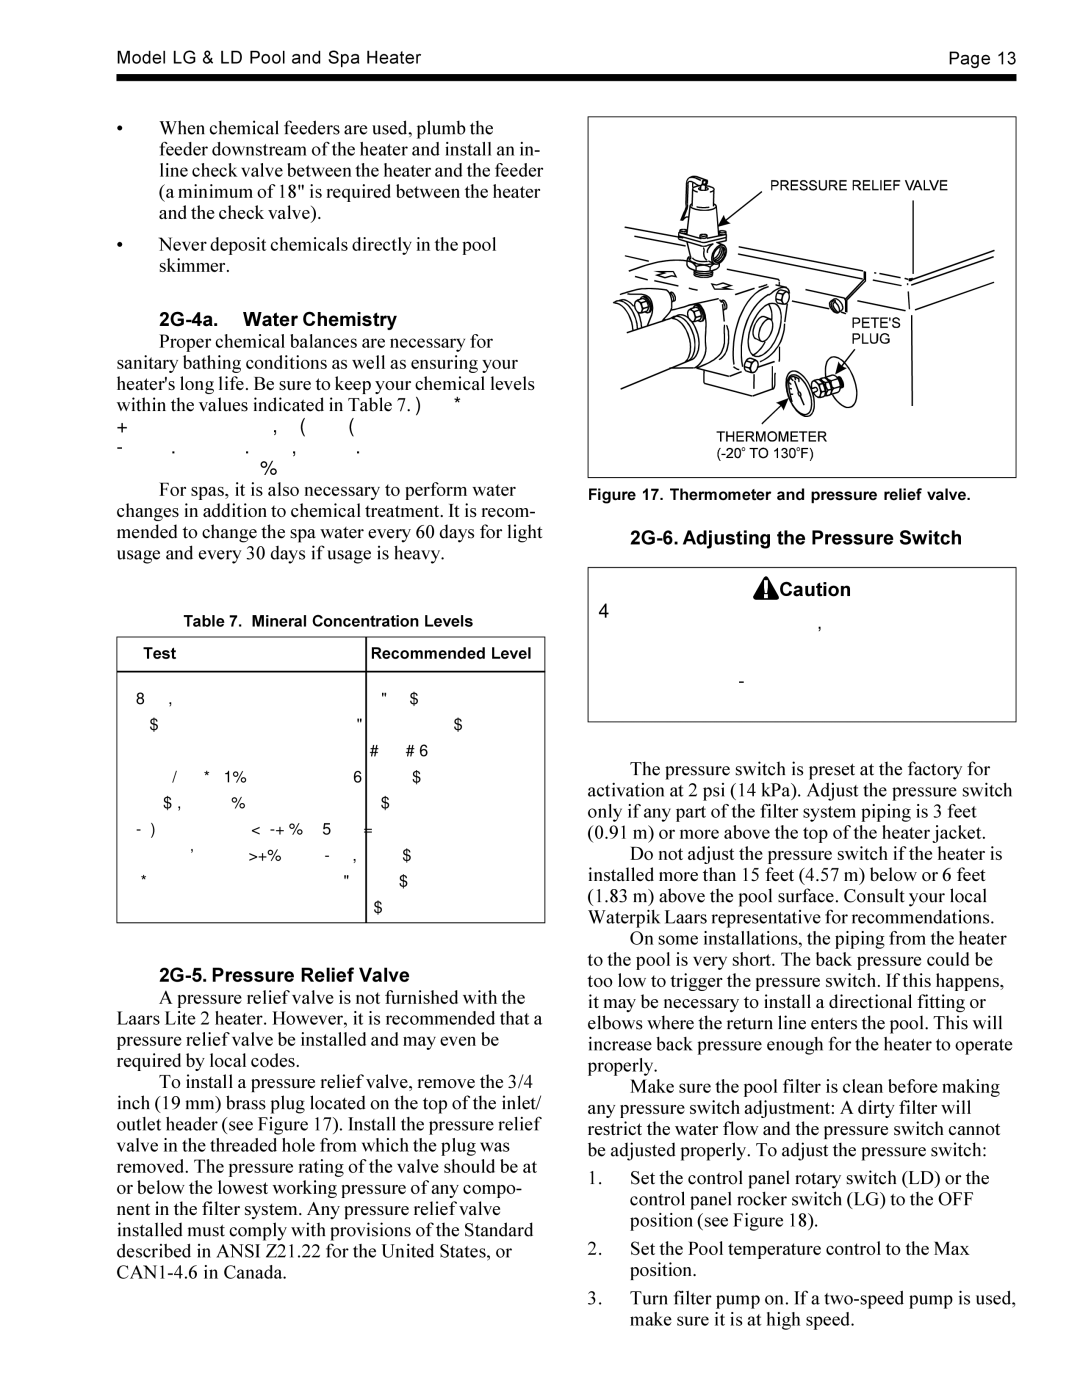
To install a pressure relief valve, remove the 3/4 inch (19 mm) brass plug located on the top of the inlet/ outlet header (see Figure 17). Install the pressure relief valve in the threaded hole from which the plug was removed. The pressure rating of the valve should be at or below the lowest working pressure of any compo- nent in the filter system. Any pressure relief valve installed must comply with provisions of the Standard described in ANSI Z21.22 for the United States, or
Figure 17. Thermometer and pressure relief valve.
2G-6. Adjusting the Pressure Switch
Caution
The pressure switch should be adjusted to turn the heater off when the pump is off. Setting the switch to close at too low of a flow can damage the appliance. Adjust the switch to turn the heater off, not on.
The pressure switch is preset at the factory for activation at 2 psi (14 kPa). Adjust the pressure switch only if any part of the filter system piping is 3 feet (0.91 m) or more above the top of the heater jacket.
Do not adjust the pressure switch if the heater is installed more than 15 feet (4.57 m) below or 6 feet (1.83 m) above the pool surface. Consult your local Waterpik Laars representative for recommendations.
On some installations, the piping from the heater to the pool is very short. The back pressure could be too low to trigger the pressure switch. If this happens, it may be necessary to install a directional fitting or elbows where the return line enters the pool. This will increase back pressure enough for the heater to operate properly.
Make sure the pool filter is clean before making any pressure switch adjustment: A dirty filter will restrict the water flow and the pressure switch cannot be adjusted properly. To adjust the pressure switch:
1.Set the control panel rotary switch (LD) or the control panel rocker switch (LG) to the OFF position (see Figure 18).
2.Set the Pool temperature control to the Max position.
3.Turn filter pump on. If a
