P.O. Box 67
Mt. Hope, OH 44660
Torquemaster®
Spring turn chart
Supplemental Installation Instructions
Note: Do NOT double wrap counterbalance cables on TorqueMaster® drums.
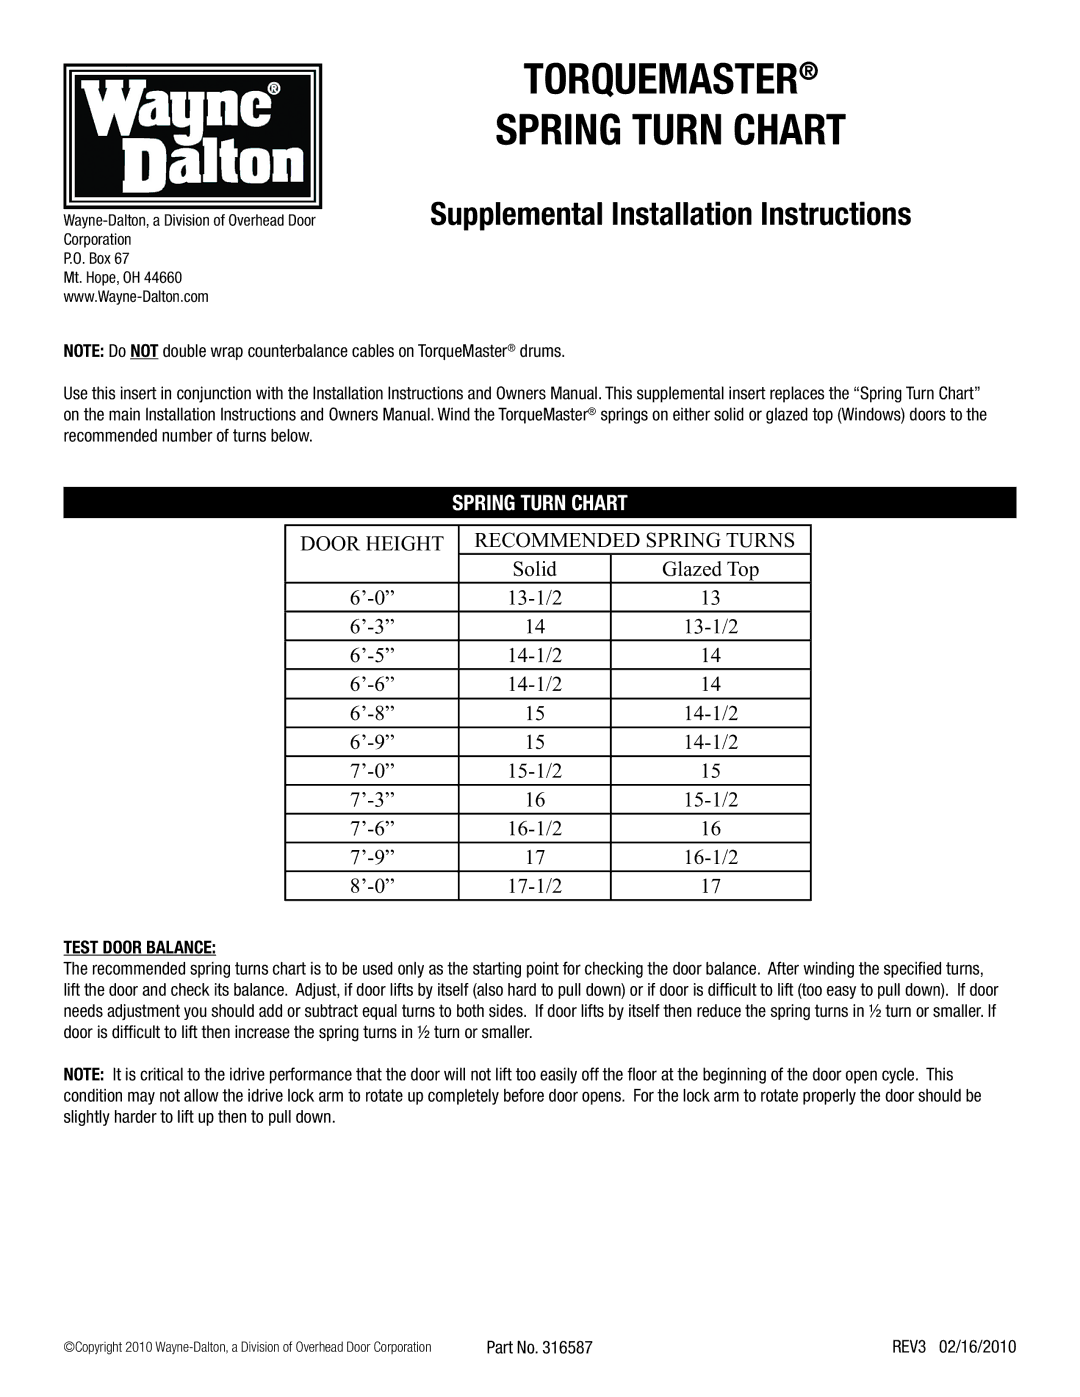
Use this insert in conjunction with the Installation Instructions and Owners Manual. This supplemental insert replaces the “Spring Turn Chart” on the main Installation Instructions and Owners Manual. Wind the TorqueMaster® springs on either solid or glazed top (Windows) doors to the recommended number of turns below.
Spring turn chart
DOOR HEIGHT | RECOMMENDED SPRING TURNS | |
| Solid | Glazed Top |
13 | ||
14 | ||
14 | ||
14 | ||
15 | ||
15 | ||
15 | ||
16 | ||
16 | ||
17 | ||
17 | ||
TEST DOOR BALANCE:
The recommended spring turns chart is to be used only as the starting point for checking the door balance. After winding the specified turns, lift the door and check its balance. Adjust, if door lifts by itself (also hard to pull down) or if door is difficult to lift (too easy to pull down). If door needs adjustment you should add or subtract equal turns to both sides. If door lifts by itself then reduce the spring turns in ½ turn or smaller. If door is difficult to lift then increase the spring turns in ½ turn or smaller.
NOTE: It is critical to the idrive performance that the door will not lift too easily off the floor at the beginning of the door open cycle. This condition may not allow the idrive lock arm to rotate up completely before door opens. For the lock arm to rotate properly the door should be slightly harder to lift up then to pull down.
©Copyright 2010 | Part No. 316587 | REV3 02/16/2010 |
