|
|
|
| Operating Instructions | ||
|
|
|
| |||
|
|
|
|
|
| |
|
|
|
|
|
| |
Rotisserie Assembly | 3) Put the spit forks on the rotisserie shaft. | |||||
|
|
|
|
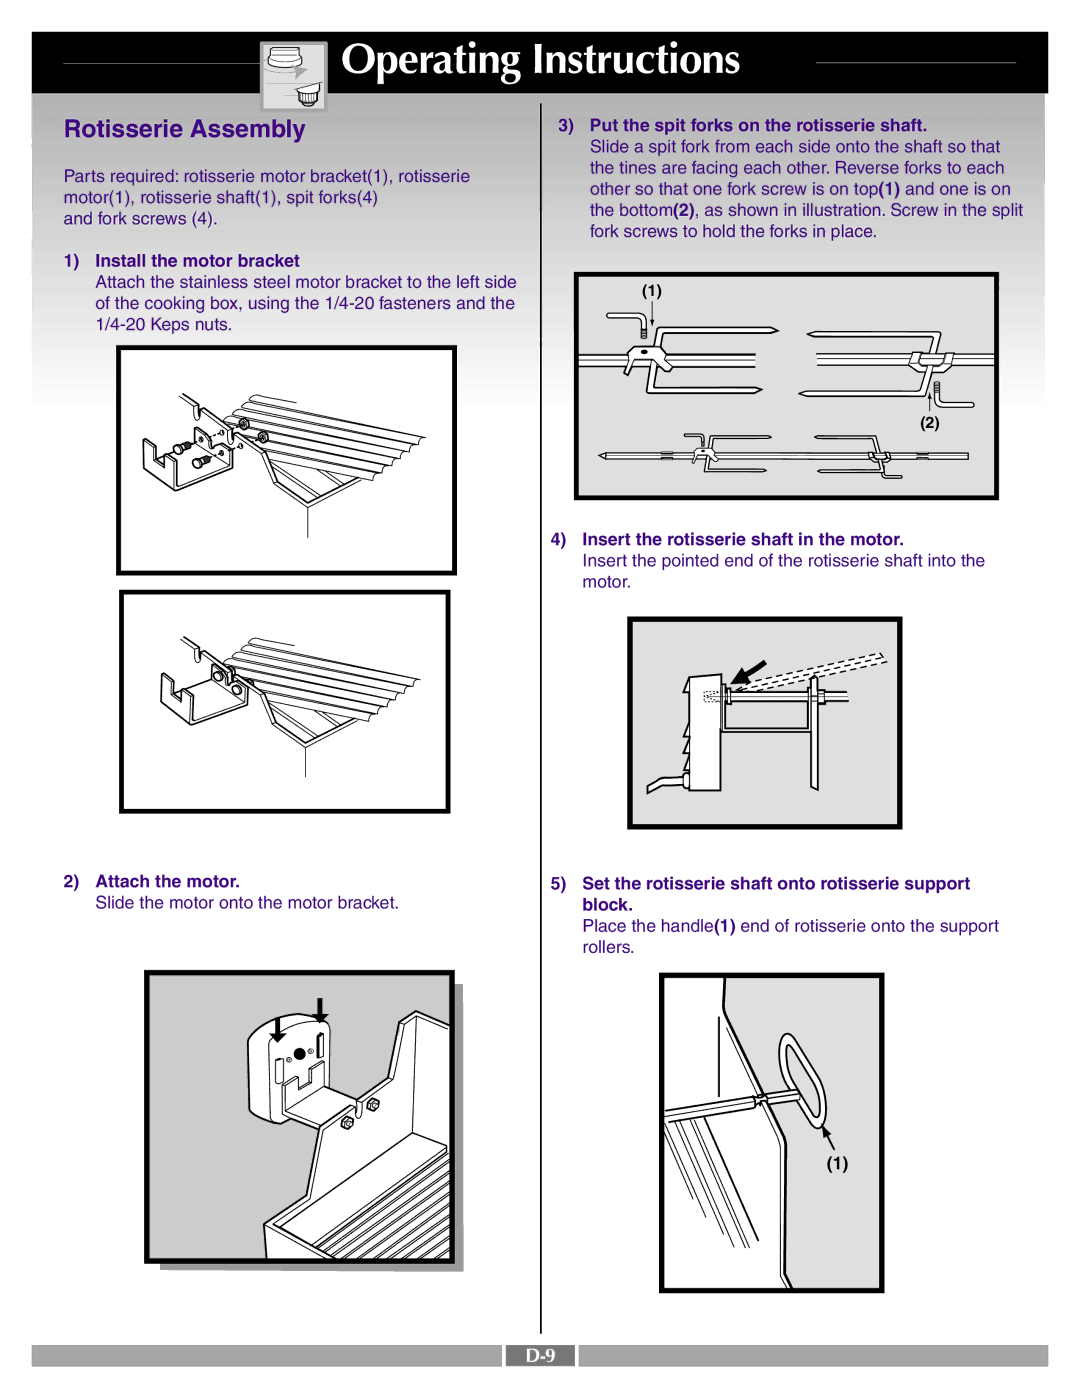
| Slide a spit fork from each side onto the shaft so that | |
Parts required: rotisserie motor bracket(1), rotisserie | the tines are facing each other. Reverse forks to each | |||||
other so that one fork screw is on top(1) and one is on | ||||||
motor(1), rotisserie shaft(1), spit forks(4) | ||||||
the bottom(2), as shown in illustration. Screw in the split | ||||||
and fork screws (4). | ||||||
fork screws to hold the forks in place. | ||||||
|
|
|
|
| ||
1) Install the motor bracket |
| |
Attach the stainless steel motor bracket to the left side | (1) | |
of the cooking box, using the | ||
| ||
| ||
| (2) | |
| 4) Insert the rotisserie shaft in the motor. | |
| Insert the pointed end of the rotisserie shaft into the | |
| motor. |
2) Attach the motor. | 5) Set the rotisserie shaft onto rotisserie support |
Slide the motor onto the motor bracket. | block. |
| Place the handle(1) end of rotisserie onto the support |
| rollers. |
(1) |
