Assembly Instructions
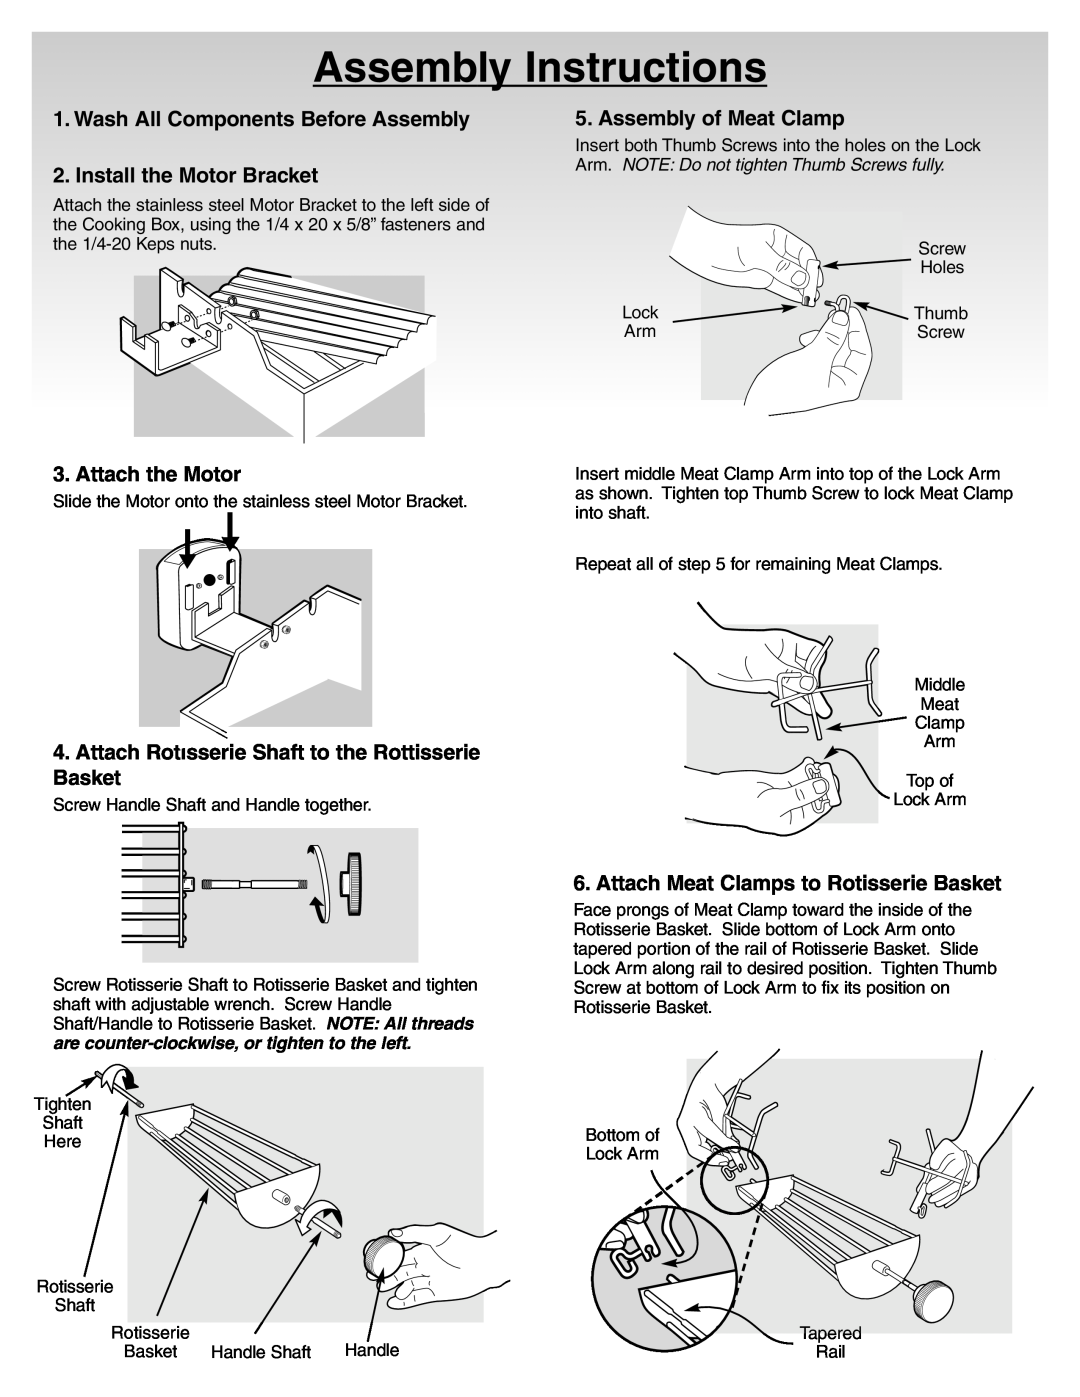
1. Wash All Components Before Assembly | 5. Assembly of Meat Clamp |
| Insert both Thumb Screws into the holes on the Lock |
2. Install the Motor Bracket | Arm. NOTE: Do not tighten Thumb Screws fully. |
|
Attach the stainless steel Motor Bracket to the left side of
the Cooking Box, using the 1/4 x 20 x 5/8” fasteners and
the | Screw |
| Holes |
Lock | Thumb |
Arm | Screw |
3. Attach the Motor
Slide the Motor onto the stainless steel Motor Bracket.
4.Attach Rotisserie Shaft to the Rottisserie Basket
Screw Handle Shaft and Handle together.
Screw Rotisserie Shaft to Rotisserie Basket and tighten shaft with adjustable wrench. Screw Handle Shaft/Handle to Rotisserie Basket. NOTE: All threads are
Tighten ![]()
Shaft
Here
Rotisserie |
|
|
Shaft |
|
|
Rotisserie |
| Handle |
Basket | Handle Shaft |
Insert middle Meat Clamp Arm into top of the Lock Arm as shown. Tighten top Thumb Screw to lock Meat Clamp into shaft.
Repeat all of step 5 for remaining Meat Clamps.
Middle
Meat
Clamp
Arm
Top of
Lock Arm
6. Attach Meat Clamps to Rotisserie Basket
Face prongs of Meat Clamp toward the inside of the Rotisserie Basket. Slide bottom of Lock Arm onto tapered portion of the rail of Rotisserie Basket. Slide Lock Arm along rail to desired position. Tighten Thumb Screw at bottom of Lock Arm to fix its position on Rotisserie Basket.
Bottom of
Lock Arm
 Tapered
Rail