WARNING: Disconnect the spark plug before performing maintenance except for carburetor adjustments.

CHECK FOR LOOSE

FASTENERS AND PARTS

SSpark Plug Boot S Air Filter

S Housing Screws

S Assist Handle Screws S Debris Shield

CHECK FOR DAMAGED OR

WORN PARTS

Contact an authorized service dealer for re- placement of damaged or worn parts.

S ON/STOP Switch -- Ensure ON/STOP switch functions properly by pushing and releasing the switch. Make sure engine stops. Wait 5 seconds before attempting to restart unit to allow switch to reset. Restart engine and continue.

SFuel Tank -- Discontinue use of unit if fuel

tank shows signs of damage or leaks.

S Debris Shield -- Discontinue use of unit if debris shield is damaged.

INSPECT AND CLEAN UNIT AND LABELS

S After each use, inspect complete unit for loose or damaged parts. Clean the unit and labels using a damp cloth with a mild deter- gent.

SWipe off unit with a clean dry cloth.

CLEAN AIR FILTER

A dirty air filter decreases engine perform- ance and increases fuel consumption and

harmful emissions. Always clean after every 5 hours of operation.

1. Clean the cover and the area around it to keep dirt from falling into the carburetor chamber when the cover is removed.

2. Remove parts as illustrated.

NOTE: To avoid creating a fire hazard or producing harmful evaporative emissions, do not clean filter in gasoline or other flammable solvent.

3.Wash the filter in soap and water.

4.Allow filter to dry.

5.Add a few drops of oil to the filter; squeeze the filter to distribute oil.

6.Replace parts.

Air Filter

Screws

Air Filter Cover

REPLACE SPARK PLUG

Replace the spark plug each year to ensure the engine starts easier and runs better. Set spark plug gap at 0.025 inch. Ignition timing is fixed and nonadjustable.

1.Twist, then pull off spark plug boot.

2.Remove spark plug from cylinder and dis- card.

3.Replace with Champion RCJ-6Y spark plug and tighten securely with a 3/4 inch socket wrench.

4.Reinstall the spark plug boot.

LINE REPLACEMENT

1.Remove spool by firmly pulling on tap button.

2.Clean entire surface of hub and spool.

3.Replace with a pre-wound spool, or cut two lengths of 12-1/2feet of 0.080! (2 mm) di- ameter Weed Eaterr brand line.

WARNING: Never use wire, rope, string, etc., which can break off and become a dangerous missile.

4.Insert ends of the lines about 1/2 inch (1 cm) into the small holes on the inside of spool.

Spool

Small

Holes

Line exit holes


Line in Notch


Line in Notch

Hub

5.Wind the line evenly and tightly onto the spool. Wind in the direction of the arrows found on the spool.

6.Push the lines into the notches, leaving 3 to 5 inches (7 -- 12 cm) unwound.

7.Insert the lines into the the exit holes in the hub as shown in the illustration.

8.Align the notches with the line exit holes.

9.Push spool into hub until it snaps into place.

10.Pull the lines extending outside of the hub to release the lines from the notches.

7

Page 7
Image 7
Weed Eater FX25 Check for Loose Fasteners and Parts, Check for Damaged or Worn Parts, Inspect and Clean Unit and Labels

FX25, XT250 specifications

The Weed Eater XT250 and FX25 are two powerful options in the realm of outdoor power equipment, designed specifically for homeowners seeking efficient and reliable solutions for their lawn care needs. These trimmers stand out due to their thoughtful engineering and user-friendly features, making yard maintenance a breeze.

Starting with the Weed Eater XT250, one of its main features is the lightweight design, which allows for easy maneuverability. Weighing in at just under 10 pounds, it’s designed to reduce user fatigue, enabling longer periods of use without discomfort. This trimmer is equipped with a robust 25cc Gas-Powered Engine, offering ample power to tackle a range of grass and weed types. The XT250 also incorporates an automatic line feed system that ensures continuous cutting, reducing downtime for line replacement.

Additionally, the XT250’s adjustable cutting width allows users to adapt the trimmer to different tasks, whether it’s edging along sidewalks or clearing thick brush. The curved shaft design enhances control and precision while trimming in tight spaces, making it perfect for intricate yard work.

Shifting to the FX25 model, it boasts an impressive combination of performance and technology. Similar to the XT250, the FX25 features a 25cc engine but incorporates advanced vibration-dampening technology to minimize user fatigue during extended use. This model is ideal for users who require a dependable trimmer for both residential lawn care and light commercial use.

The FX25 also includes a dual-line bump feed head, which allows users to easily advance cutting line with just a tap on the ground, increasing efficiency and convenience. Its ergonomic handle design enhances comfort and grip, providing a secure hold while tackling tough jobs. Furthermore, the FX25's easy-start mechanism reduces the pull effort needed to start the engine, streamlining the user experience.

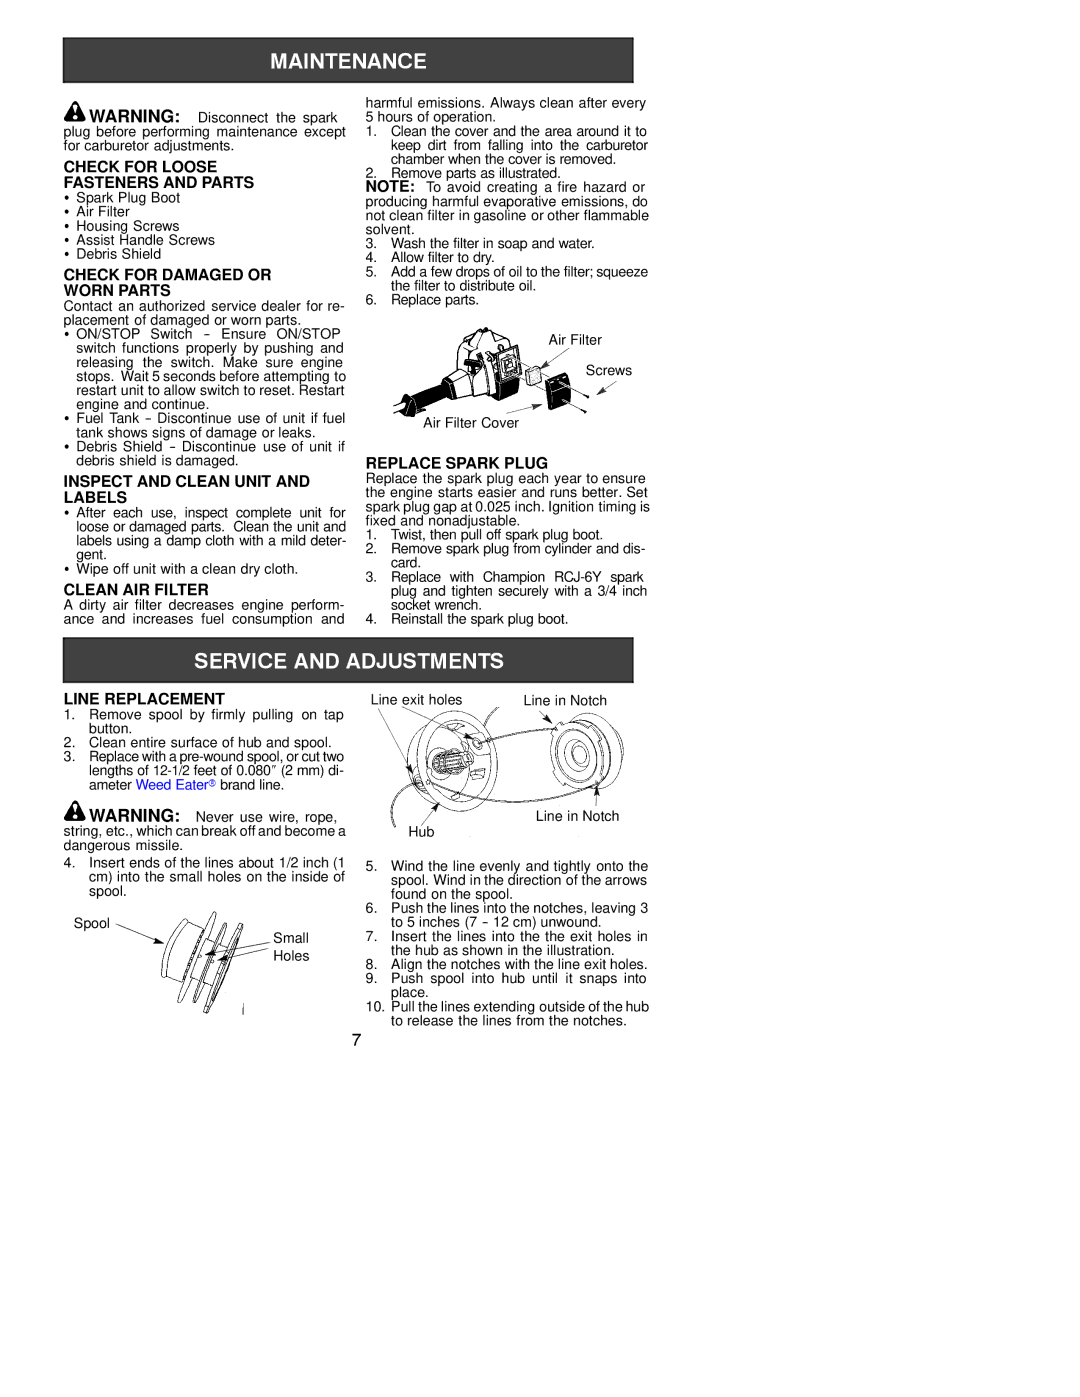
Both models are engineered for durability, featuring rugged construction that withstands the rigors of yard work. They are also designed for easy maintenance, with accessible air filters and spark plug locations that enable effortless servicing.

In summary, the Weed Eater XT250 and FX25 combine power, comfort, and innovative technology, making them excellent choices for anyone seeking to maintain a pristine lawn. Their user-friendly features, coupled with robust performance, ensure that whether you are tackling stubborn weeds or simply tidying up your yard, these trimmers will deliver reliability and efficiency. Perfect for homeowners and light commercial users alike, these models exemplify the commitment to quality that Weed Eater is known for.