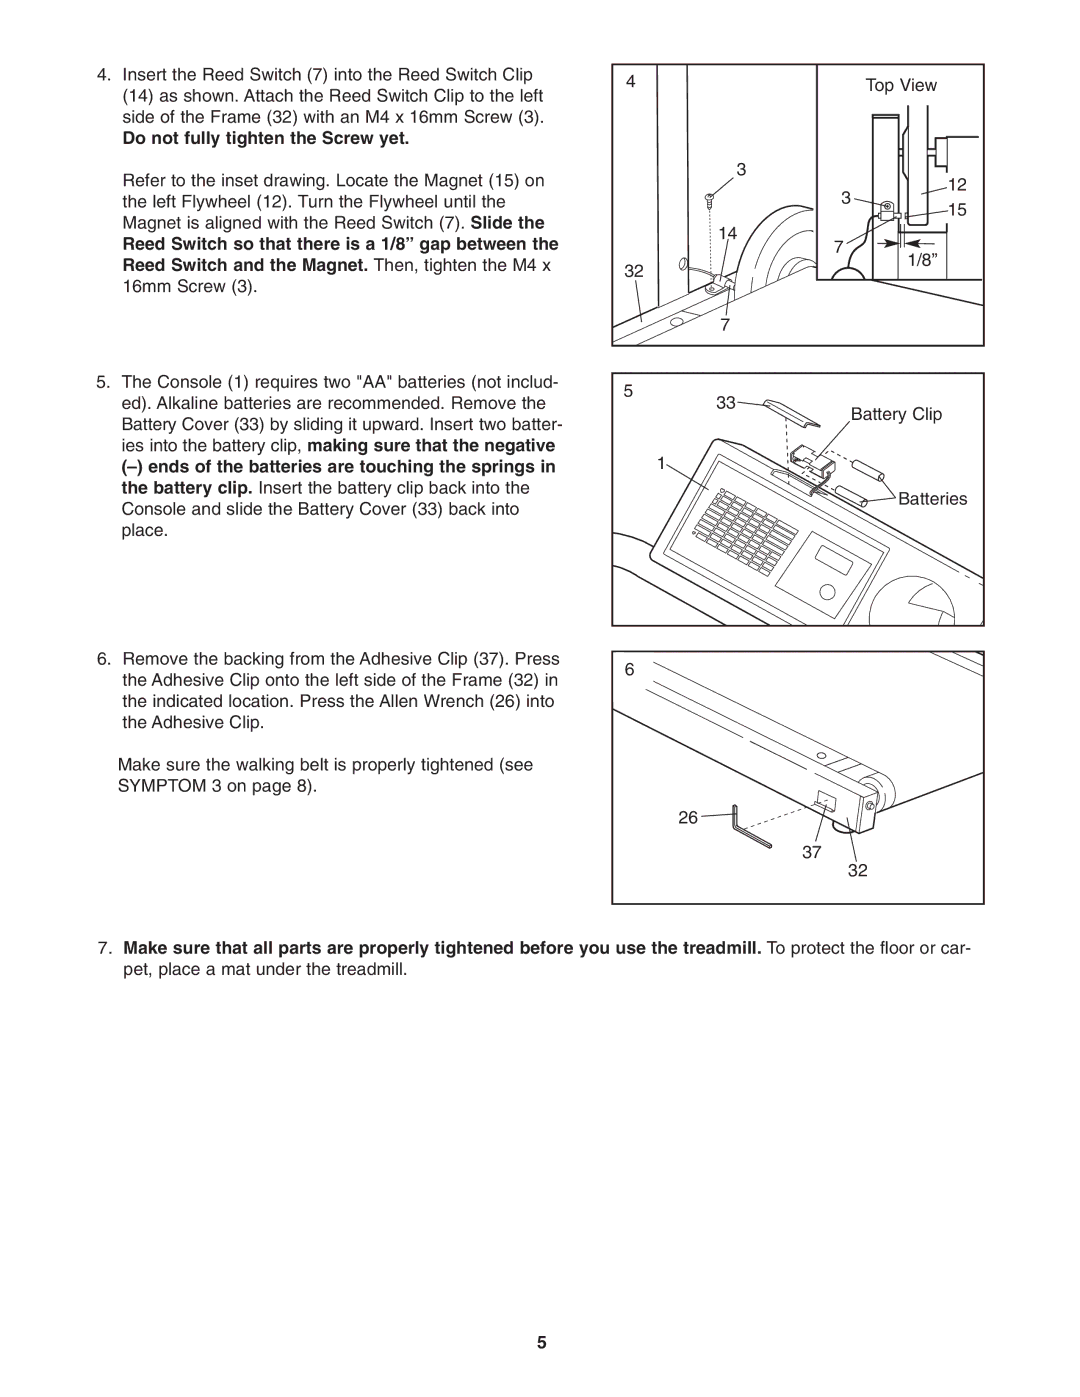
4.Insert the Reed Switch (7) into the Reed Switch Clip (14) as shown. Attach the Reed Switch Clip to the left side of the Frame (32) with an M4 x 16mm Screw (3).
Do not fully tighten the Screw yet.
Refer to the inset drawing. Locate the Magnet (15) on the left Flywheel (12). Turn the Flywheel until the Magnet is aligned with the Reed Switch (7). Slide the
Reed Switch so that there is a 1/8” gap between the Reed Switch and the Magnet. Then, tighten the M4 x 16mm Screw (3).
5.The Console (1) requires two "AA" batteries (not includ- ed). Alkaline batteries are recommended. Remove the Battery Cover (33) by sliding it upward. Insert two batter- ies into the battery clip, making sure that the negative
6.Remove the backing from the Adhesive Clip (37). Press the Adhesive Clip onto the left side of the Frame (32) in the indicated location. Press the Allen Wrench (26) into the Adhesive Clip.
Make sure the walking belt is properly tightened (see SYMPTOM 3 on page 8).
4 |
| Top View |
| 3 | 12 |
|
| |
|
| 3 |
|
| 15 |
| 14 | 7 |
|
| |
32 |
| 1/8” |
|
| |
| 7 |
|
5 | 33 |
|
| Battery Clip | |
|
| |
| 1 |
|
|
| Batteries |
6 |
|
|
| 26 |
|
|
| 37 |
|
| 32 |
7.Make sure that all parts are properly tightened before you use the treadmill. To protect the floor or car- pet, place a mat under the treadmill.
5