INCLINE ADJUSTMENT
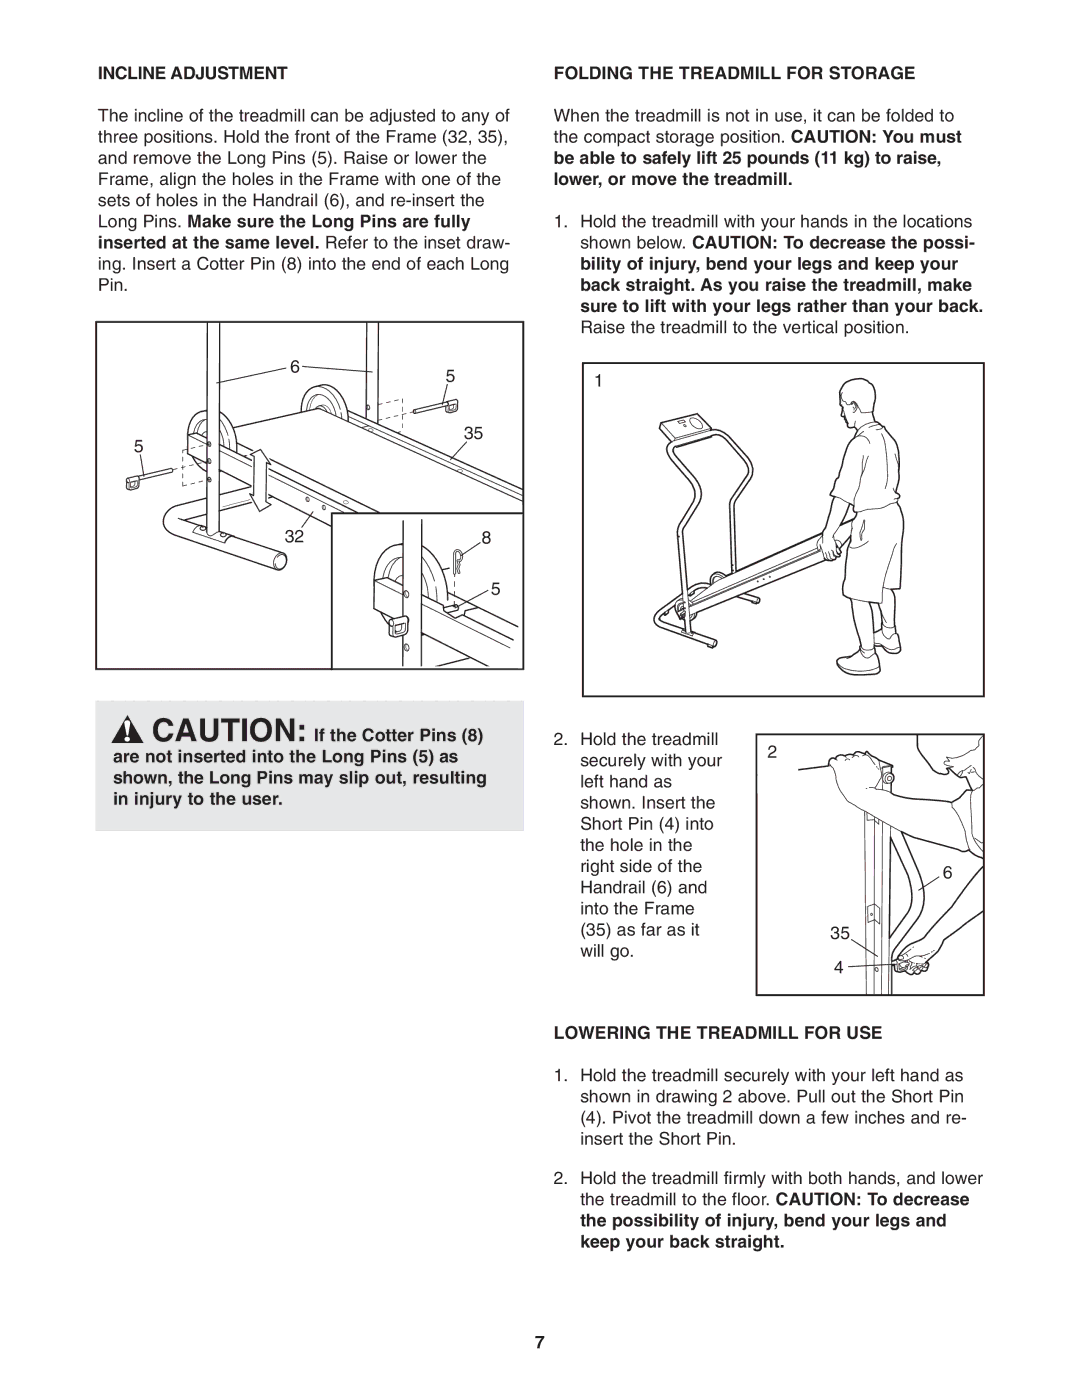
The incline of the treadmill can be adjusted to any of three positions. Hold the front of the Frame (32, 35), and remove the Long Pins (5). Raise or lower the Frame, align the holes in the Frame with one of the sets of holes in the Handrail (6), and
6 | 5 |
| |
5 | 35 |
| |
32 | 8 |
| 5 |
FOLDING THE TREADMILL FOR STORAGE
When the treadmill is not in use, it can be folded to the compact storage position. CAUTION: You must be able to safely lift 25 pounds (11 kg) to raise, lower, or move the treadmill.
1.Hold the treadmill with your hands in the locations shown below. CAUTION: To decrease the possi- bility of injury, bend your legs and keep your back straight. As you raise the treadmill, make sure to lift with your legs rather than your back. Raise the treadmill to the vertical position.
1
![]() CAUTION: If the Cotter Pins (8) are not inserted into the Long Pins (5) as shown, the Long Pins may slip out, resulting in injury to the user.
CAUTION: If the Cotter Pins (8) are not inserted into the Long Pins (5) as shown, the Long Pins may slip out, resulting in injury to the user.
2.Hold the treadmill securely with your left hand as shown. Insert the Short Pin (4) into the hole in the right side of the Handrail (6) and into the Frame (35) as far as it will go.
2
6
35
4 ![]()
![]()
![]()
![]()
![]()
LOWERING THE TREADMILL FOR USE
1.Hold the treadmill securely with your left hand as shown in drawing 2 above. Pull out the Short Pin
(4). Pivot the treadmill down a few inches and re- insert the Short Pin.
2.Hold the treadmill firmly with both hands, and lower the treadmill to the floor. CAUTION: To decrease the possibility of injury, bend your legs and keep your back straight.
7
