|
| GPS NMEA0183 | Ground Wire Color | |
GPS MFG. | Model Number(s) | OUTPUT Wire Color | ||
(connect to BARE | ||||
(Connect to YELLOW | ||||
|
| WIRE on your radio) | WIRE on your radio) | |
|
|
| ||
Northstar | All Models | Yellow | Black | |
RayMarine | 420 | Yellow | Brown | |
RayMarine | 520 / 620 | Blue | Brown | |
RayMarine | RL Series | White | Brown | |
Simrad | All Models | White | Brown | |
Sitex | Neptune, | Gray | Brown | |
Nautilus | ||||
|
|
| ||
Standard | CP150 / CP150C | Green | Yellow |
3.Be certain all wire connections are secure and that all open wires are adequately covered.
##NOTE: To extend the life of the radio, use waterproof tape to seal electrical connections.
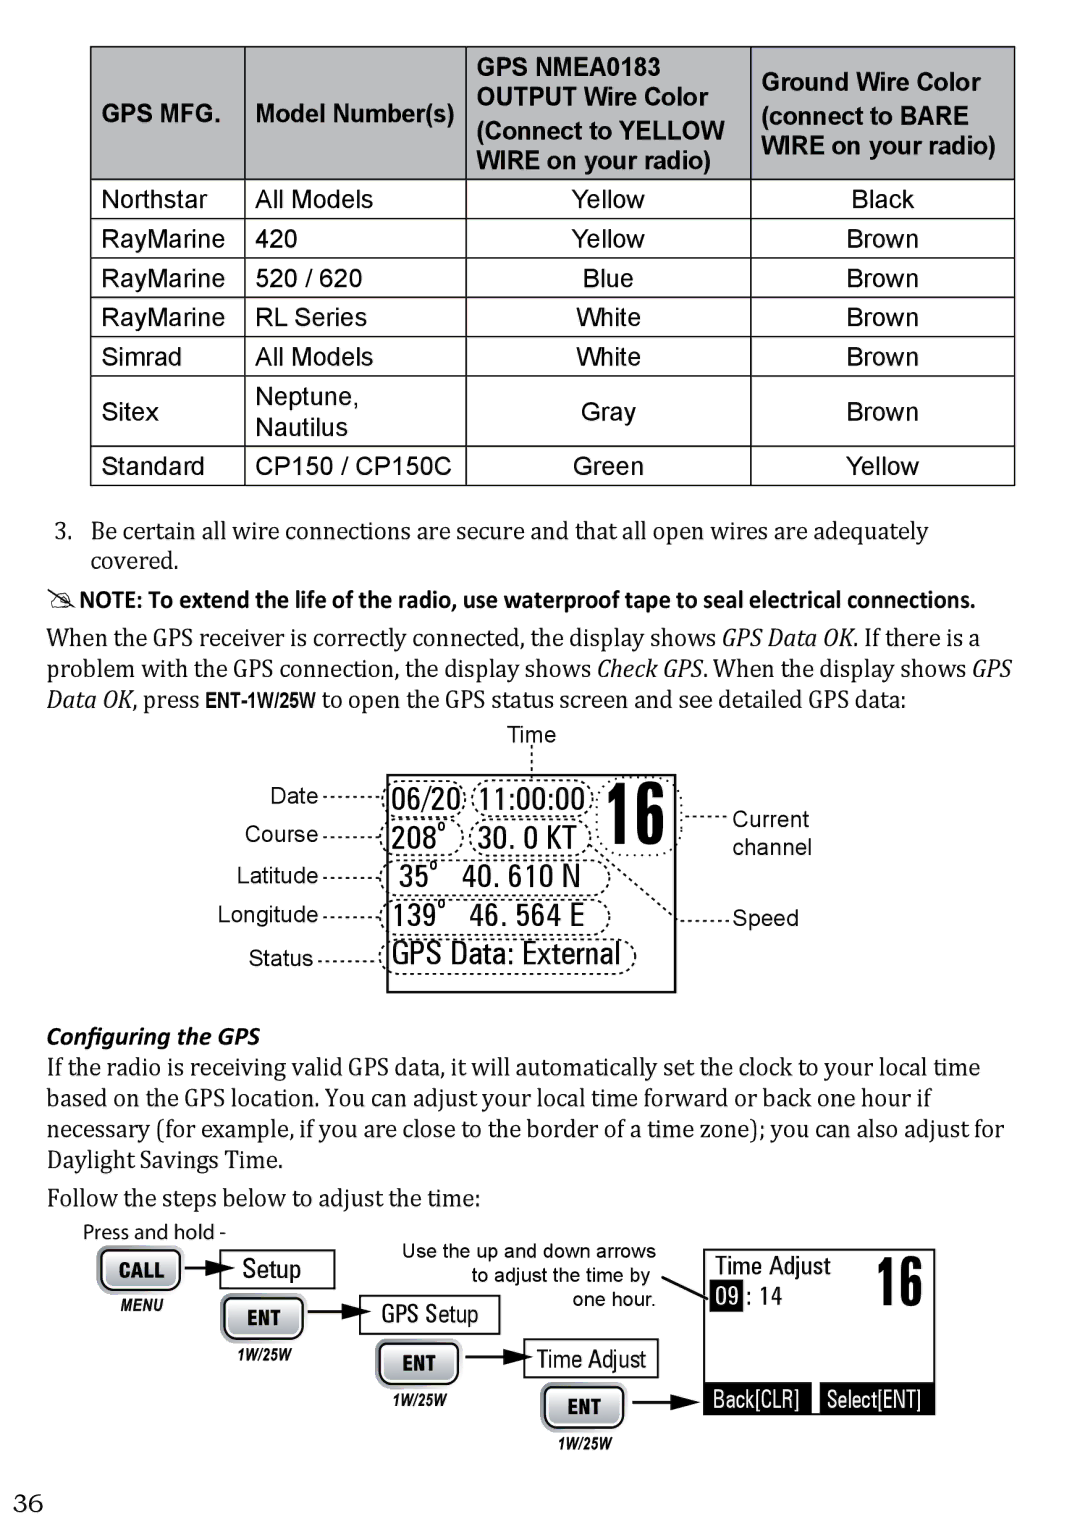
When the GPS receiver is correctly connected, the display shows GPS Data OK. If there is a problem with the GPS connection, the display shows Check GPS. When the display shows GPS Data OK, press
Date![]()
Course![]()
Latitude![]()
Longitude![]()
Status![]()
| Time |
|
|
06/20 | 11:00:00 | 16 | channelCurrent |
208o | 30. 0 KT | ||
35o | 40. 610 N |
|
|
139o | 46. 564 E |
| Speed |
GPS Data: External |
| ||
Configuring the GPS
If the radio is receiving valid GPS data, it will automatically set the clock to your local time based on the GPS location. You can adjust your local time forward or back one hour if necessary (for example, if you are close to the border of a time zone); you can also adjust for Daylight Savings Time.
Follow the steps below to adjust the time:
Press and hold -
Setup
Use the up and down arrows |
|
|
|
| ||
| Time Adjust | 16 | ||||
to adjust the time by | ||||||
09 | : 14 | |||||
| one hour. | |||||
GPS Setup | ||||||
|
| |||||
![]()
![]() Time Adjust
Time Adjust
![]() Back[CLR] Select[ENT]
Back[CLR] Select[ENT]
36
