lf your dryer Is gas and has a full front panel, remove tront panel as follows:
1. Unplug the power supply cord or turn off the |
electrical power. |
2. Open lint screen lid. Remove two screws |
from lint screen area. |
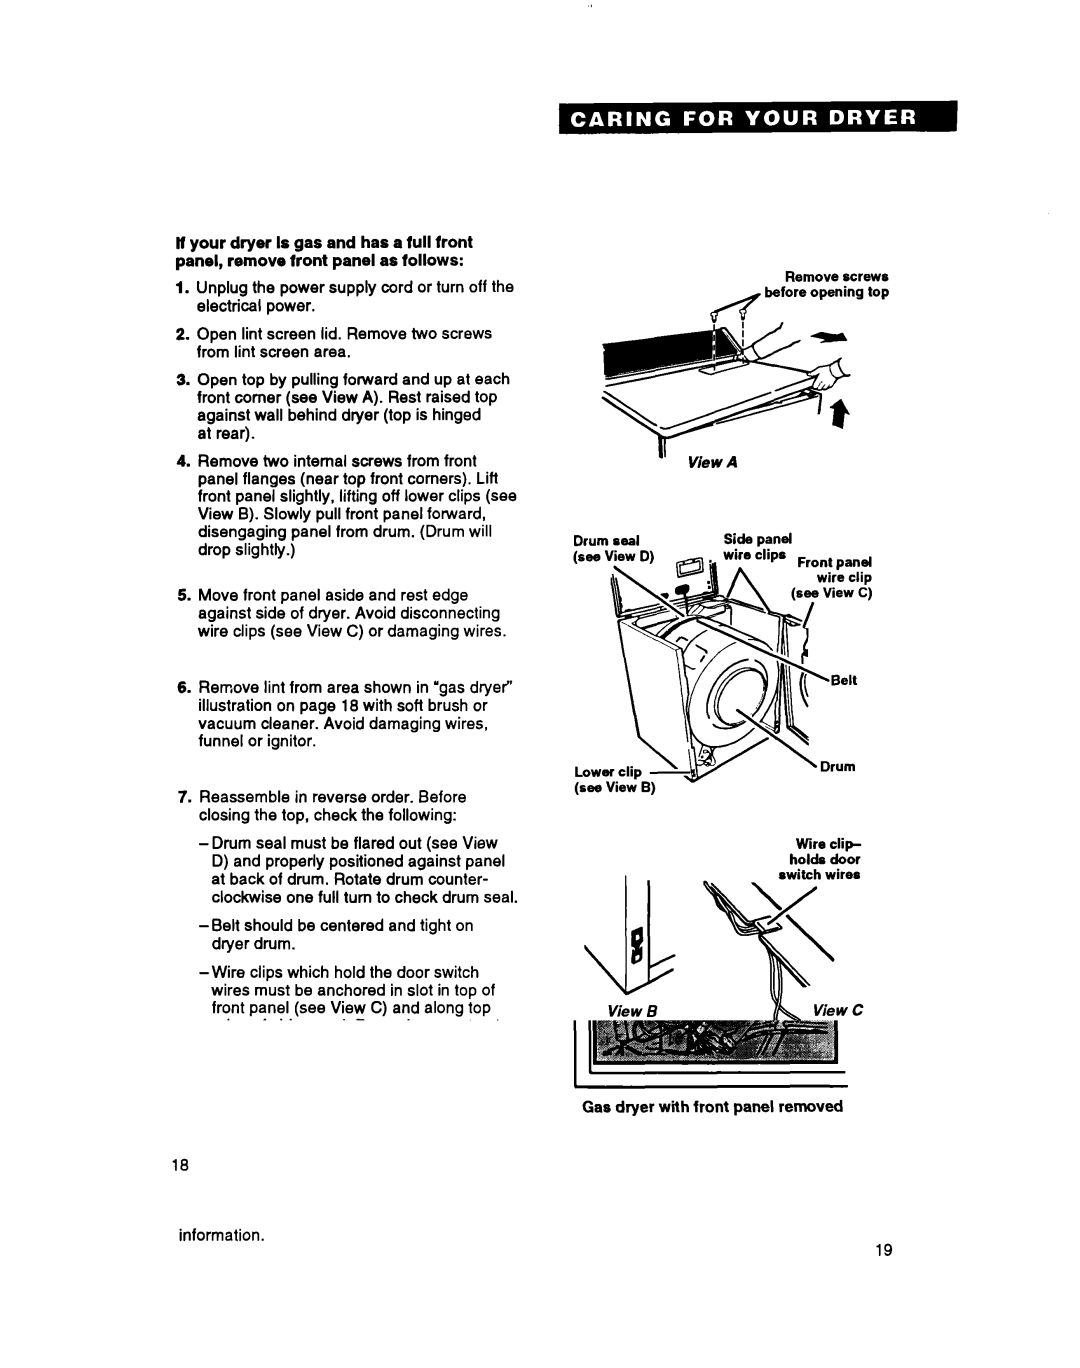
3. Open top by pulling forward and up at each |
front comer (see View A). Rest raised top |
against wall behind dryer (top is hinged |
at rear). |
4
Remove screws before opening top
4. Remove two internal screws from front |
panel flanges (near top front corners). Lift |
front panel slightly, lifting off lower clips (see |
View B). Slowly pull front panel forward, |
disengaging panel from drum. (Drum will |
drop slightly.) |
5. Move front panel aside and rest edge |
against side of dryer. Avoid disconnecting |
wire clips (see View C) or damaging wires. |
6. Remove lint from area shown in “gasdryer’ |
illustration on page 18 with soft brush or |
vacuum cleaner. Avoid damaging wires, |
funnel or ignitor. |
7. Reassemble in reverse order. Before |
closing the top, check the following: |
”View A
Drum seal | Side panel |
-Drum seal must be flared out (see View
D)and properly positioned against panel at back of drum. Rotate drum counter- clockwise one full turn to check drum seal.
6.Replace top panel and lint screen screws. Top and front panels must be securely in place before operating dryer.
9.Reconnect power and level dryer again (if necessary).
4t
View B
Wire clip- holds door switch wires
NOTE: Call our Consumer Assistance Center at